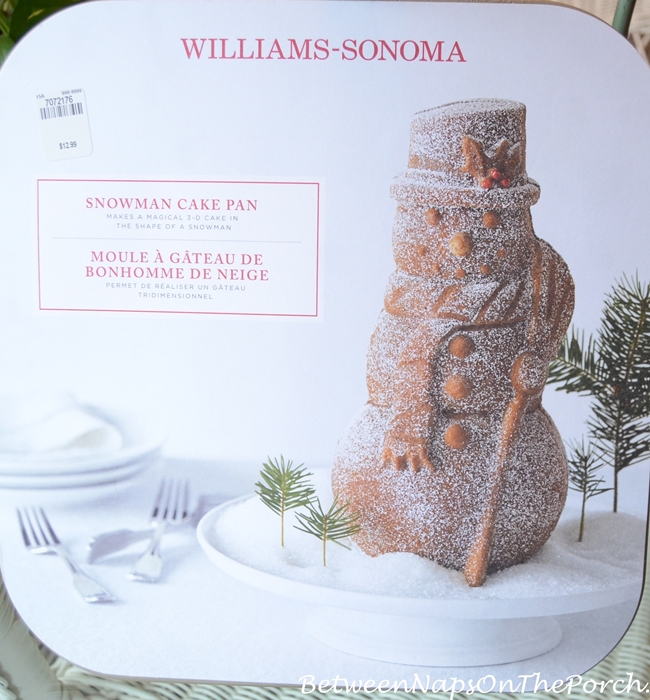
Recently while shopping in Williams-Sonoma, I came across a Nordic Ware snowman cake pan. It was on sale, greatly reduced from $39.95 to $10.39 so I couldn’t resist trying my hand at making this cute cake. Update: You can still find this pan here: Snowman Cake Pan
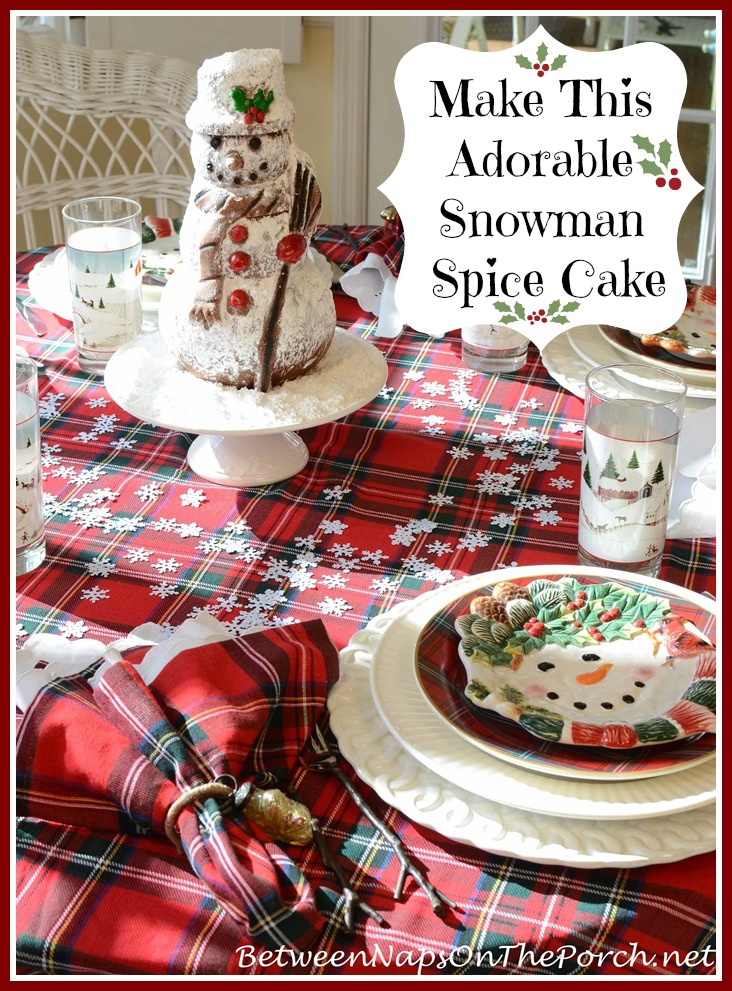
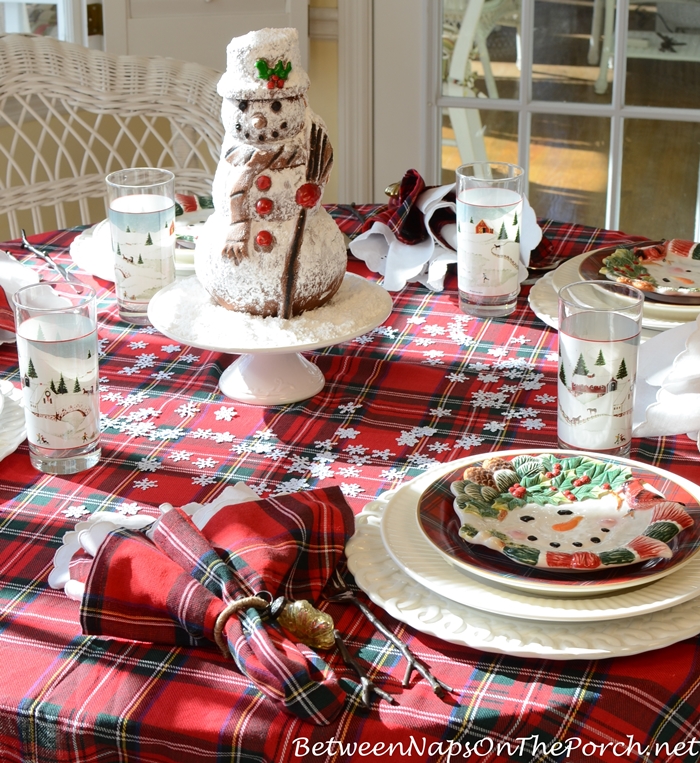
The cake ended up being a centerpiece for yesterday’s winter table setting seen in this post: Winter Table Setting With Snowman Cake Centerpiece This cake would be cute at Christmastime but it really works as a dessert any time during the winter season.
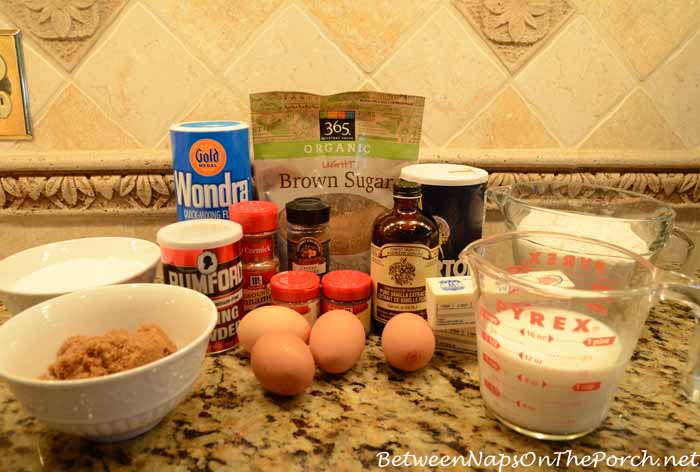
I gathered together my ingredients for the cake:
- 3 cups all-purpose flour
- 2 tsp. baking powder
- 2 tsp. ground cinnamon
- 3/4 tsp. ground ginger
- 1/8 tsp. ground cloves
- 1/2 tsp. freshly grated nutmeg
- 1 1/4 tsp. salt
- 1 1/4 cups milk
- 1 Tbs. vanilla extract
- 2 sticks unsalted butter
- 1 2/3 cups granulated sugar
- 3/4 cup firmly packed light brown sugar
- 4 eggs
- Vegetable shortening (for greasing pan)
- Wondra Flour (a fine flour for flouring pan)
- Frosting of your choice for assembling and decorating
- Powdered Sugar
The only thing I changed was I used ground nutmeg instead of fresh nutmeg because that’s what I had on hand. You’ll find a printable version of this recipe at the end of this post.
Preheat your oven to 325° F.
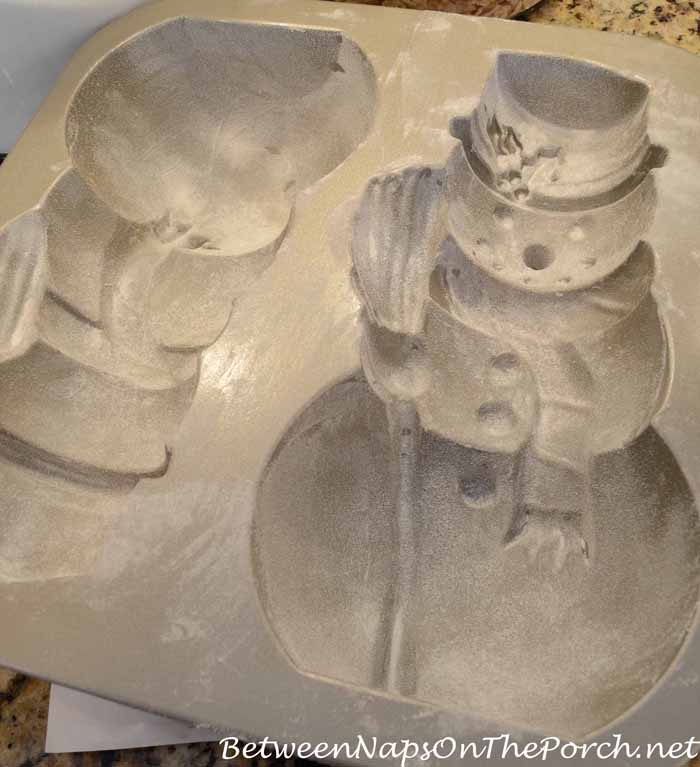
Grease your snowman pan with vegetable shortening. Be sure and work your shortening down into all the little grooves and indentations of your pan. I usually use Crisco (not shown in pic above) and always have a small can of this shortening in the refrigerator for this purpose.
Personally, I would not just spray the pan with some type of cooking spray. In the past when I’ve baked small heart-shaped cakes in a decorative pan like this, I’ve always used canned shortening and I’ve never had an issue with the cake(s) sticking. I simply would not trust the sprays. Since it’s so important that the cake comes out of the pan in one piece, it’s not worth the risk using something other than a good shortening.
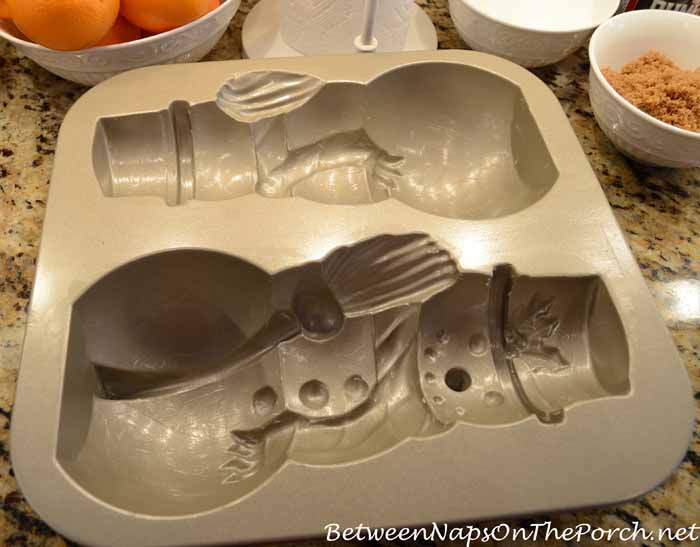
Flour your pan using a fine flour like Wondra. I had never used this flour before but it was what was recommended in the recipe on the Williams-Sonoma website. I found it in a Walmart Neighborhood Market. I would imagine most grocery stores would have it, too. It comes in a small can so you don’t have to buy a huge amount and it’s not expensive. It’s super fine and works well for getting down into all the teeny, tiny groves of the pan.
You’ll quickly spot any places you’ve missed, like that spot I missed near the broom. So be sure and look for any missed spots and grease/flour those, too. This is one of the key components to a carefree release of the cake, once you’re ready to turn it out.
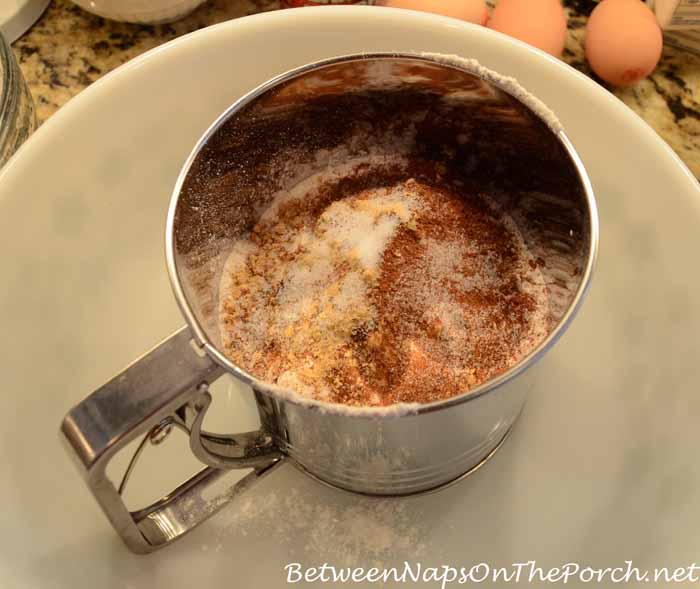
Over a large bowl, sift together the following: flour, baking powder, cinnamon, ginger, cloves, nutmeg and salt. If you prefer, you can do this over a medium size bowl with wax paper underneath to catch any spills.
In a small bowl or measuring cup, combine the milk and vanilla extract.
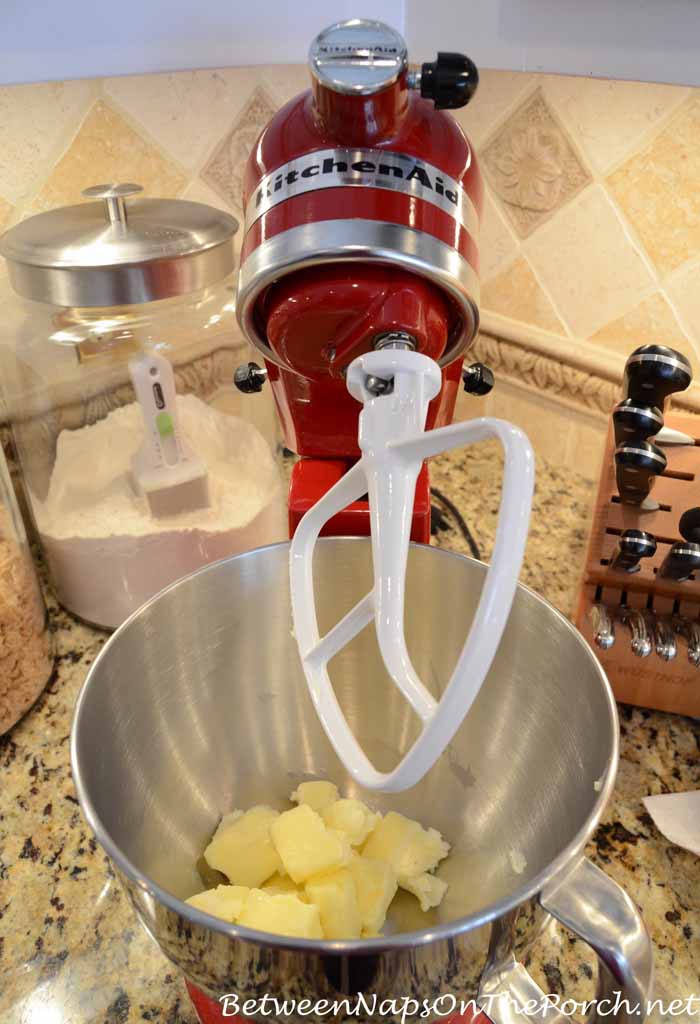
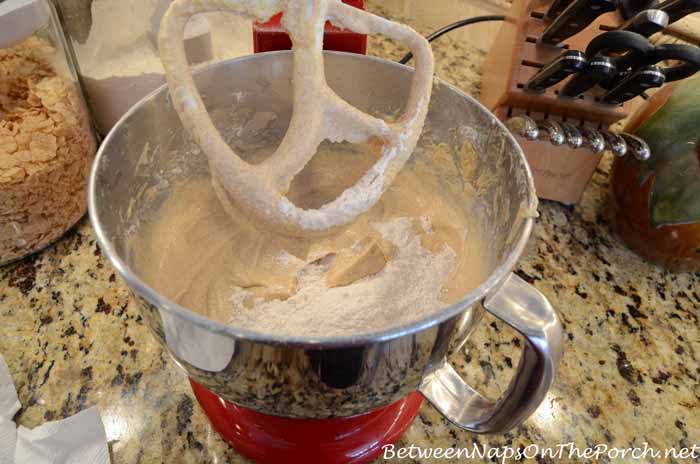
Using a flat beater attachment, cream the butter for 1-2 minutes. I usually get my butter out a little early so it can reach room temperature…just makes beating it a little easier. Can you believe, this was the first time I’ve ever used this flat beater attachment. I never knew what it was for but the recipe called for it so I got it out and put it to work. I always thought it was a dough/bread-making attachment. Maybe it’s good for that, too. I don’t do a lot of baking, can you tell? 🙂
Next, add in your granulated and brown sugar.
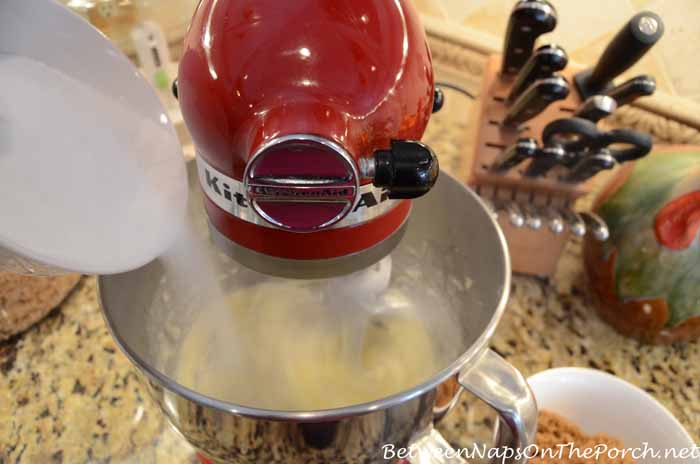
Continue beating until light and fluffy. In the end, my cake didn’t rise as much as I think it should have and I wonder if it’s because I didn’t beat the butter/sugar mixture long enough. Back story: When I first bought this mixer many years ago, I remember reading in the booklet that came with it (yep, I actually read the instructions) that a KitchenAid mixer beats more thoroughly and better than other mixers so the booklet said that you should be careful to not “overmix/overbeat” whatever you’re mixing together.
Well, that stuck in my brain the day I read it and I think I tend to overcompensate by sometimes not beating mixtures as long as I should. Any experienced bakers out there who can share some tips on how to know when those eggs and sugar are really light and fluffy? 🙂
Or, maybe my baking powder may have been a little too old, more on that in a sec.

Next, add in the eggs one at the time, beating well after each one.

Now it’s time to add in your flour mixture and milk/vanilla mixture. Reduce the speed of your mixer so the flour doesn’t go flying all over the place…trust me on that! 😉

Alternate adding in the flour and milk mixtures, beginning and ending with the flour mixture.
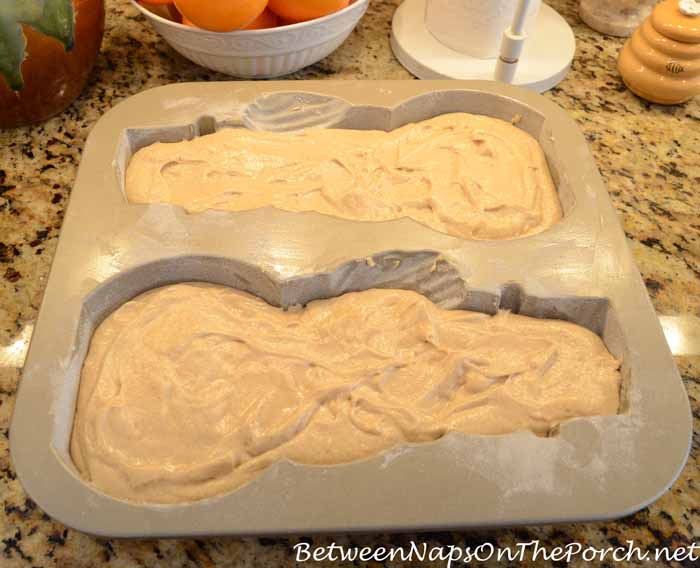
Using a large spoon, spoon the cake mixture into your pan. Here’s one place I think I kinda goofed. The recipe said to spread a little extra into the head area. I wasn’t sure how that would work and thought it would just spread right back out. I was also worried about the head being too big. I think I should have followed those directions, though. You’ll see what I mean in just a minute.
Also, once your pan is filled with cake mixture, tap it a time or two on a work surface to help fill in all the little indentations with cake and to help burst any little air bubbles that may have formed in the cake mixture. You’ll see why that’s important in just a minute.
The directions say to cook the cake for 55-60 minutes until a toothpick inserted into the cake comes out clean. After 55 minutes, a toothpick stuck into the fattest part came out gooey so I stuck it back in the oven for another 5 minutes. It still came out gooey, so I stuck it back in for about 5-10 more minutes. That did the trick and it was done.
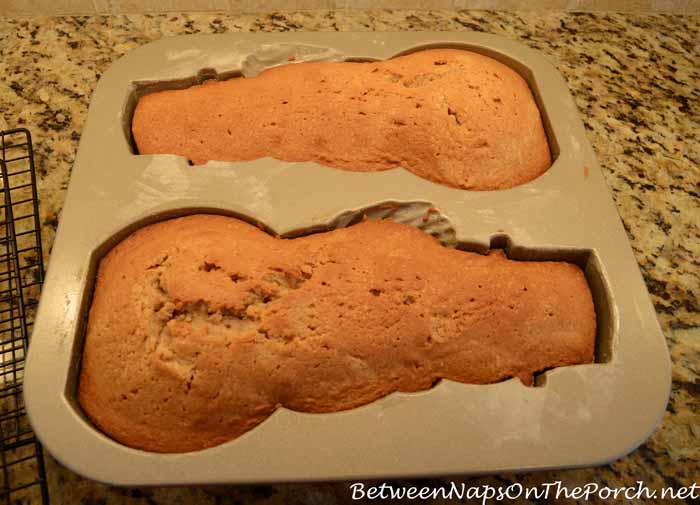
Once your cake is done, let it cool in the pan for 15 minutes. Then tap your pan on a work surface/counter 2-3 times to loosen the cake in the pan. I could actually see mine loosen from the sides when I did that.
Then place a large wire cooling rack over the pan and turn the pan upside down letting the cake come out onto the rack. Let your cake cool for 3-4 hours until completely cool. I placed mine in the fridge because I was in a bit of a rush to get it decorated for my tablescape post.

I’m not sure why but I had little holes in my snowman’s mouth and in a few other spots. I didn’t think to tap the pan on the counter after initially filling it with the cake mixture, so maybe cake didn’t get all the way down into the little mouth indentations or maybe there was an air bubble blocking it.
In any case, tap that pan a time or two after filling it with the cake mixture and hopefully, you’ll have a hole-less snowman in the end. Fortunately, I knew I was going to use a little icing to define my snowman’s features so I didn’t worry too much about it.

Now, here’s a tricky point to consider. I’ll give you the choices I found online and on the cardboard thingy that came with the cake pan and then you can decide how you wish to handle this. 🙂
Once the cake has been baked, the cardboard thingy that came with my cake pan said to, “trim excess cake with a serrated knife while the snowman is still in the pan to create two flat sides.” Then it says to cool the cake in the pan for 10 minutes before removing it from the pan.
BUT…
Another place online said to remove the cake from the pan to cool it, then place it back into the pan to cut it to create the flat sides.
I didn’t do either because there really wasn’t any cake sticking up to trim off. 🙁 Ummm, that’s why I’m thinking my cake must not have risen as high as it should have. I’m blaming it on either not beating the eggs and sugar enough in the beginning or perhaps my baking powder was too old. Just sharing these things to help you avoid them, if possible.
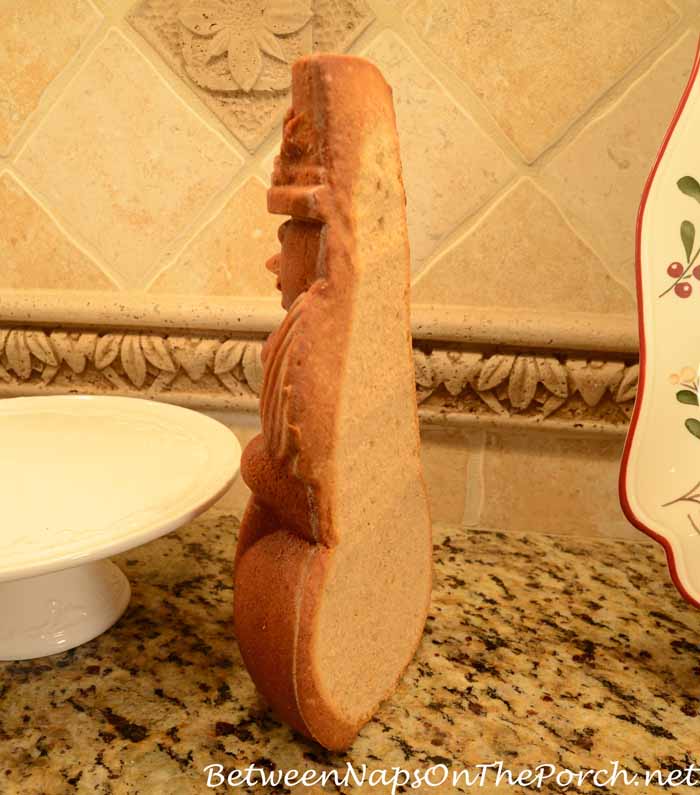
So here’s what I ended up doing. The back of my cake was very rounded so I needed to cut off part of it. I stood it up and using a large serrated knife, sliced away. Looks pretty flat, right? Looks can be deceiving. That curving head gave me some issues. I’m not sure if adding more batter into the head would have helped because the head kind of curled forward a little while baking. Next time I make this cake, I will add more batter into the head area, though…just in case it does help.
You’ll be using frosting to hold the two halves of your snowman together. I always make my frosting from scratch when baking a cake because I really don’t like the taste of ready-made frosting. But since the only frosting needed for this cake is the amount needed to hold the two halves together, I decided to go with canned frosting to save time.
The recipe calls for vanilla cream frosting, but I picked out a lemon frosting because I thought the lemon would taste yummy with all the spices in the cake. If you want to use a Vanilla Buttercream frosting, you’ll find the one recommended by William-Sonoma here: Vanilla Buttercream
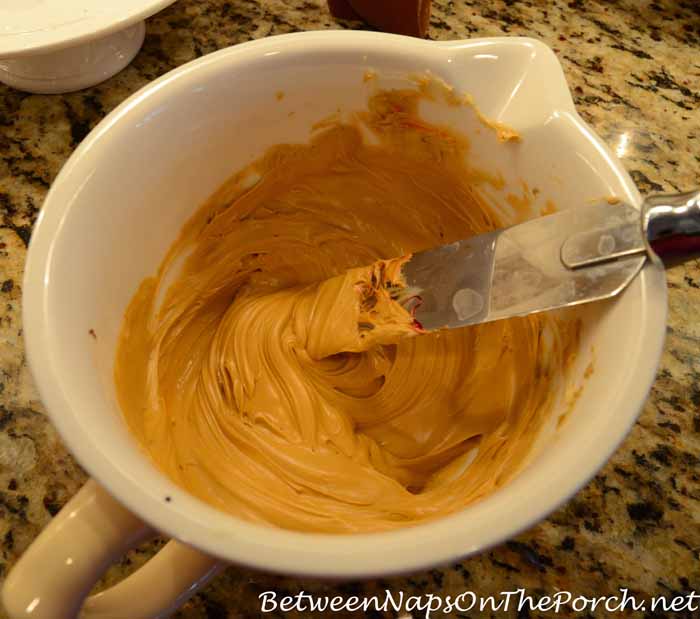
I wanted to darken my frosting a bit to help it blend in better with the cake, so I added some brown and orange food coloring.
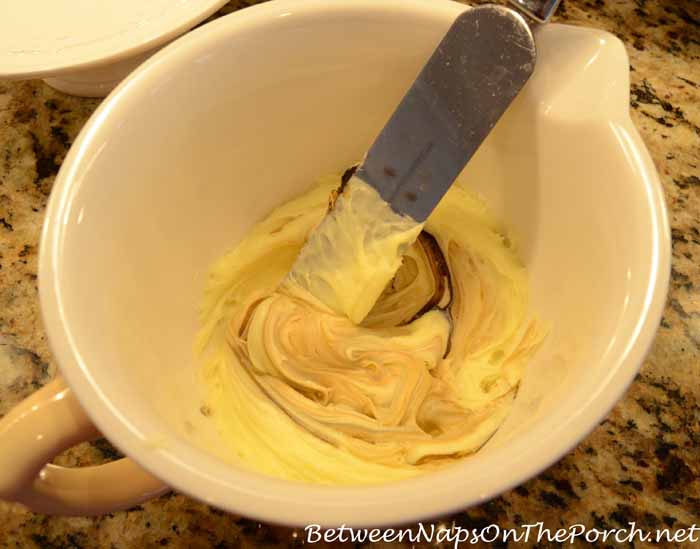
It was taking a lot of brown food-coloring so I didn’t darken it as much as I could have. It was getting dark outside and I needed to get this baby done and on the table!
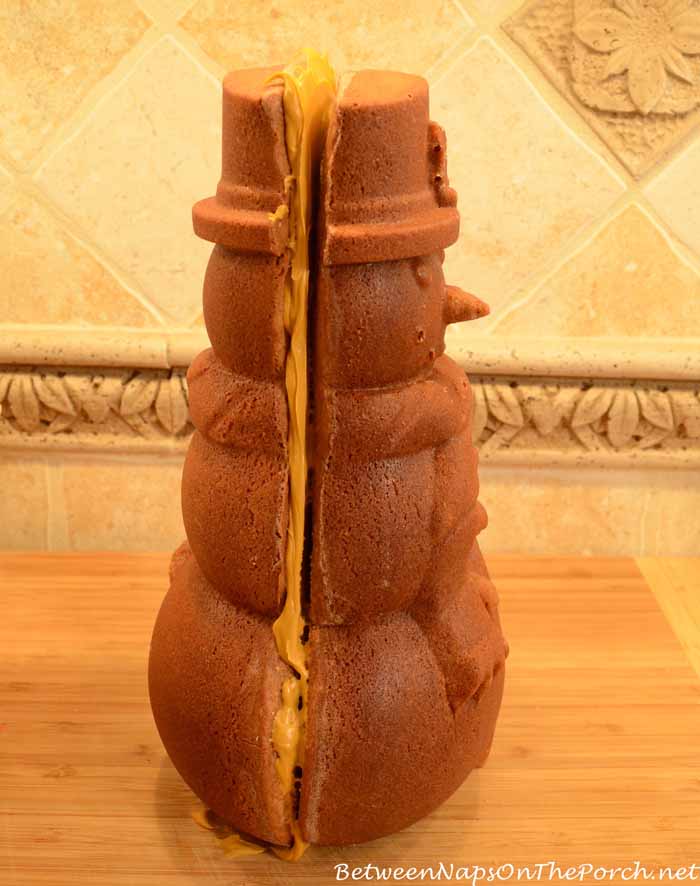
Next, I spread some of the frosting onto the inside of the back of the snowman. It’s easy to rest the back down since you don’t have to worry about the nose being crushed as you would if you lay the front down to spread the icing.

Then I squished them together. See that big ole gap at the top of the head. Think of your frosting as caulk. 🙂 I just slathered a bunch more in, figuring the powdered sugar would help hide the gap a bit.
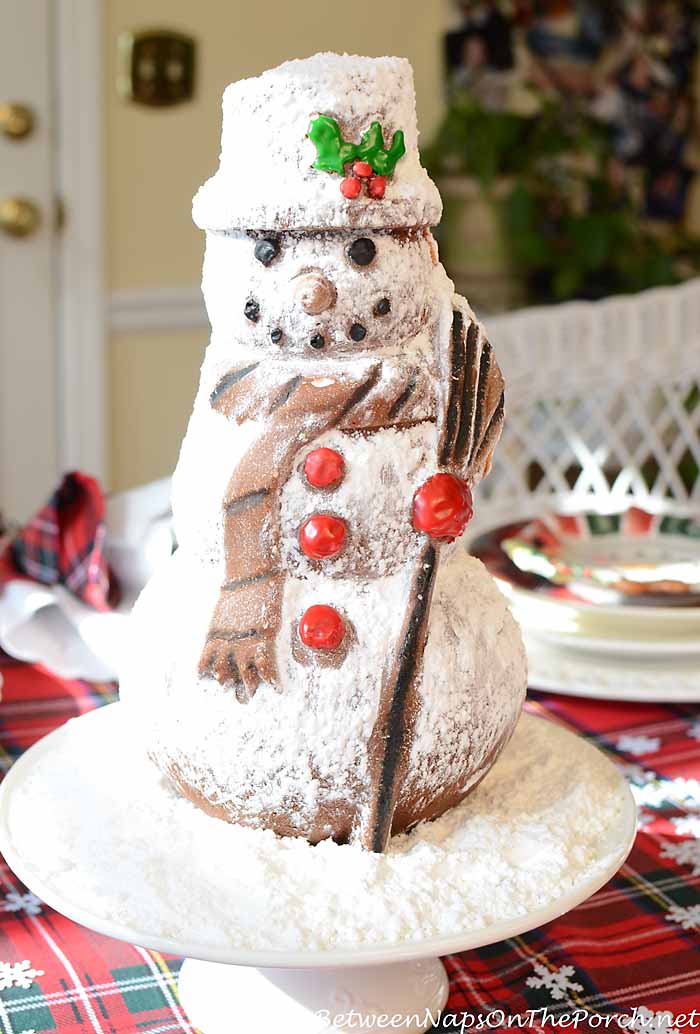
Here he is put together. He stood really well due to his flat bottom. There was no danger of him tipping over.
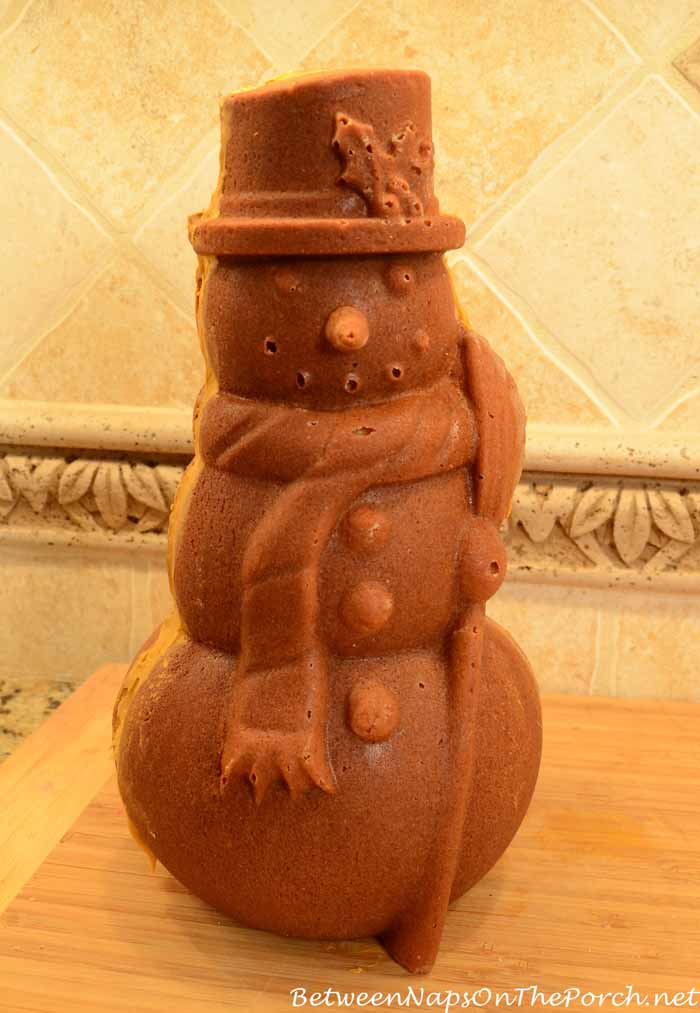
Here’s a side view where if you look closely, you can see a gap at the top. Don’t sweat it if that happens because you can fill in the gap with your frosting. Plus, powdered sugar hides a multitude of sins! 😉 Also, if you spoon a bit more batter into the head area when filling your cake pan AND your cake rises better than mine did, you may not have as big a gap as I did.
May I point out, you’ll notice in every single picture of this cake on the Nordic Ware website and on the Williams-Sonoma website, they NEVER, EVER show you a side view. Yeahhh…

It was getting dark outside and I was rushing to get him decorated so I could take pics of the tablescape, so I didn’t take pictures of the decorating. To decorate him, I put some powdered sugar in a sifter, then I sprinkled Mr. Snowman with the sifted powder sugar. Be sure and do this first before decorating him with icing.
Using the same recipe I always use to make Powdered Sugar/Confectioners Icing, I mixed up a very small amount of red icing and black icing in separate bowls. (The next day I mixed up the green for his holly.) You’ll find a printable version of that recipe here: Powdered Sugar Icing.
It’s the same icing I used to ice these shamrock cookies for a St. Patrick’s Day centerpiece in this post: St. Patrick’s Day Table Setting With Shamrock Cookie Tree Centerpiece. If you like, you can just buy the little tubes of colored icing at the grocery store and other places that sell those. That would probably work, too. I used confectioners icing since I knew it would harden.

Using a small, watercolor paintbrush I already had, I painted Mr. Snowman’s eyes, mouth, buttons, mitten and broom with the icing. I added a few highlights on the scarf. The next day when I had more time, I mixed up some green icing for the holly on his hat. I didn’t mean to make the highlights on his broom quite so dark…got a little heavy-handed with the paintbrush.
Again, this cake stands very well. I had no problems at all getting him to stand. When you move him around, be sure to move him holding onto the base since he’s a little bottom heavy.
The things I would watch for or do differently the next time are:
- I’d make sure to beat the butter and sugar a little longer, just in case that’s why my cake didn’t rise as much
- I would double-check that my baking powder is really fresh, again in case that’s why my cake didn’t rise as much
- After spooning the cake mixture into the snowman cake pan, I would tap the pan a few times on the counter/work surface to release any air bubbles and to get the batter really down into all the little grooves, like the mouth and nose. That would help prevent the teeny holes on the mouth, I think.
- I would add a little extra cake batter to the head area of the pan, as the recipe suggests. That would help with the gap near the head when assembling the two halves.
Here’s a printable version of the recipe. Don’t let this cake intimidate you, it truly is easy to make. And it’s fun! With as little baking as I do, if I can make it, you definitely can! Update: Cake pan is no longer available at Williams Sonoma, but you can still find it here: Snowman Cake Pan

Snowman Spice Cake
Ingredients
- 3 Cups all-purpose flour
- 2 tsp. baking powder
- 2 tsp. ground cinnamon
- 3/4 tsp. ground ginger
- 1/8 tsp. ground cloves
- 1/2 tsp. freshly grated nutmeg
- 1 1/4 tsp. salt
- 1 1/4 cups milk
- 1 Tbs. vanilla extract
- 2 sticks- unsalted butter
- 1 2/3 cups granulated sugar
- 3/4 cup firmly packed light brown sugar
- 4 eggs
- Vegetable shortening for greasing pan don't use butter or oil
- Wondra Flour to flour the pan
- Powdered Sugar
Instructions
- Preheat oven to 325°F.
- Grease and flour your snowman cake with a good vegetable shortening and a fine flour like Wondra. Tap out any excess flour.
- Sift together the flour, baking powder, cinnamon, ginger, cloves, nutmeg and salt.
- In a small bowl, combine the milk and vanilla.
- Using a flat beater, in the bowl of an electric mixer fitted, beat the butter on medium speed until creamy and smooth, about 1 to 2 minutes. Add your granulated and brown sugar and continue beating until light and fluffy, about 5 minutes. Stop occasionally to scrape down the sides of the bowl.
- Add the eggs one at a time, beating well after each addition.
- Reduce the speed of your mixture to a lower setting, and add the flour and milk mixtures, alternating the two, beginning and ending with the flour.
- As you're adding in the flour and milk, beat each addition just until it's mixed in, stopping as needed to scrape down the sides of the bowl.
- Spoon the batter into your snowman pan, dividing it evenly between the two halves and spreading a little extra into the head area of the pan.
- Tap the pan onto a work surface a few time to ensure the batter gets down into all the little indentions of the pan and to release any little air bubbles in the batter.
- Bake until the center of the cake springs back when touched and a toothpick inserted into the center comes out clean, 55 to 60 minutes. Mine actually took around 65 minutes.
- Transfer pan to a wire rack and let the cake cool upright in the pan for 15 minutes.
- Tap the pan gently on a work surface to loosen the cake.
- This would be a great time to slice off any cake sticking up above the pan with a serrated knife since the back of your snowman will need to be flat for assembling.
- Set a cooling rack over the top of the cake and invert the pan onto the rack. Your cake should come out easily.
- Let the cake cool completely, 3 to 4 hours, before assembling and decorating.


Susan, first I want to tell you how much I enjoy your blog! I love everything you do. My taste goes right along with yours. I love the way you explain what you do too.
About greasing and flouring cake pans, I too, used to use crisco and then flour, but a few years ago I was introduced to the most wonderful product, Bakers Joy. Spray that has flour in it. It really is wonderful ! Cakes come out perfect every time. No mess. Love, love love it. Keep up the good work.
Rose
Thanks, Rose! Do you think it would work for decorative pans with all the little grooves and indentations? I may give it a try next time.
Susan, I love it. You inspire me and I may have to make a trip to Williams Sonoma. I saw the pan on line for $19.95, but you got a great deal. It would look great to somehow color the scarf a red plaid too. 🙂 I think you did a great job.
I wish I had thought about that…that would be so cute, Margo! Next time!
Your snowman turned out great looking! I bet he was tasty too. I too enjoy your blog. Are those the glasses that go with the plate from Walmart? Can you tell me the name again, please?
thanks!
Anne
Thanks, Anne! He was yummy from the extra cake I cut off the back. I’ll share him with friends this weekend. Those glasses would work well with the Better Homes and Gardens dishware from Walmart. I don’t remember if the Walmart dishware had a pattern name, not sure it did. The glasses are a David Carter Brown pattern called Christmas Village and I think they were originally designed to go with the dishware seen in this post: https://betweennapsontheporch.net/winter-themed-table-setting-let-it-snow/ You can usually find them on Replacements.com or eBay. I see them on those sites a fair amount.
Susan, you did a great job with Frosty!! I have the same mixer, even the same colour as you, and it is my most prized possession (I do a lot of baking). I use my flat beater for nearly everything. Not sure what came with your mixer, but I also had a whisk for whipping and a hook which is for dough making.
I do think you must have under beaten your initial mix. I have never had a problem with over beating and as I do not usually read manuals, 🙂 I never saw that information.
I checked on the Williams Sonoma site and the snowman was on sale for $19.99 but that was U.S. and would cost me $29.99 Canadian.
Just some info for those wanting to buy it.
You are a mine of information in all things Susan, you even swing a mean hammer!! 🙂
lol Thanks, Megan! That’s a shame the price is so much higher. If you can find it on Amazon, would it be higher there, too? Oh, now that you mention it, my mixer came with a hook, too. I usually use the whisk attachment…never tried this flat one before. I do like it, though! What do you use the whisk for…maybe beating eggs or whipped cream…or making frosting? That’s the one I usually use.
Susan, I use the whisk for beating cream and even potatoes with cream added to it. I basically use the flat beater for all baking.
I was just noticing on that page in the PDF that most of the beating the whisk is used for are lighter things and the flat beater does the heavy lifting. That makes a lot of sense. Thanks, Megan!
Hey Megan, I just googled about the mixing stuff and here’s that part where it says about how you can overmix/overbeat. It’s on page 12 of this PDF under “Mixing time”: http://www.kitchenaid.com/digitalassets/KSM500PSOB/Use%20and%20Care_EN.pdf
It even says that for cakes, the beating time may be half as long as with other mixers. I think I over compensate. lol I’m also going to buy some new baking powder. I can’t find an expiration date on the can I have but I don’t it’s that old. I’m going to buy some new though, just in case.
Susan, I forgot to mention, I also have an attachable shield with a spout which you can use for adding flour etc, saves everything flying around.
Mine has that, too. I should have pulled it out for adding those eggs! The tricky part was pouring and taking pictures at the same time.
He’s adorable!!
Thanks, Judy!
What a cute cake! You did a great job. I bet it will be delicious! Thanks for all the pointers, and the recipe. =)
Thanks, Mary!
Thank you so much Susan! This is going to be a “project” for sure! How time consuming but what a stunning and delicious holiday centerpiece! Your snowman turned out amazing and that takes a great baking skill! I applaud you in the tablescape and the adorable cake!!!
Thanks, Betsy! He is a lot of fun to make.
Your snowman cake came out so cute! I have always wanted to try one of those type cakes, but did not have the nerve. You make it look easy. Thank you for giving me courage!
Thanks, Charlotte! You can definitely do it…promise he’s really easy to make!
Love it! When I saw this tablescape and cake I could not wait to see how you did it. Great tutorial! I have seen shaped pans like this and they definitely did intimidate me. Now, thanks you you, Susan, I will try one out!
It’s so much fun to make, Claudette! You’ll have fun…hardest part is actually cutting him to eat. lol
He is just the cutest ! Went to Wm-Sonoma website to order the cake pan
for my dtr and grands for Valentine’s Day and saw on sale as others mention here but your deal far, far better.
One thing while there I noticed a customer review who loved the results in general but said her cake when stood up, collapsed and said next time she
would use a different recipe, maybe a pound cake recipe. Did you just get
lucky with yours? Did the recipe come with cake pan?
Thanks, Alyce! The day I bought it in WS, it was marked down to $12.99, then 20% off that. I think it was that same price online that day but I guess it has gone back up since then. I didn’t have any problems with the cake being too soft. Mine was good and solid. It’s still standing. The outside gets nice and crunchy…not hard, just good and brown which makes the cake good and solid. Mine didn’t include the recipe. Instead, the cardboard thingy that came with it say, “Find a recipe for Spiced Vanilla Snowman Cake, plus assembly instructions at Williams-Sonoma.com.” There’s a link in this post to the WS recipe and that’s the one I used, too. I liked it a lot and it wasn’t too soft, so I do think it’s a good one to use. The flavor is great, also!
Smart lady! Pays to read the directions!! Thanks for sharing this info as it
could make a great deal of difference what cake recipe is used apparently.
I bought this cake pan also but actually wanted to show off the cake and serve it as dessert. So I just used the front half of the pan and laid it down to decorate and of course to eat…it was pretty darn cute..I am going to save your directions and when in the mood going to try the whole thing..
Thanks.
Susan, I never thought about doing it that way…that would be cute, too!
Susan, thanks for all the tips on how to make this adorable snowman cake! The grandgirls would love it!
Thank you so much for sharing this post, your cake looks fab, and what a steal for the pan! ❤
Thanks! Yeah, Williams-Sonoma always has some killer sales after Christmas.
Hi, Susan. Creaming butter/sugar develops volume and texture. When baking cookies I cream room temp butter w/sugar for about four minutes. Look for the texture to become fluffy and the color will actually change as well, becoming a more pale yellow color. I’m sure this would apply to baking cakes, as well. Thanks for your blog. You are a highly talented lady!
Thanks, Mamie! I’ll look for that paler color next time…and the texture change.
Susan, Gotta have it!!! Thanks for sharing with us!
Thanks, Sheree!
He really is adorable! Thanks for the tips on making him. I always wondered how the two piece cakes really work out in real life!
Thanks, Pam!
The snowman cake is adorable! You did a great job! However, he looks too cute to eat! Wonder if there a any pans left. I just might have to buy this little guy! My grandkids would love him! I love your Blog, Susan. I look forward to all your emails. Thanks for sharing!
Thanks so much, Nancie! Appreciate that so much! Your grandkids will love it, I know. I can’t wait until my grandson is a little older, I want to make one for him.
I swear this is the cutest cake ever! YOu did a GREAT job!!! I never bake but now tha I have a grandchild I will! Next winter maybe she will get a snowman cake!!!
Thanks Pinky! I was thinking the same thing…I want to make this for my grandson when he’s a little older. Your granddaughter will love it!
Love, Love, Love your Snowman cake!
I think he turned out awesome!
I just checked the Williams-Sonoma web page and if you place an order by Jan. 12 you get free shipping…. My Snowman is on its way…Yeah me….
Good deal! I love it when they offer free shipping!
To serve the snowman would you lay it down to slice it?
Yep, I just laid the cake down on the back side and cut slices starting at the bottom. That worked well.
Hi Susan,
After seeing your post, I called the Williams-Sonoma store here in the Lou and had them hold a few of the Snowman pans they had remaining. Got them for $7.49 a piece on Friday! They had been marked down an additional amount. Will make a great Christmas present next year for my friend that is a baker (and one for me, of course 🙂 Thanks so much for mentioning!
Wow, that’s a great price! They will make awesome gifts. Glad you got one! 🙂
Just picked up a new one on eBay for 7.00.Lot’s of good buys on there.
Cute cake !
Looks great. Can’t wait for Christmas ! Thanks for the inspiration.
Susan, how did you get the powdered sugar to stick to the cake? Thanks, Trish
It just stuck, I didn’t have to do anything. I kind of wondered if it would, but it did…no problem.
Hi! I finally made time to use my cake pan this year. The pictures and tips on your blog post were very helpful! Even though I read your tips about the head of the snowman, I just had the same results. I wonder if it is because of the way the pan sat on my oven shelves. Regardless, thanks so much for this post 🙂
So adding a little extra into the head area didn’t work, huh? I bet it just spreads back out into the pan. Oh well, it’s still cute. lol Guess we’ll just have to use some extra icing and powdered sugar, to hide it. 🙂 Thanks for letting me know how yours came out, Karen.
Test Comment
Test Reply to see what a reader would receive in a reply.
Susan, thank you so much for sharing this snowman mold and recipe. I put the mold on my Christmas wish list last year, and was gifted it from my daughter and son-in-law. I used a cream cheese pound cake recipe that I’ve used for other molded cakes and it came out great! I decorated it in a similar fashion to yours, only with a little less powdered sugar because I would be traveling with it to Christmas dinner. It was such a hit! Thanks again for the inspiration in this, and so many other things. Merry Christmas!