Do you ever see intricately carved pumpkins and wonder how they did that?

Well, it turns out, the trick is using a tool like you see on the left and not like you see on the right…

So, where do you get those teeny little saw cutting tools? I found mine many years ago at Williams-Sonoma. I think this kit was around $20, which seemed like a lot at the time…but it was totally worth it. You can find them online with a google search. Check Michaels and other craft stores, too. Maybe Williams-Sonoma has them again this year…haven’t been in one in a while so I’m not sure.

Here are all the tools that came in this kit…

It also came with 6 templates. Whenever I carve a pumpkin using one of the templates, I always make a copy of the template to use. This preserves the original template for future Halloweens.
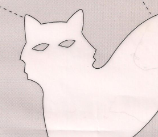
Each year I always carve the Black Cat, he’s my favorite. (Note the carving tips at the bottom of the template.)

I usually buy a medium size pumpkin to use with these templates. Before you get started, cut a hole in the top and lift the “lid” of the pumpkin off and scrape out the inside…my least favorite part. When cutting the hole for the lid, slant your knife inward so the lid will sit on top and not fall in later.

Next, you cut the extra paper you don’t need from around your template…then tape the template onto your pumpkin.

Next step: Poke tiny holes all around the design on the template…

To do that, you use one of these poker thingies. The kit came with the poker you see on the left. I actually always use the one you see on the right. It came in an old tool kit with my ancient Kenmore sewing machine.

Here’s how it looks once you poke holes every 1/8 to 1/4 inch around the design. Even though the template gets removed after you punch the tiny holes, you still refer back to it during the cutting process. So, I placed an R on the sections that get removed just to remind myself to cut out the dark sections, not the light.

I carved two pumpkins last night…here’s how the backside of the templates looked after I had placed them on the pumpkin and punched a gazillion holes through them into the pumpkins.

Now, I have to tell you what happened next! After I got the cat template taped onto the pumpkin, I took it upstairs and sat with it in my lap and punched all the teeny holes. Then, while I watched Sunday’s episode of Desperate Housewives online, I cut out all the dark sections. I was so proud of myself for not slicing through any parts I shouldn’t, like that tiny spot between the kitty’s eyes.
Once finished, I headed down stairs to put a candle inside to see how he looked, only I had forgotten that I left this in the center of the kitchen floor. I had placed a big garbage bag on the floor to scoop out the inside of the pumpkin and when I came downstairs into the dark kitchen, I couldn’t turn the lights on because I was carrying my newly carved pumpkin.
Well, let me tell you, a banana peel ain’t got nothing on the innards of a pumpkin in the slippery department. In the darkness, I reenacted that scene out of the movie Home Alone where the robber is trying to stand on the steps Kevin sprayed down with water earlier in the day. You may remember, they had become a sheet of ice.
It was a miracle I didn’t drop the pumpkin on the floor. Instead, it went flying across the kitchen counter and crashed into the back splash, or at least I think that’s what it did. It was too dark to see. You can just imagine how much fun this was to clean up later.

After sliding around for what seemed like an eternity, I managed to get back steady on my feet and get to the light switch. When I looked at my newly carved pumpkin…HORRORS! Half of the cat’s face was GONE! My carved kitty looked like this. I was not amused! 🙁

And pumpkin bits were everywhere! (LOL) I had to laugh…Hollywood could not have scripted a more ridiculous scene!

I searched for about 10 minutes for the other half of the face and had given up and was starting to clean up pumpkin bits when I finally found it at the far end of the counter behind the mixer. Using a straight pin, I reattached it. In that whole disaster, the tail was also broken where it attaches to the cat. 🙁 I had done such a good job on that tail…dang it.
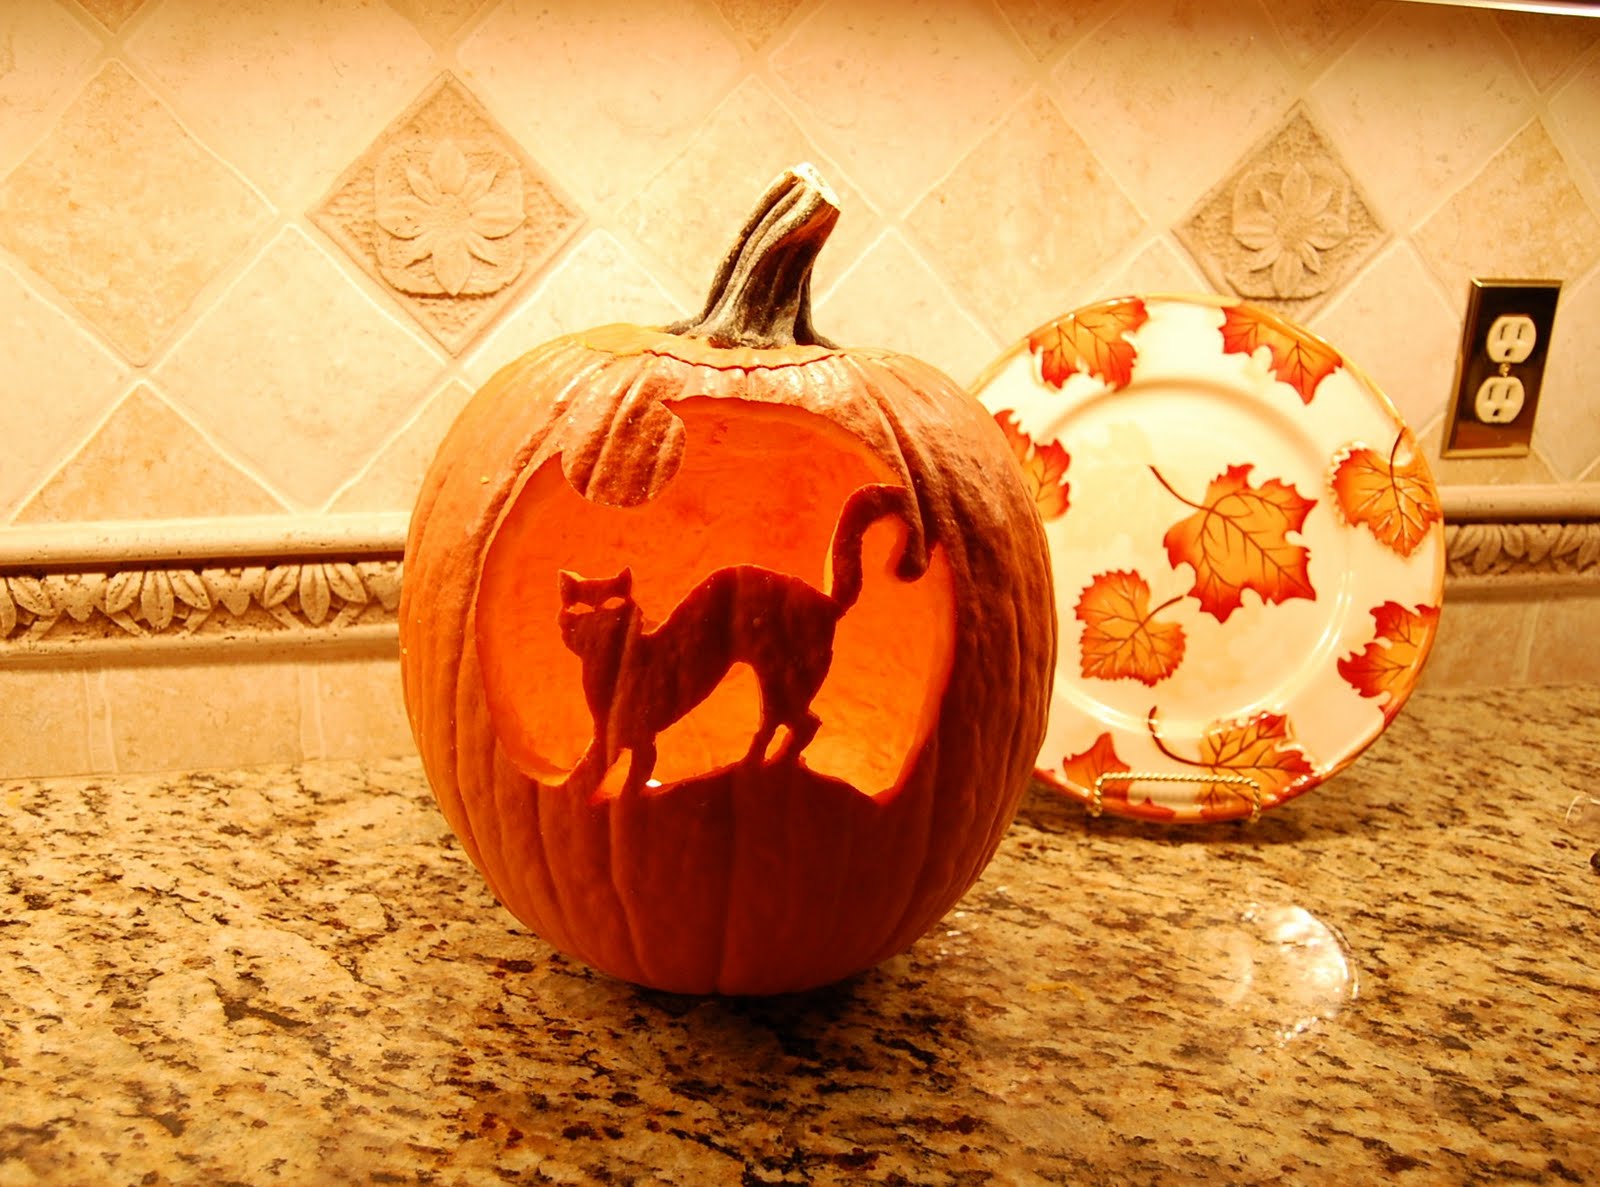
Here’s how it looked on the kitchen counter with the lights turned off. Notice the reflection in the granite counter…cool!

Here’s how it looked out on the porch…

Another porch shot…

After that little disaster, I decided to try my hand at one more…

I managed to keep this one intact…no Home Alone scenes in the kitchen this time. 😉

Here are three of my favorite templates from this kit. The first two are the ones I carved and have shown here in this post. Just right click and choose “copy” and “paste” them to your computer. Or right click and choose “save” to save them to your computer. Then enlarge them on a copier to whatever size you like. You may even be able to enlarge the templates on your computer. The templates that come with the kit are on a standard 8 1/2 by 11″ paper size.
There are little tips on the bottom of each template…they are important because they tell you which sections to cut out first. It is best to follow them exactly.

Another tip: The dotted lines on the white sections of the paper…those are areas where you crease the template to make it fit on the round pumpkin, if needed. The dotted lines on the dark areas are where you can cut when you’re done carving to help remove the big sections that need to be removed.
Happy Carving! 🙂


Wow!! I LOVE your pumpkins, I need to get better tools, mine never come out right, and reading this post, I think the tools are key! And oh my gosh, I'm glad you weren't hurt! We have cement floors in our kitchen and the other day I stepped on the floor with wet feet and went sliding "curler" style across the kitchen {you know that little sport where they sweep the puck thing to the other side of the ice?} anyway, my hutch broke my fall when I slammed face first into it! I hit it so hard I pushed it a good 4 inches back up against the wall! It was crazy, I was sore for days!!!
Terrific pumpkings Great tutorial. Made me smile at all the pumpkin bits that made their way all over the kitchen.
That's quite a pumpkin carving kit you have there. We are carving ours Saturday. La
Your pumpkins turned out great…even with all the drama that accompanied the first one!!! LOL Thanks so much for the templates. It does make it much easier to have the right tools!
Too Funny! I'm glad you weren't hurt. Your pumpkins look great! We just carved our pumpkins, too. I always cut the bottom out of the pumpkin instead of the top. That way I don't have to worry about angling the cut, but the boys all cut the tops off, traditional style.
Very nice! You're lucky you didn't hurt yourself though. If I cut a pumpkin now it would mold by Thursday and be a caved in, rotting corpse by Halloween. I found some cool stencils on the Better Homes and Gardens site that are different dog breed faces. Since I have Goldens, I downloaded that one. My favorite pumpkin, though, is carved stars. Scatter star designs all over the outside and cut the outer skin away in the star shape. Bore a hole in the center, then you put a string of mini lights in and poke one through each hole. The star pumpkin is magical. Thanks for sharing!
Great post Susan! I am going to attempt mine tomorrow! Glad to see you make huge messes too 🙂
Oh Susan! So glad you aren't hurt and that you were able to put your pumpkin back together again..but oh, wouldn't that have made a funny video? Great tutorial and thanks for the tips about the tools!
Hugs, Lisa
The black cat is a favorite of mine. I always … almost … do a cat of some sort. Love the carving kit. W & S is over an hour away for me so I'll have to do with the local orange/black kind that I get at the local stores.
I'm glad that someone else takes photos of their creations. We do each year and have a winner too.
Oh Susan, that was a perfect "I Love Lucy" moment!! So glad you were not hurt…just the cat!!
Great thinking on the retrieval of the cat tail and head.
I have copied the patterns, they are great. I especially like the Haunted House one…now to find some tools in my hubby's tool shop.
Thank you.
I am sorry, but I laugh so badly while reading your pumpkin adventure :):) I'm glad all end up OK for you and for pumpkin cat:)
Monique
AMAZING!
What a great and funny story- and luckily you weren't hurt!!Thankfully the pumpkin with the cat turned out great in the end!
I wanted to do something different with pumpkins this year and have included this on my new blog- I will enclose the link if you want to have a look.
http://moderncountrylady.blogspot.com/2010/10/different-kind-of-pumpkin.html
Those turned out great! They take a lot of patience. My kids like using the templates. I leave it to them these days.
OH NO! Smash! Tools do make all the difference in the world when carving a pumkin—-that's why my 4 year old grandson used his fathers DRILL! HA!
~Heidi
Wow!!!!!
Oooh, great tips! I can never get my pumpkins to look fantastic, so I guess I need to get my hands on some new tools.
I've been looking at templates for my pumpkins! I'm inspired! Sorry about your fall…founds like something I would do! LOL!
I should not have laughted. but that was something out of the tales in the life of moi!! I'm just glad you are okay. You could have been seriously hurt. Your pumpkins are gorgeous. I think I'll have to give this a try this year. I have a perfect pumpkin for carving!
I'm sorry to be laughing at your expense Susan but your story was just too funny. Thank goodness the cat lost his head instead of you. I've never really thought about how to do the reverse cuts on a pumpkin. You've taken all the mystery out of it, thanks I may have to give this a try this weekend. I've got the same tool from my old Kenmore too.
Eeewwwwww…Pumpkin guts!!! Yuck!!
You're lucky you didn't break your OWN TAIL or NECK!!! What a mess!
Glad you're okay. Sore???
fabulous post!! I linked it to my blog. You made me feel like I could actually do it!
your pumpkins look wonderful!!! loved the dripping "pumpkin juice" !!
That could have been a VERY EXPENSIVE pumpkin if you had broken your leg and ended up in ER! Glad you weren't hurt. I did a similar thing with a lovely decorated cake once…..in front of a room full of people…..the people never even got to see it as it ended up face down on the carpet! Now THAT was fun to clean up! I'm downloading your pumpkin pictures for next year! Thanks so much. Toni
I think you pumpkins turned out grrrrreat Susan! Myself I do like the Halloween themed ones the best, however last year I did do a portrait image of my grandson which turned out 'surprisingly' well, but I must admit it took me at least five attempts and a whole lot of frustration.
Two pumpkins = 4 sides … and finally the last a success. Talk about trial and error! 🙂
Regarding the tools you used, I hope you don't mind me suggesting a few others in event someone opts to improvise. They are — A 'beginners wood-carving set' which is inexpensive (about $9.00) plus 'ribbon loop(s)' that you use in clay sculpturing. (Prices vary according to size.) The latter is super for 'shaved' areas when pumpkin sculpting (not to be confused with cutting/sawing). Their blade is similar to that of a potato or lemon zest peeler.
Also shud mention, after you punch out the design (as Susan did), rub a bit of flour over the pumpkin to define the pattern lines. It will give you a better concept as to where or what not to cut. On occasion I light up my pumpkin during the carving/sculpturing process particularly if its an intricate design. (A battery operated tealight will do.)
Thanks so much Susan, for letting me share a few tips of my own and for your patience. Hope I didn't babble on too too much. Hugs
-Brenda-
Brenda…what great tips…thanks so much for sharing those. I would love to see pics of the pumpkins you've carved! They sound amazing!
I am awful when people fall and NO help because I am laughing too hard. I am glad you are o.k. Be careful pumpkin carver girl!
You are super talented, those pumpkins look great! You'd never know what really happened!
Stay safe!
Mary
Susan, you make me smile everyday! These punkins are the cutest! and so intricately carved…a huge impact on the porch…how nifty!
Thank you for sharing. Bless you!
Carole M.
Hi Susan,
Oh my gosh…thank goodness you weren't seriously hurt. It could've been so much worse. But your pumpkins turned out great…you're so talented. What an adventure simple pumpkin carving turned out to be!
Evelyn
Your pumpkins turned out great Susan! I'm glad you didn't hurt yourself falling with your cat pumpkin. After all that work it would have been awful to have to throw the pumpkin out. Thanks for the great tutorial.
Good GRIEF, thank God you didn't break your neck! Actually you were very lucky when you thnk about it. The pumpkins turned out beautifully! Joe did the haunted house on ours too! We need new tools though. I am going to look for them. XO, Pinky
Hello Susan!!
I hope you are ok and I hope you weren't hurt.
Enjoy your evening!!
Suzann
Absolutely love the pumpkin patterns, thanks for postiong the templates up. Going to get a couple more pumpkins tomorrow now I think.
And I hope you were OK after your "incident", but that really did make me chuckle 🙂
Eddi
I loved your carved pumpkins! I bought 3 and they are sitting by the front door waiting to be carved! I don't know… lots of work!
No, Thank YOU Susan for letting me babble on. I just finished doing a Witch pumpkin for myself; and hope to do some Disney characters for the Grandchildren tomorrow. Nothing too amazing this year I'm afraid, but its fun!
Also re the wood carving set that I mentioned yesterday is some times called a 'student wood chisel' set. Just thought I shud mention it, as they can be found Online under that name. (The ones I use are ancient …. just like me 🙂 … but are the same thing.)
I do hope you are not feeling any delayed aches 'n pains after your Pumpkin carving mishap. Take care my friend and HAPPY HALLOWEEN! Many hugs -Brenda-
So glad you hurt nothing but your pride. I just fell recently and was unhurt. We are so lucky.Love your pumkins but don't know if I could do one so elaborate I usually paint their faces and put wigs hats and such.
Usually the danger with pumpkin carving is the loss of a finger or two not a concussion from hitting the floor.
Glad the only casualty was the kitty head.
Ha! I rember using these and I might still have the kit too! Boy that must have been quite the moment when you slipped and crashed! Glad you weren't hurt! At least you could fix the pumpkin in the end and it looked great!
Wow you are right Hollywood couldn't have written this script! I'm just glad it wasn't you and your face that got all smashed up!
Your pumpkins are just wonderful, I love how these turned out and typically I don't care for carved Pumpkins because I don't like the "missing tooth look" that most people do! Yours are great Susan and thank you for the tutorial and the templates!
Terry
WOW..this extraordinary Pumpkin Carving
Oh Susan, you’re slippy slidey story was so funny! 😀 The way you said you seemed to be sliding for an eternity, lol. It just gave me a chuckle. Awww. Now that you posted those pics of yourself at Ralphie’s house I had a better ‘mental image’ of what you looked like, slipping and sliding and desperately holding on to your pumpkin. Too funny. Oh gosh. And the bit about looking for the rest of the cat’s head … lol. This is one of your most fun posts. I know it must have been a real pain in the neck when it happened, especially wondering if you were going to land on your hiney or break something, (other than the pumpkin 😉 ) but on top of that — having to clean up all the spattered pumpkin guts! Ewww. You’re such a great sport and I’m so glad you didn’t throw out the pumpkin in frustration because it looked really great after the repair.
I was just looking ahead a bit for the next ‘big’ holiday (I don’t count labor day) and found this and not only did I have a fun read, I am excited about the templates and the technique to make the pumpkins. I will definitely be dong that this year. Thanks, and thanks for having such a great sense of humor about life’s little mishaps. 😀
lol It def wasn’t funny at the time but made me laugh thinking about it later. I had pumpkin EVERYWHERE! 🙂
excellent pumpkin carving! Great Work Susan Carry on.
I love these pumpkin Carving Ideas these are just simple and awesome