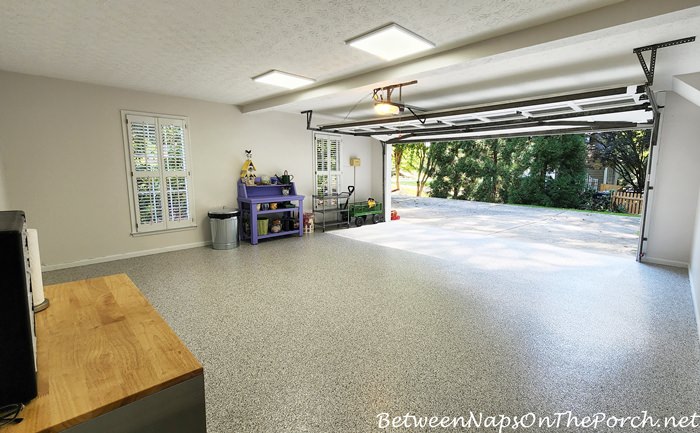
So remember when the garage looked like this?
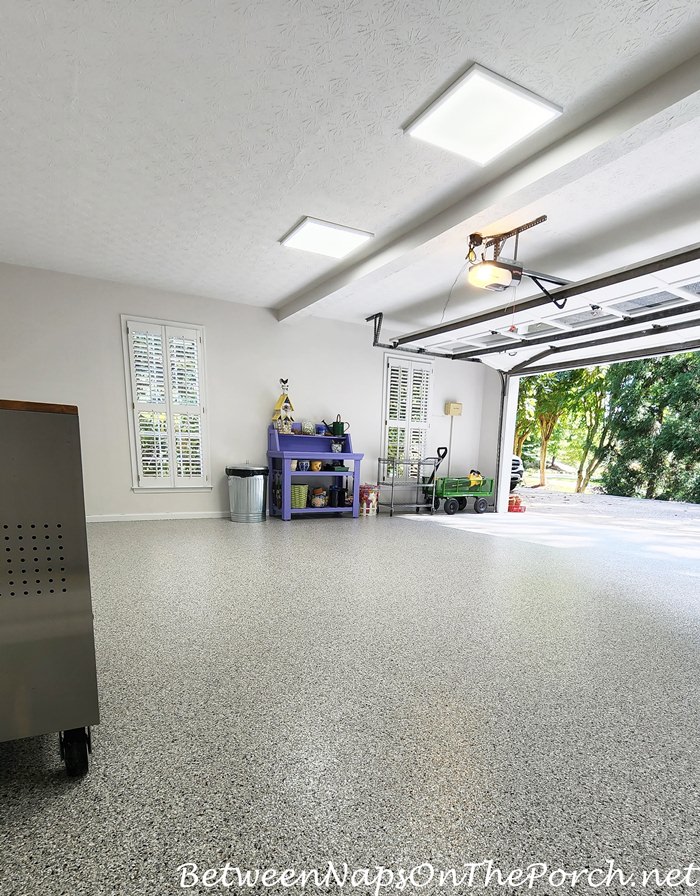
Well, it looks like this again. Arggh! 🙁 I’ll explain more on Monday but basically, the original painter the company sent out did a terrible job of fixing a couple of places on the ceiling where the sheetrock tape that was used 40 years ago was starting to loosen in places. He really botched it. So the painting company has sent out a much more experienced painter who is fixing what the original painter did on the ceiling, in addition to some other areas he missed. The new painter has covered all the freshly-painted walls and the cabinets I’d brought back out with plastic to protect them. He’s coming back again today, but it looks like he won’t finish until sometime next week. I know this had to be done, but I am reeeaaaallly ready for the garage (and life) to get back to normal.

In the meantime, I thought I’d share a little hack I thought of in case it would come in handy for a similar situation in your life. See those two cans I have on either side of the potting bench in the photo below? The one on the left is a large metal trash can and the little one on the right is a can I purchased from my local Wild Birds Unlimited 20+ years ago. Currently, the small one is filled with trash bags in varying sizes. Over the years it’s held birding supplies, potting soil, and all number of things.
After having the new floor installed here in the garage, I’ve been a bit worried about those two cans–worried they would scrape the floor if they were dragged around on it at some point, or maybe leave rust marks on the floor if the bottoms began to rust a bit. I’ve been told this floor is super hardy and can hold up to almost anything, but I’d still rather not take any chances. So, I got an idea.
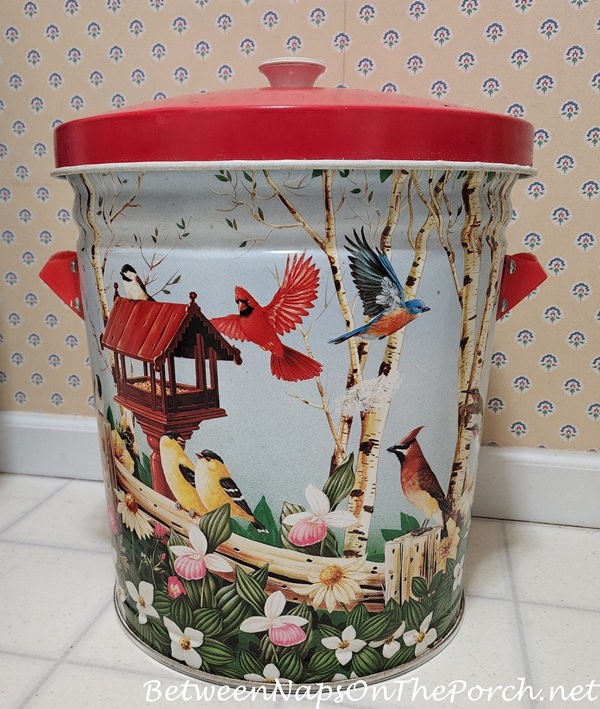
I have a second small can in the laundry room that’s just like the one on the right side of the potting table, only this one has an image of birds on the outside. It was also purchased from Wild Birds Unlimited 20+ years ago. I actually purchased them both on the same day after falling in love with the beautiful images. This one in the laundry room is filled with bird seed for my outdoor feeders that get filled every other day.
Over the years the bottom edge/rim of the can has started to show a bit of rust, occasionally leaving a light rust-colored ring on the laundry room floor. If you look closely, you can see the ring before I removed it with the super cleaner I’m always raving about. (Cleaner is available here although it appears they only have it right now in the large refill size: Super Cleaner.)
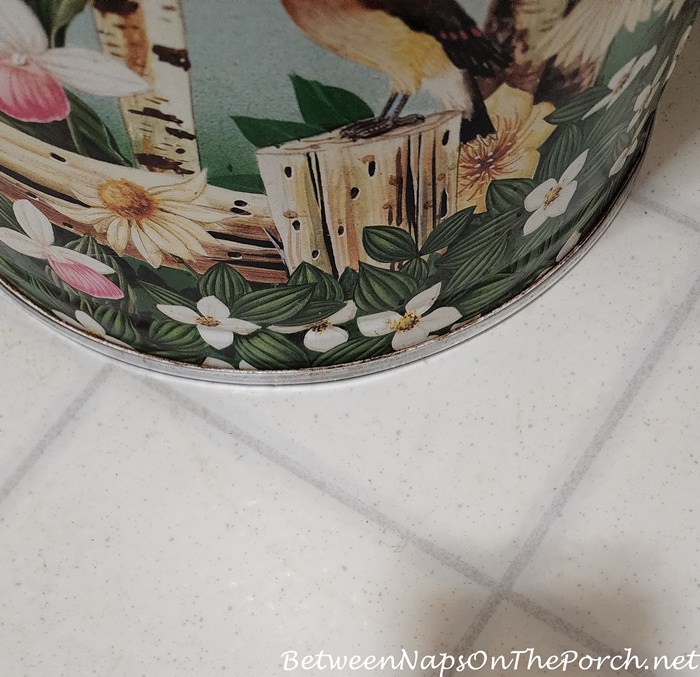
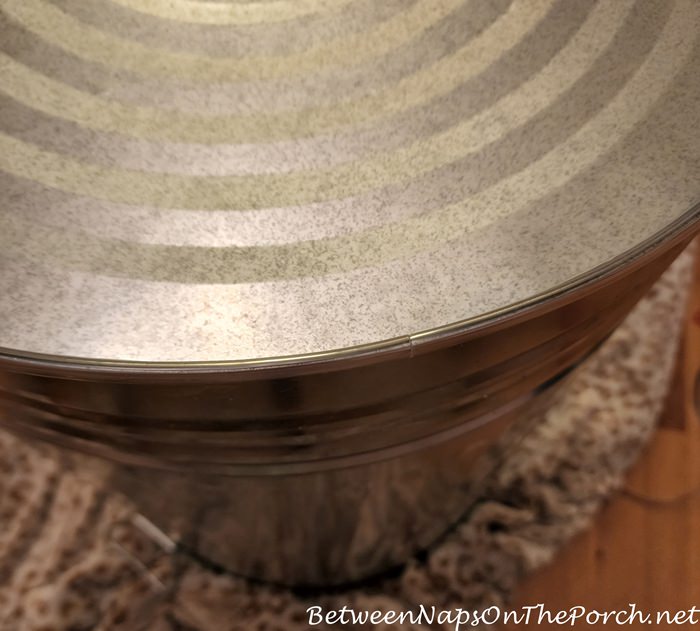
I was able to remove the ring with the super cleaner, but I wanted a way to protect the laundry room and the garage floor from any possible damage/rust stains from these smaller cans. When I flipped the can over, this is how it looked on the bottom.

I went in search of something to protect the floors and found this clear protective seal strip that was designed to go on the edge of car doors to protect them from chipping. I ordered it hoping it would fit on the edge of my cans and it did!
![]()
Here’s how the edge protector looks on the small decorative can that’s normally in the garage but is back inside right now while the painting is being done. You can’t really see it on the edge of the can since it’s clear. I like that! Now I never have to worry about that can leaving any rust marks on the new garage floor.

I took a few photos when I was applying it to the large trash can that’s normally in the garage. This can is made of galvanized steel, which may not ever rust, but I still like having the protective edge strip in place so I can shift or move the can around without worrying about scratching up the floor. To apply the protective strip, I pulled out the inner red tape which exposed the adhesive that’s inside, then I pressed the protective strip over the edge of the can. That’s how easy it is to apply! As I worked my way around the can, I kept pulling out the red inner strip so the adhesive inside would bond with the edge of the can.

Here’s where the two ends met once I had covered the edge around the entire trash can.
Hard to see it but here’s how the can looks now with the clear protective strip in place.

This clear protective edge strip is available here: Clear Edge Protection. I purchased the 16 ft length/size and had enough to do the large trash can and both small cans with around 3 feet left over. Just wanted to share this little hack in case you have a floor that you want to protect from a heavy trash can or have any cans that could possibly rust at some point.
![]()
The painter has arrived, I hear him working downstairs in the garage, so I guess I’d better run down to see if he needs anything. Hopefully, he’ll be able to make a lot of great progress today.


I can hear you screaming..”NO……..” and it echoing to Eatonton. Good luck
Ha! Yup, that would be me! 😉 The painter just gave me some good news–he expects all the plastic to come down today and I may be able to place the new cabinets back against the front wall. 🙂 Yay!
Glad the company has sent out a more experienced painter to fix the issues Susan, just hate that it has set you back on finishing up with the garage project. But at least you know it will be done right now and hopefully will late you for a long time to come. Hopefully the painter will be done in a timely manner and you can get back to the job at hand, getting all those beautiful dishes back into the cupboards! Then all will be just a memory and life will get back to normal but will be so well worth it. Hugs, Brenda
Thanks, Brenda!I know, mentally I was way past this, so it’s taken a bit of adjustment…felt like I was starting over. Fortunately, he expects to take down all the plastic today and thinks he will be done with the wall where the last 4 cabinets go by the end of the day. If that happens, I’ll put together that final 4th cabinet tonight and finish putting all the dinnerware away tomorrow. I manage to sneak some into the cabinets I already had in the garage…wasn’t easy with all the plastic but made me feel better freeing up a little space in the dining room and breakfast room.
I have trouble moving heavy cans of birdseed, dog food, or potting soil. If you are worried about dragging cans across your new floor you might find these plant caddies helpful. I have several in my garage. There are all sorts of decorative ones out there but I prefer the clear heavy duty plastic. They are not as noticeable once underneath the can. Your garage looks great!
https://www.amazon.com/Panacea-Plastic-Plant-Caddy-Clear/dp/B06XGB85MD/ref=sr_1_6?crid=1RKSB4SSJUABY&keywords=Clear+plant+caddy+with+wheels&qid=1661006306&sprefix=clear+plant+caddy+with+wheels%2Caps%2C71&sr=8-6
Thanks for that suggestion, Imbi! Normally the trash can is fairly light since I don’t usually put anything heavy in there and rarely move it…except right now with all that’s been going on out there. I will definitely keep the plant caddy in mind…just in case! That’s a great idea!
I was going to suggest plant caddies but someone beat me to it! I love your solution. Very clever. One of my pet peeves is the bottom of a can of shaving cream. My husband places it on a coaster in the bathroom otherwise it leaves a rust mark on the counter. Bad design. I am loving your garage. A huge project but it has made a huge difference.
You would think they would coat the bottom of those shaving cream cans a lot better since they know they are going to always be around wet surfaces. That’s a great idea about the coaster! Thanks, Lin! I still have one more battle to fight. I had the seal on the garage door replaced last week since the old one was damaged by some critter…and it looks terrible. It’s already ripping and he left a big gap at one end. So another guy garage repair guy is coming out on Monday. This garage renovation is taking a while! lol
I seem to remember that you had problems with inexperienced painters painting your front porch, too. I know everyone can’t be an expert from day-one, but it seems that many companies hire folks to “learn on the job” and the customers are the “Guinea Pigs”. I wish we would go back to the time of a few years of apprenticeship before they are allowed tackle a job by themselves. Makes me want to say to the business owner “Send me your MASTER plumber/electrician/painter/carpet layer/etc. – please do not send a trainee.” – In the past 50+ years I’ve experienced problem installs by trainees in carpet, plumbing and electrical work. Fingers crossed this is a “one-time fix”.
I know, plus all these companies seem to be short on employees right now. I always tell them I want their best crew and they swear that’s who they are sending. It’s frustrating! There were so many issues, some I hadn’t even noticed until a few days later. Thankfully, they are all being corrected. I wonder if it’s worse finding reliable tradesmen in big cities than in smaller ones. I always wonder if it’s an Atlanta area thing because there is just SO much business here.
If you can stand one more suggestion – – -Look for “coasters” on weather tech.com. This is the company known for their floor mats, but they offer much more. I purchased several of the large “coasters” – have some under potted plants & even one under a small fountain on the patio. They are fabulous! Various sizes, colors, dishwasher safe, and supposed to not discolor from UV rays. All you have to do it put one under the cans.
Ran into the same problem with the cans of Skintimate leaving rust stains in my shower. I now just store the Skintimate upside down, on its plastic lid. No more rust stains.