If you’ve been reading Between Naps on the Porch for a while, you know I love organizing “stuff.” It’s ridiculous how excited I can get over finding cool ways to store those things we need and use each day. It’s icing on the cake when storage is actually pretty and decorative in addition to being functional.
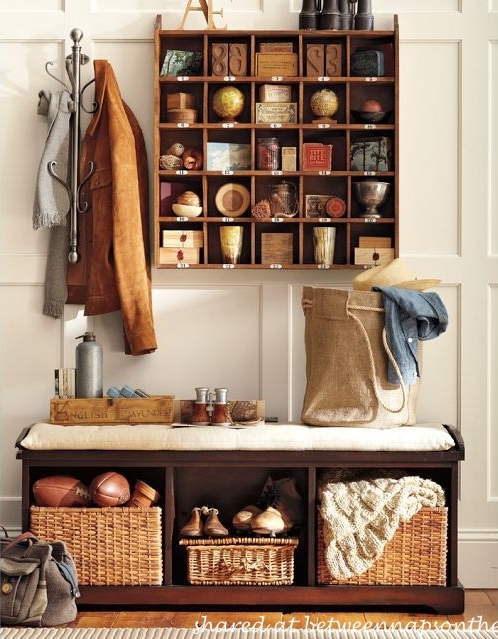
One handsome storage solution I’ve been eyeing for a long time is Pottery Barn’s Cubby Organizer.
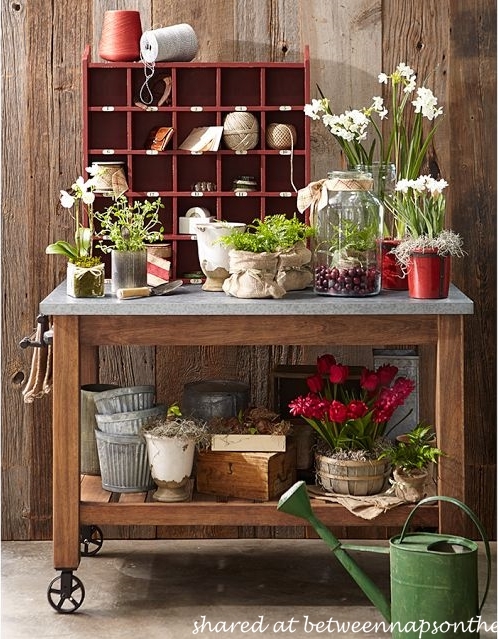
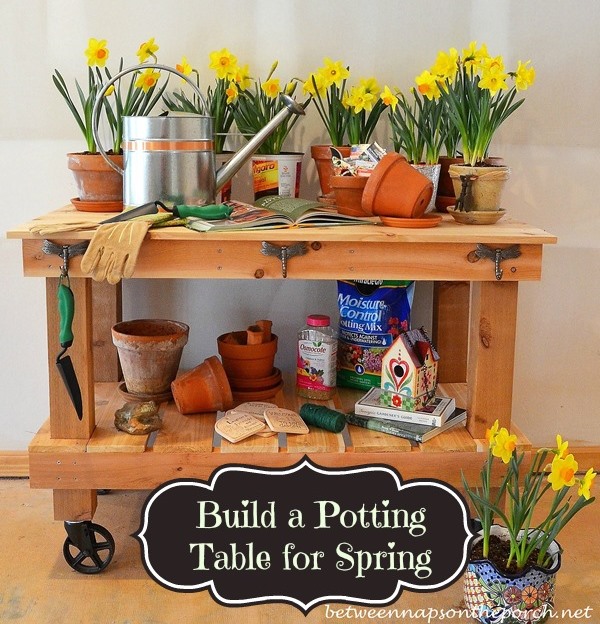
Here it’s being used with their Abbott Potting table. (You’ll find a tutorial for building an Abbot inspired potting table here: Potter’s table) It looks super cute holding gardening twine and ribbon, doesn’t it? Tucked inside a garden shed, it would be great for storing seed packets, ribbon and all kinds of floral and gardening goodies.
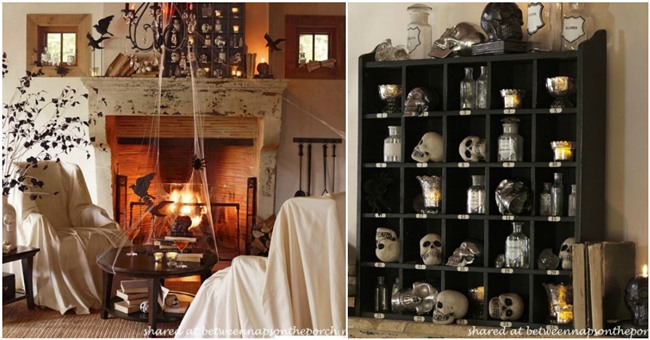
How do you like it on the mantel dressed for Halloween? What a hoot!
Love it in an office, such a versatile piece! Seeing the PB office pictures started me thinking.
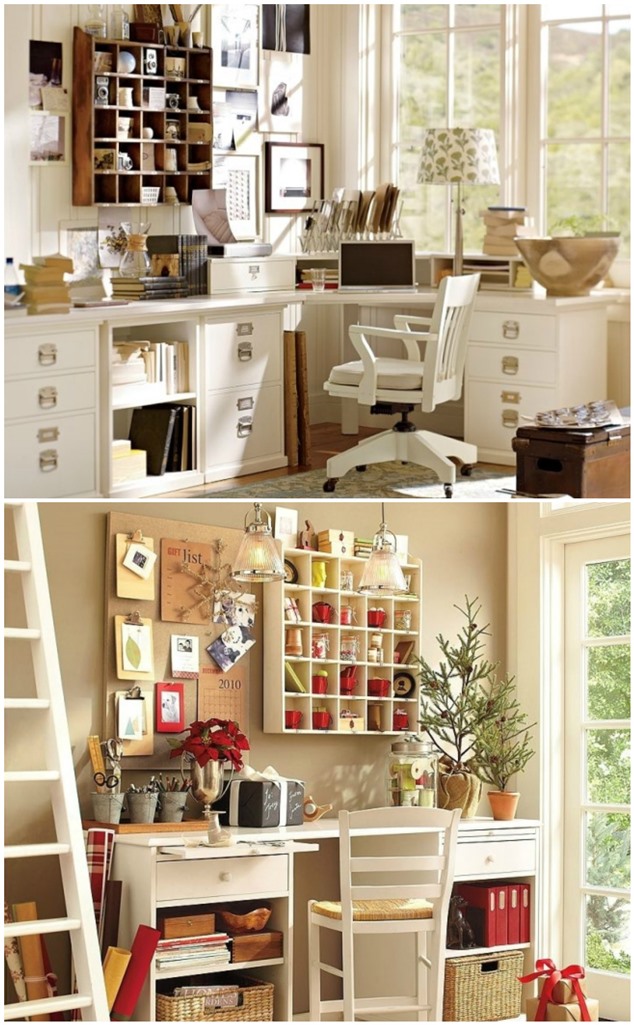
Wonder how it would look in my home office?
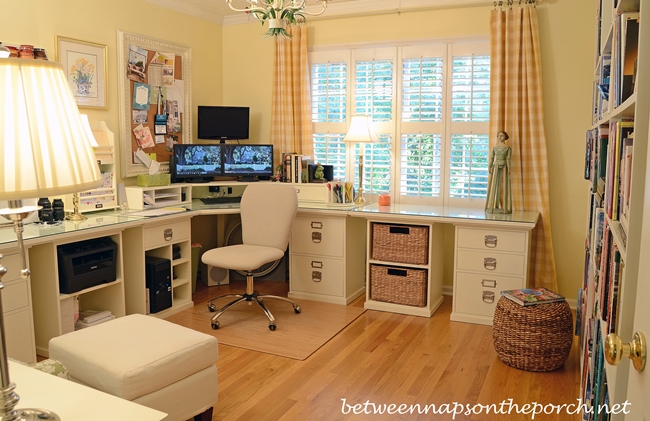
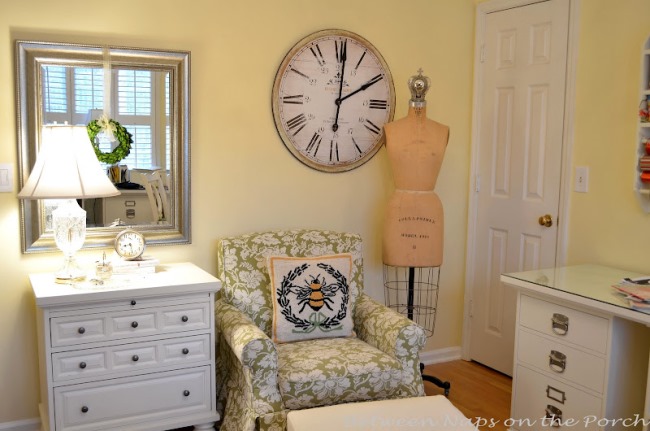
I was especially eyeing the clock wall in the office, wondering if it would work here above the chair, in place of the clock.
It’s $149 in the PB catalog but I remembered seeing plans for a similar one online at Ana White so I decided to build one myself. Once I got deep into the building process, I started jokingly calling it the “glove of woodworking.” Back when I first taught myself to knit in my 20’s, the first project I chose to make was a pair of gloves. Little did I know, gloves are one of the most challenging things to knit!
Building the cubby organizer really isn’t hard, but if you get off to a rocky warped start, it can quickly become a challenge. I’m thinking of building a second one now that I know all the things NOT to do. I’m sharing those with you today so you can avoid those pitfalls if you decide to build one.
How to Build a Cubby Organizer, Pottery Barn Inspired
Materials Needed:
4 – 1×6 Boards, 8′ Long (I purchased five 6-ft boards because those fit in my SUV better.)
1 – 1/4″ Plywood (You’ll need around 28 1/4″ x 32″ size)
2″ Screws or nails (I used nails that work in a brad nailer.)
1 – 1/4″ Nails (I used nails that work in a brad nailer.)
Wood Glue
Wood Filler or caulk to caulk holes
Paint or Stain (depending on your finish)
Paint Brush (if painting)
Strong hooks for hanging if you wish to hang it
Tools Needed:
Compound Miter Saw (I used a circular saw since that’s what I had but would definitely be easier with a miter saw)
Jig Saw (Optional)
Brad Nailer
Sander
Safety Glasses
Hearing Protection
Pencil
Square
Once you have your materials and tools, here’s what you’ll need to cut:
Cut List:
6 – 1×6 @ 30 1/2″ (For the shelves)
20 – 1×6 @ 4 3/4″ (To make all the cubby dividers)
2 – 1×6 @ 31 1/2″ (For the sides)
1/4″ plywood @ approximately 28 1/4″ x 32″ (This is for the back. I waited until I finished building the organizer to measure and cut the back. I was glad I did because mine needed to be about 1/4 inch smaller than the plan indicated.)
The wood I purchased was labeled “Mixed Wood, Made in Sweden.” It looked like it would work well for building the organizer and it did except for one problem, more on that in a sec.
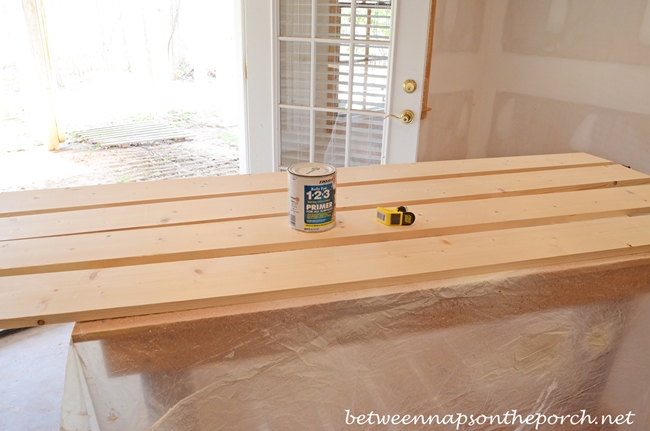
I started out by priming all five of my six foot, 1×6 boards. I actually had one more board than you see here, just couldn’t fit them all on the table for priming/painting at the same time. As mentioned, I purchased 6 foot boards and 5 boards was barely enough for this project. I only had about a foot of wood left over.
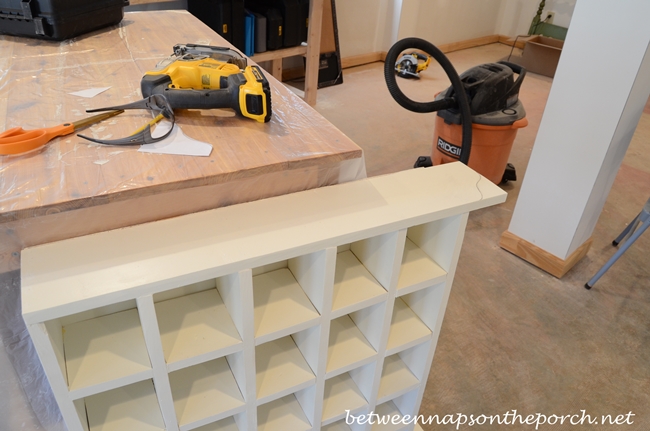
That’s my recently built potting table lurking under the drop cloth. I had someone lined up to come move it onto the deck for me but he didn’t show up. I’m kind of glad he didn’t now since it came in handy for this project.
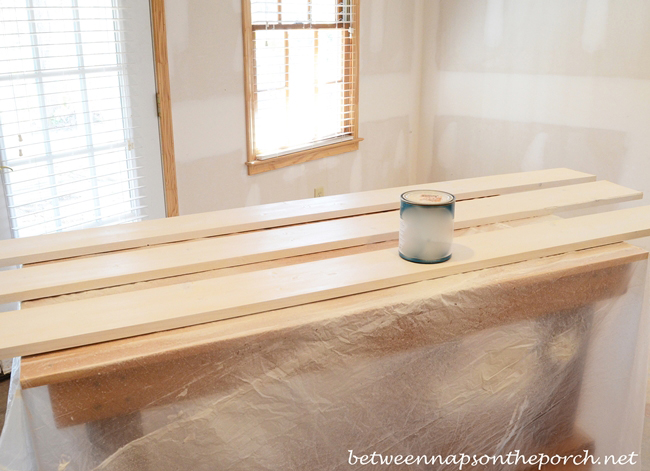
After the boards were all primed, I painted them with a soft, creamy white color (Sherwin Williams Dover White) that I thought would work well in the office.
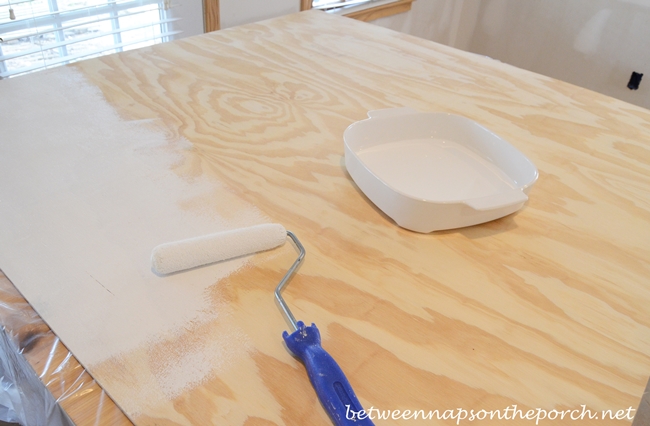
I also primed and painted one side of my plywood. Do you like my fancy roller pan? I didn’t think to buy any pans at the store so I made do with a ceramic dish and it worked great with my mini-roller.
Here’s everything painted, cut and ready to go. Notice anything about the shelving boards stacked behind the little dividers? Gaps abound. Can you say “warped board?!” 🙁
So here’s the first thing you REALLY need to know about building this project: If you would still like to be a sane person when you’re all done, don’t buy any warped boards. I want to type that statement about 200 times on this page, but I’ll spare you that.
You can get away with a slightly warped board on some larger projects but not on this project. If your boards are not pretty close to perfectly flat, this project will take longer and you will be super frustrated while you are building it. No matter how many boards you have to look through at the lumber yard or hardware store, it’s worth it to get flat, flat, flat boards. Can’t state that enough!
The other thing you really need to know is that each cubby divider board needs to be cut to the exact size needed, which is 4-3/4 inches long. That will become the height of the divider walls when you start assembly the organizer. I used my circular saw and apparently I didn’t cut them exactly that size…maybe got off an 1/8 of inch with my circular saw a few times. If I build another one of these, I’m thinking of cutting all my wood with a jig saw to get a more accurate cut. Update: I’ve learned from some of the comments that compound miter saws are great for projects where the cuts need to be super precise. Going on my tool wish list!

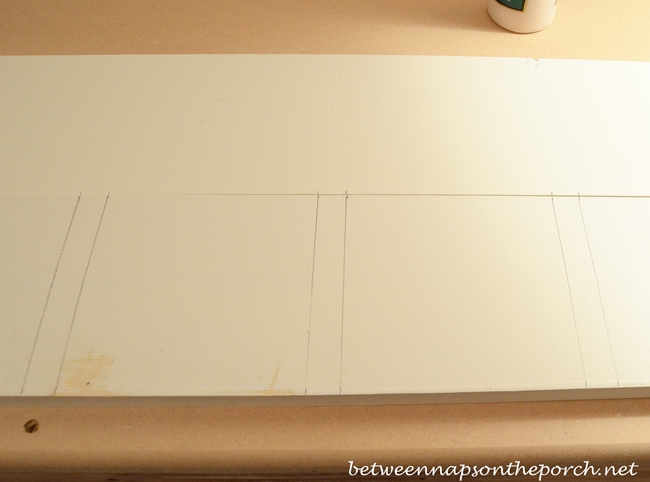
After you have all your wood cut, next you’ll need to mark the location of each divider on your shelf boards. At first, I started marking them on one end, measuring across, marking as I went. The measurements didn’t come out right in the end though, so I erased all the marks and started over.
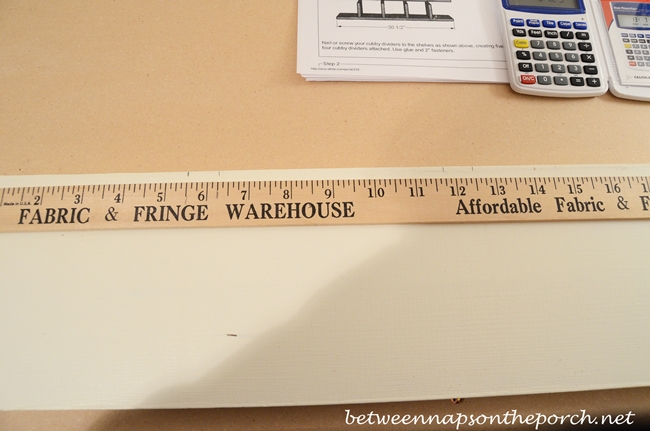
I decided the second time to use a yard stick. That worked great because I could mark all the divider locations at once while keeping the yard stick stationary and in place. Not sure why it worked so much better, but it did. Can you see the little pencil marks along the top of the board?
Once I had all the cubby divider locations marked out on one board, I just scootched another shelf board up to that board and marked it in the same place using that first board as my example. That worked great and was a fast way to mark all the other boards. If you look closely, you can see the little marks I made on the top board by using the already marked board below as my guide.
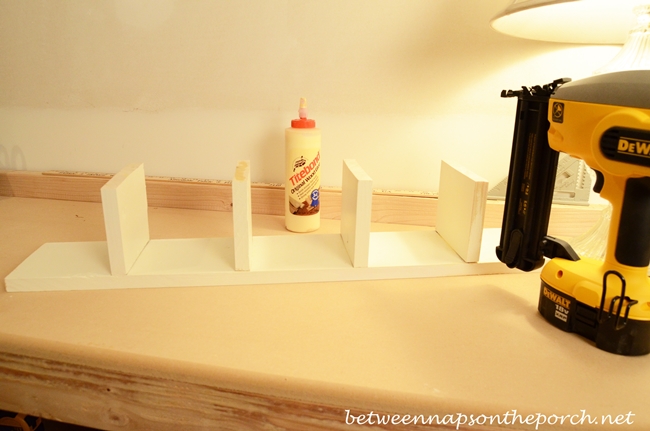
Once all your boards are marked, run a bead of glue along the area where the divider wall will be. (Ignore the board that’s laying behind it. I forgot to take a pic showing where I applied the glue.)

Then turn your board up and holding the divider wall in place (since the glue hasn’t had time to really dry) using 2-inch nails, nail the divider to the board from underneath using a brad nailer. This project would be kind of hard to do without a brad nailer. You may be able to glue all the divider walls in place, let them dry overnight and then try nailing the dividers the next day by hand, but a brad nailer is definitely the easier and faster route to go. Here’s how my first shelf looked with the dividers nailed and glued in place.
Repeat this process to make your five shelves. I just stacked them all up on my work bench and took a pic to share how they looked. I was still in blissful ignorance at this point, had no idea things were about to get “interesting.”
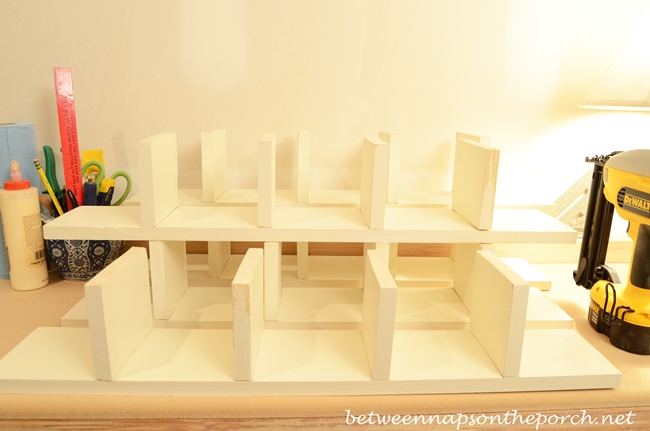
Things Get Interesting!
The next step is to start stacking your shelves (with their attached dividers) on top of each, other one at the time, toe-nailing them into place as you go. This is where I ran into problems so of course I forgot to take pictures. Bad blogger! To make up for that, I took a picture and kind of photoshopped out part of it to make it work for explaining this next part. So if the picture below looks a little strange, that’s why.
After all your shelves are built with dividers, take one shelf of dividers and place it atop another shelf of dividers as shown in the pic below. NOTE: Be sure to use glue in between. Just run a bead of glue along the top of each of the dividers on the bottom shelf, then place the next shelf on top.
As soon as I stacked the first shelf on top of the bottom one, I realized something was amiss. I had two things working against me. I had at least one very badly warped board (did I mention don’t buy warped boards?!) and I realized that all my cubby dividers were not quite the same height. Rats! A couple were maybe 1/8 of an inch taller, just enough to throw everything off.
If that happens to you, here’s the easy fix. Using a good sander, sand off a teensy bit of the divider wall(s) that is sticking up a little too high. Place your next shelf back on top again, if it’s still not level, sand off a bit more. Take your time with the sanding, you don’t want to remove too much since you can’t put it back.
NOTE: Buy a good sander! The first night I ran into this problem, I had an ancient sander that was extremely loud and very hard on the hand. Plus, I didn’t have any heavy grit sand paper on hand, so I sanded and sanded and it made little difference. All I got was a sore, numb hand.
I stopped and the next day I bought a REAL sander, a nice handheld one. I couldn’t believe how much quieter and less jarring it was to use, should have done that a hundred years ago. I also bought some serious grit sand paper. It was much easier to even out those slightly-too-tall dividers with a good sander and some heavy-duty sand paper. A good sander is worth its weight in gold!
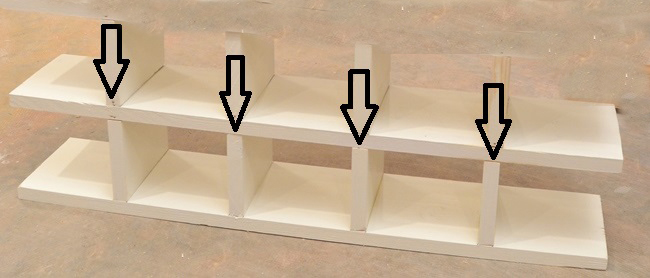
Once the dividers were all the same height, I attached the next shelf by gluing and toenailing it to the tops of the dividers of the shelf below using 1-1/4 inch nails. Toenailing is just a funny word for nailing at an angle. Brad nails are finishing type nails so they have virtually no head on them, plus the brad nailer sort of sinks them down into the wood. If you’re painting your organizer, you can caulk over or fill the teensy hole the nail makes later. The arrows below show where the nail went into the top board to secure it to the top of the divider underneath.
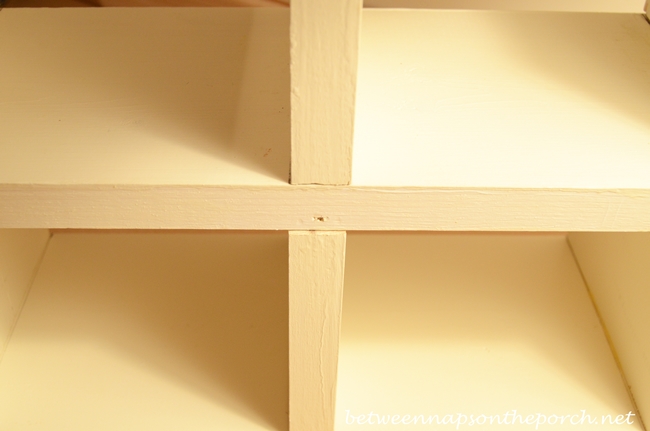
Here’s an upclose-shot for you. See the tiny hole where the brad nail went in? I shot it in at an angle, down into the divider underneath. You do the same thing on the back of the cubby organizer, too. I used two nails a few times on the back rows for extra support.
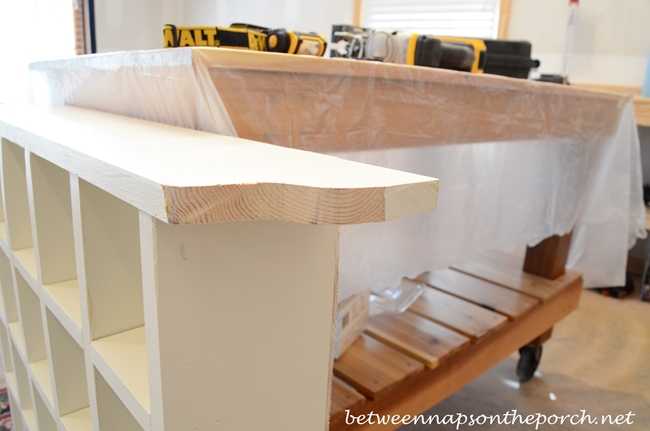
Here’s how it looked when I had all the rows attached to each other. Those are the “sides” of the organizer you see leaning up against the column. I ended up building the organizer down on the floor because it was just easier to shoot the nail in at a downward angle with the organizer on the floor than having it up in the air on a table or bench.
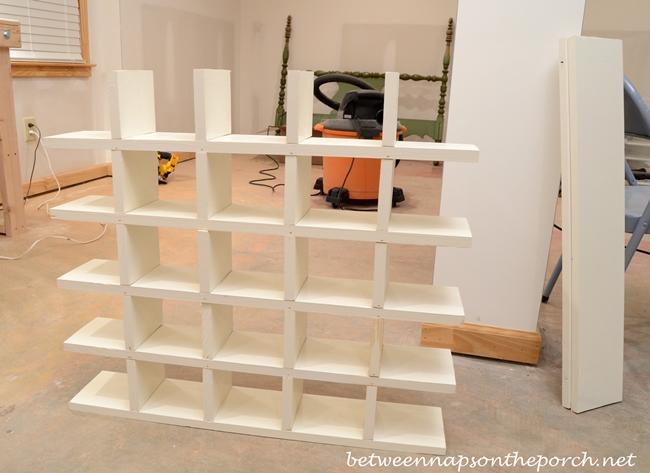
Gently lay your organizer on its side and nail the side to the ends of the row boards using 2 inch brad nails. Forgot to take a pic of that so pretend like the back isn’t on, yet. :)) You’ll want to use glue here, too.
After the side was attached, I filled all the little nail holes with paintable caulk. Once the caulk was dry, I lightly sanded it with plans to touch up the paint once the cubby organizer was all finished.

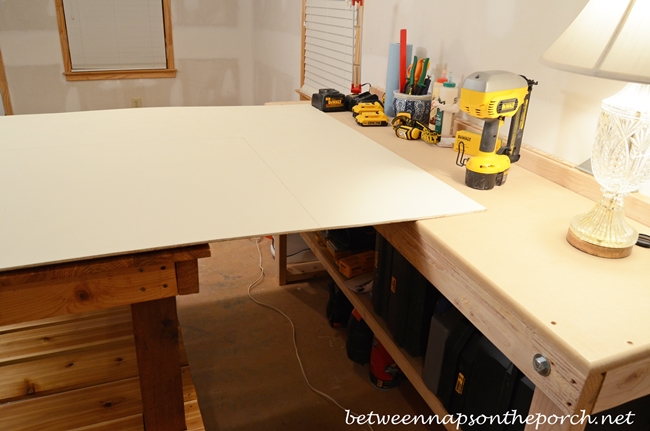
I waited until I had my organizer built to cut the back. I was glad I waited because mine needed to be about 1/4 inch smaller than the plan indicated. When I placed the plywood on my table to cut it, the plywood kept flopping over. I had decided to cut the back with my jig saw since there would be little room for error and I wanted it to fit perfectly.
There was no way I could hold up the plywood and cut it at the same time, so I came up with an idea. My new work bench is about the same height as my potting table so I rolled the potting table over near the work bench and was easily able to cut out the back with no problem. I’m going to miss that potting table when it goes to live on the deck.
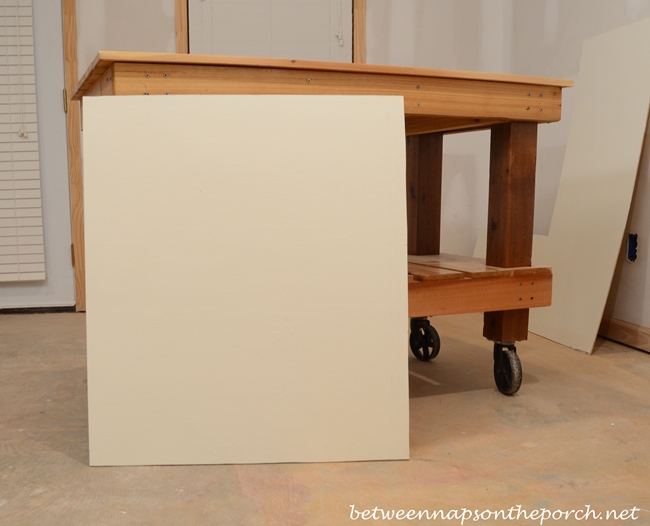
Here’s the back, all ready for installation. It was easy to attach the back using a brad nailer. I nailed it all around the outer edge of the organizer using 1-1/4 inch nails. The plans recommend nailing it to the back of each individual shelf, too. I didn’t do that but I’m sure it’s a good idea.
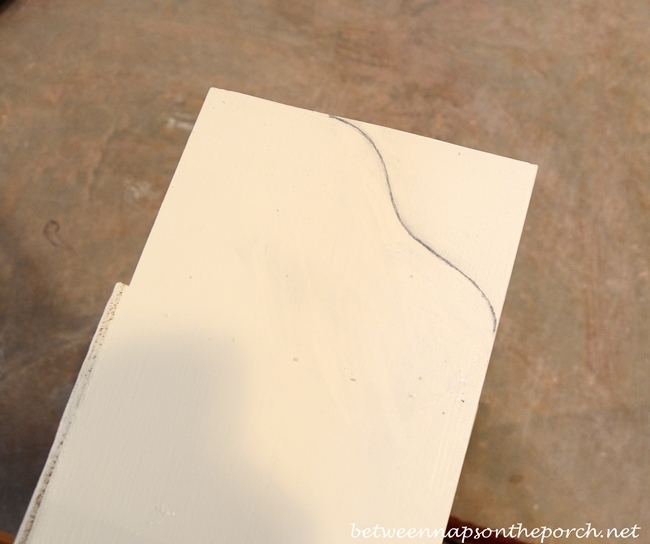
Once I had the back in place, I decided to make the tops of the sides curvy like the inspiration piece. This can also be done prior to attaching the side but I thought it would be a little easier once it was attached to the organizer.
I drew out a template on a piece of paper, cut it out, placed it on the side of the organizer and traced it onto the side board.
Using my jigsaw, I cut out the shape. Afterwards, I used my new sander to smooth out the little angular spots visible below.
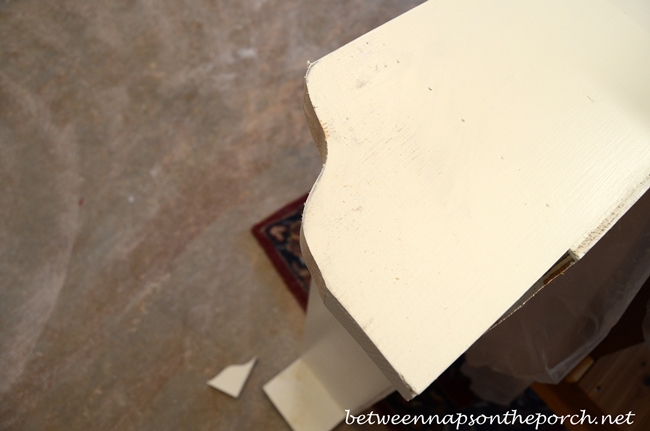
Tip: My sander offers different speeds for sanding. When you’re doing little jobs like this, you’ll want to make sure your sander is set on a low-speed, other wise you could take off more than you want. So go slow and take your time.
Ready to see how I’m using my cubby organizer? Hint: It didn’t end up in the office, at least not yet.
For now Mr. Cubby Organizer is hanging out in the basement. I like how he looks here so much, I don’t want to take him upstairs.
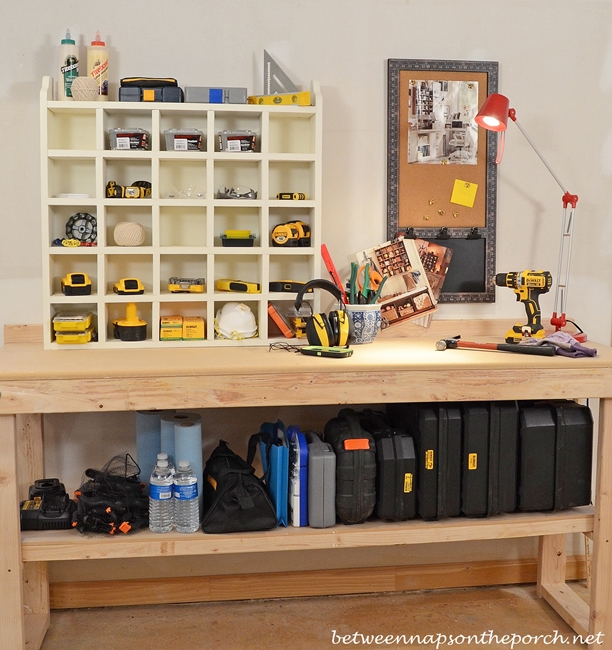
I may eventually draw in or stencil the little numbers seen on the inspiration piece. If I had known I was going to use it in the basement, I probably would have painted it a different color. It looks pretty bland against the unpainted sheetrock walls so try to envision it against a different color wall.
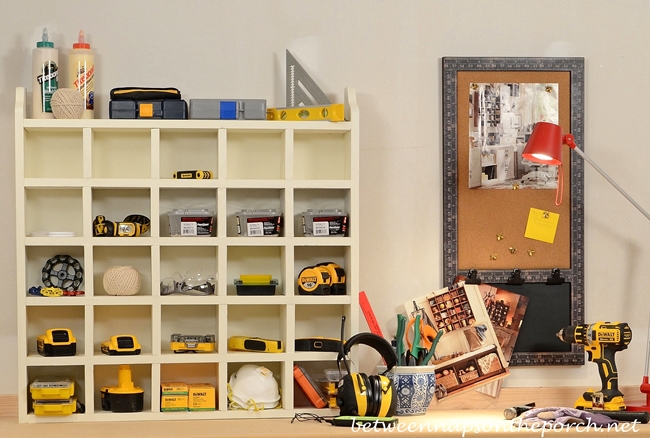
Here’s a little close-up of some of the shelves.
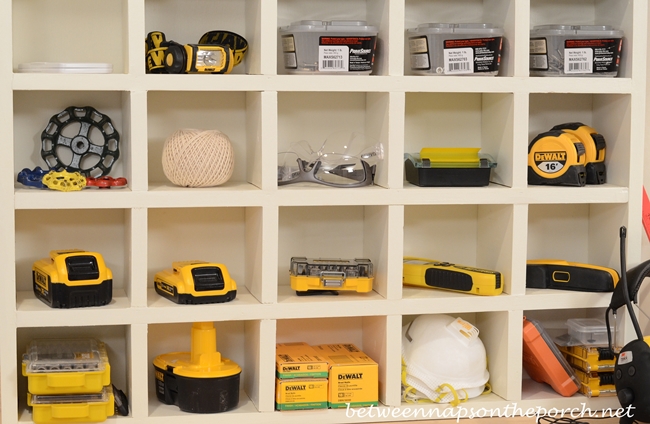
This is what happens when you use warped boards. Just say NO to warped boards! 😉

Here’s how the sides came out with their fancy, dancy curved tops. The left side…

The right side. Gotta love a jigsaw!

A few nights ago I remembered a task light I had purchased from Ikea for the office. I only used it in the office for a few days since I could never find a good spot for it. I pulled it out of the office closet, brought it downstairs and found it works great for a little extra light here in the basement. Looks a bit more appropriate for a workbench than the one I was using, doesn’t it? 🙂

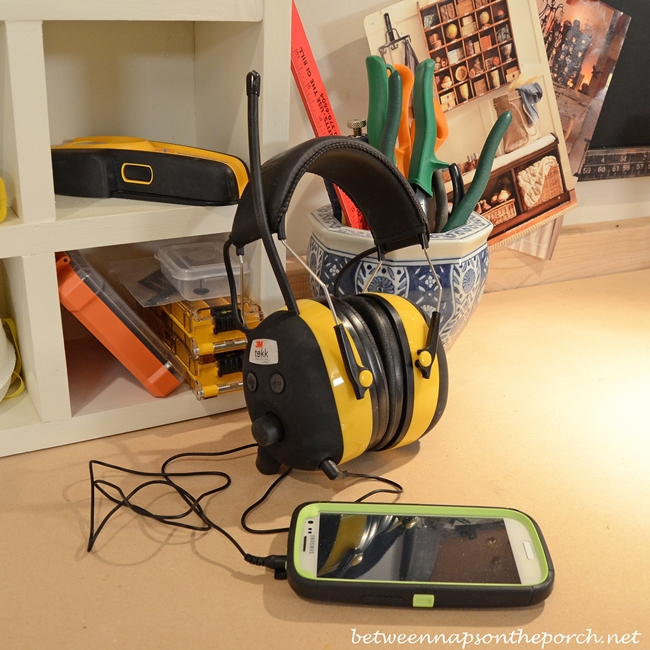
My WorkTunes Hearing Protector earphones arrived and I do like them. Just as some of the reviews online indicated, the radio reception isn’t great. But they do what I really want which is to listen to books on my phone and have good hearing protection. They will also work with iPods.
I couldn’t resist this bulletin board I found for $20 in the clearance isle of a local store.
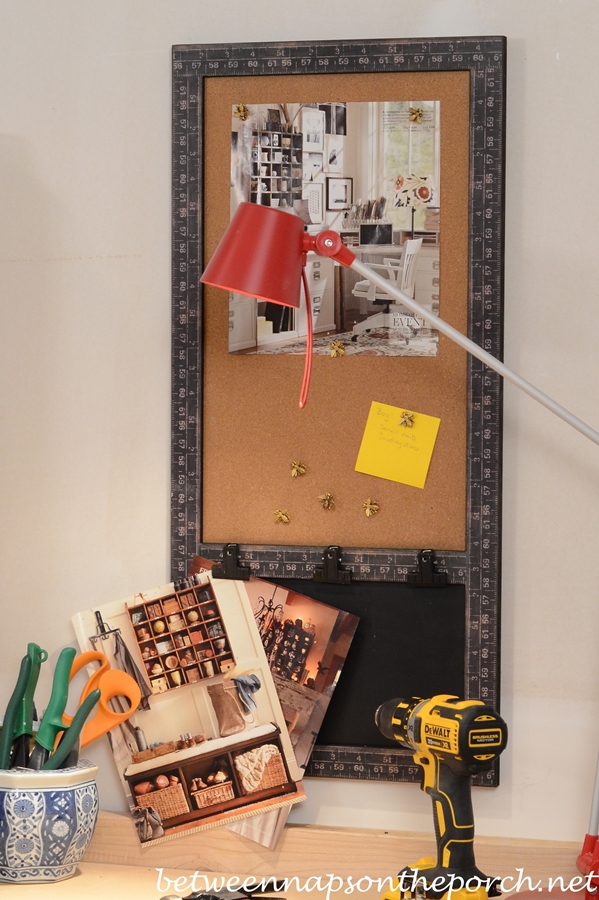
Love the yardstick/ruler frame for my mini workshop.

It has a chalkboard below for jotting down needed shop supplies and the little clips are great for pinning inspiration pictures of that next project.

In summary, this is NOT a hard project to make if you use non-warped wood AND are super careful with your divider wall cuts. If you’re not careful, it becomes a glove with 25 fingers. 😉 The two things I would do differently if/when I build this piece again are:
1. Inspect the wood I buy more carefully and stay far, far away from warped boards
2. I would cut my cubby divider walls with a jigsaw or compound miter saw instead of a circular saw. I think my cuts would be way more accurate that way. My measuring was fine but it’s hard to cut 20 small pieces with a circular saw and have them all the exact same height. It only takes one being slightly too tall to throw off the entire row when you’re assembling this piece.
My final cost to make the cubby organizer was as follows: $24.90-Wood, $11.32-Paint and few pennies for the brad nails. I’m not sure what to price those at since I purchased a whole box and only used a couple of rows of them, if that. I already had the glue. So the cost for this piece was right around $40 estimating in a little for nails and sandpaper. That’s a savings of $109 compared to the $149 price tag for the inspiration piece. Whoot, Whoot! I can see why this building stuff is so addictive!

Love a good Pottery Barn knock-off? Check out this gardening table you can build, inspired by Pottery Barn’s Abbott Potting table here: Build a Pottery Barn Inspired Potting Table, Great for Parties on the Deck, Too!
Check out these Pottery Barn, Ballard Designs, Grandinroad knock-off tutorials here: Decor Knock-Offs
Let me know if you have any questions about this project, happy to answer those.
Are you working on any projects for spring?
I was one of the bloggers selected by True Value to work on the DIY Squad. I have been compensated for my time commitment to the program as well as writing about my experience. I have also been compensated for the materials needed for my DIY project. However, my opinions are entirely my own and I have not been paid to publish positive comments.


This is amazing! I appreciate your fantastic tutorial! You amaze me with your projects! You did a fantastic job on this cubby! Wow! I love it!
Thanks, Betsy! Appreciate that so much! XO
Hi Susan
Oh my goodness, how absolutely beautiful!! You did a fabulous job, it looks so professional excally like the one a PB. Congratulations. I will probably never build one, I am not a patient person and would probably nail a finger instead of the board, lol. I like the white paint it looks so fresh. I love it when you do your projects and give such detailed instructions, especially with pics. Love and Hugs, Doreen
Thanks, Doreen! They really aren’t hard to build, especially with non-warped wood! If I can do it, anyone can! 🙂
Susan you are becoming quite the woodworker! Your cubby turned out great even if you had some small problems. We get so frustrated at the big box stores because of the bad lumber we find there. We’ve gone through dozens of 2 x 4’s just to find a couple of good ones. P.S. – I guess now you need wood clamps for your projects 🙂
Thanks, Liz! When I got home and realized one board was so terribly warped, I returned that one. While there, I asked the guy who was helping me go through board after board to find the least warped one why they kept placing all the bad boards right back on top again. He said that’s “just what they do” until eventually that’s all that’s left and then they get some new wood in. I think they are hoping folks will accidentally buy that bad wood. They are going to hate seeing me coming in the future. lol I’m going to be extra choosy from here out.
You amaze me! I would NEVER attempt that and you are whipping out projects like a pro! Have you contacted HGTV about having your own show?????
You are too cute! My show would be the “Don’t Do It This Way” show. 🙂 I could serve as the example of what to avoid. lol
More wonderful inspiration for us “Newbies”. Thanks!
Thanks, Norma! XO
I think it looks terrific, warped boards and all! You can’t even tell from the front…great job! I could think of several places one of those would come in handy! 🙂
Great job. Your workshop is really looking good.
Thanks, Rita…having so much down there!
Where did you find the bee pushpins? Cubby looks great!!!
Thanks! Those came from Ballard Designs 2-3 years ago. They used to sell them online, too. They may still have them.
I just checked and they do still have them. Hope this link works for ya: http://www.ballarddesigns.com/set-of-12-style-tacks/194158?redirect=y
You have more talent in your little finger, than I will ever have in my hold body! This is way too nice to hide in a garage, I would have to leave the doors up so you could see it. Everything you touch turns to gold. Thank again for sharing and God Bless! Have a wonderful week!
Awww, thanks Pat! I still want to make one for the office since this one got hijacked for the workshop.
Great job ,Susan ! You can do anything. Enjoy your new organizing shelf.
Thanks, Peggy! XO
Susan, it looks terrific and I am very impressed with all your tools. I would never tackle anything like this, I would probably cut off a finger or two. I love the organization though. Thanks for sharing.
Thanks, Sharon! It really was a lot of fun to make! 🙂
Susan, great job, but you might consider purchasing a compound miter saw, makes cutting easier and more accurate when making projects like the cubby.
Jean, thanks for that tip! I was thinking those were just for cutting angels for crown molding and such. So they work for regular straight cuts, too? Good to know!
Susan, I was going to suggest a compound miter saw as well and the one that DeWalt makes is excellent. they work great for cutting many matching size pieces and there is a fence perpendicular to the blade and the blade locks in place so the cuts are square. When I make lots of matching size pieces I measure the first one and then use that as a template by laying it on top of the board to be cut, making sure that the ends are flush and then i pull the blade partway down (while it is not running ) and scoot the board over until the template board just touches the side of the blade. I lift the template out of the way, pull the trigger to cut and a second later your next piece is done. A compound miter saw is limited to narrower boards, but it would have worked great on 1x4s or 1x6s. Definitely should be on your tool wish list.
Thanks, Lorri, that def sounds so much easier! I was just reading online about all the various miter saws. One site mentions compound miter saws, a dual compound miter saw and a sliding compound saw. Lots of choices! Looks like prices vary from $200-$500. Sure would speed up the process having nice accurate cuts! 🙂
I’m a new reader here, hope you will take my tip as helpful…use your first piece and mark all your cuts by putting the 1st piece on top of your lumber with the edges lined up. Clamp it down and cut. (Or just mark your cut line) You can use a compound saw for all kinds of cuts, we rely on it for most, and it gives a bit smoother cut, I think! Great job with the shelf – mistakes help us learn, and it looks good and functions as you hoped, so it’s all good! 🙂
Sounds like I need to save up for a compound saw if I’m going to keep building things. Thanks Marianne!
When we were doing our laundry cabinet we looked thru the entire stack of plywood and thought we had a perfect piece and guess what? By the time we got it home and down in the basement, it had warped. My husband thought he could cut it so it would be OK, but I have one very warped door. Your project is more than I would have tried. Your next investment should be a tablesaw and once you get on to it, it’s fast and makes things easier. I admire you for attempting these projects.
Susan, run the blue dawn/vinegar cleaner again. I have some projects to clean.
Carol, I sympathize. I called myself looking the wood over good, too. Maybe that’s what happened, maybe it warped after I purchased it. Thanks! I can see why folks love having a workshop. Projects are so much more fun and easier when you have the correct tools for each job.
Ummm, I don’t remember the blue dawn vinegar cleeaner. I wonder if it was a post that got linked on a Met Monday. I just googled it and a bunch of posts came up…check this one out: http://geekmom.com/2013/07/dawn-and-vinegar-cleaner/
Susan,
You have us all wanting one for ourselves.
You give so much time and detailed instructions.
I’d never attempt to do this myself.
Is there a way to print your instructions
similar to recipes cards?
Then I can give it to my friend as a hint. lol
Happy Spring
Linda C in Seattle.
Thanks, Linda! I don’t really know of a way to print a post like this one but here’s a link to the plans I followed at Ana White dot com: http://ana-white.com/2010/06/plans/25-cubbies-wall
At the very bottom of that post, you’ll see a box that says “printable version” so you can print out the plans there. Not sure if this link will work but I think this will take you directly to the printable version: http://ana-white.com/print/318
Well look at you! You’re like Ms. Bob Villa!
Fabulous job, in spite of warped boards. Seeing how much time you put into it makes us realize why certain items cost what they do.
Make another one and put this one in your office. 🙂
Ha! I know, does make you appreciate furniture and case pieces a lot more! I think this would really be a relatively fast project with a compound miter saw. Thanks, Doreen!
I love it. You amaze me, you have really gotten into this woodworking stuff and you are sensational at it too. What a great piece. You did an amazing job. Hugs, Marty
Thanks, Marty! Warning, it’s addictive! 🙂 You amaze me with your drapery skills!
You are so talented! I love your cubby on your workbench. I smiled seeing your crystal lamp on the workbench when you were building the cubby – so Girly! You can be pretty, smart, funny, build anything your set your mind to AND do it all with style!
Awww, thanks Charlotte! Every workshop needs a little bling, right? 🙂 Yep, fanciest workbench light around! lol It was covered in sanding dust before I purchased a new sander that has a little vacuum/bag attached.
You are one smart woman. It makes me tired to even think about making something like that. You are truly amazing. I guess I’ll just be the woman that looks and dreams of what other talented women are doing and think to myself that would be nice to do, however knowing I’ll never be able to put something like that together. Thank you so much for sharing.
Awww, thanks Kathy! Trust me, if I can do this, anyone can! I feel a bit overwhelmed each time I purchase a new tool…thinking oh gee, another tool to learn to use. But so far they have all been really easy. Even the brad nailer was easy to learn to load/use. Also, you can find a video for anything you want to do on YouTube!
Wow….I’m impressed…..great job!!! That was a lot of work!! I bought this piece more than 3 years ago from PB, and I love it!!! Have it hanging in the back hallway with lotsa knick knacks in it. Got it on sale with free shipping and then had to hire a man to hang it up….quite heavy……….
If any of you watch Rizzoli and Isles on TV……Maura has one hanging on the wall of her kitchen…….pretty neat!!!
Oh, I bet it’s great in a hallway! I was surprised how heavy it was when I got it all together! I could barely lift it to place it atop the workbench. I think if I hang it, I’ll definitely need to sink the screws into a stud or use heavy duty molly bolts. I wondered it the Pottery Barn one was heavy too…wasn’t sure if they used a really lightweight wood of some type. The wood I purchased felt very light but when you get it all into a piece, I guess it adds up…plus there’s the plywood back. Yep, it’s heavy! I’ll have to look for that show so I can see it. 🙂
Susan; If you are really bothered by the gaps from the warped boards you could try running a little bit of paintable caulk in the seam. It covers a lot of imperfections! You were very brave to tackle this project – I think you could probably knit that glove now!
I thought about that…I just may do that! lol about the glove! Thanks Kris!
Your cubby organizer looks great. I don’t think I could leave it in the basement though, it is too pretty. It deserves a spot on the main floor! Looks so good. Kathy
Kathy, I may have to build another one…or two! 🙂 Thanks!
Holy Cow! You are so amazing. You should go to work for the Yankee Workshop! I love your projects. Perhaps if I get over my fear of power tools, I may give it a go.
Thanks, Debbie! I need Norm Abram to come here and teach me how to use a pocket hole jig! 😉
I’m still not over my fear of them either. Maybe that’s a good thing…keeps us on our toes!
I looks like a Baby Expedit!
Lori, this is so funny because I literally just hung up the phone with a friend who was looking at my blog and he said, “You built a baby Expedit.” Then I checked the blog and found your comment. 🙂
You rock Susan! You make it seem so easy. How did you learn how to use all of your equipment? Your hubby?
Thanks, Mary! No, I’m no longer married so I just learned the basics of each tool by reading the info in the booklet that came with each one. Then I went to You Tube and Googled that tool and there’s usually several videos with folks demonstrating how to use either that exact tool or one similar. I watched several of the videos because each video/person would mention something the others didn’t. I also practiced using each tool on a scrap piece of wood once or twice before using it to build. They really aren’t hard to use. The most important reason to watch the videos is to just learn what NOT to do…how to avoid injury.
You blew it out of the field!!! Love what you did and how you did it. It looks just GREAT!!! Enjoy!!!
Thanks, Irene! 🙂
I have always loved that cubby from PB. You did an amazing job at reproducing it!
Thanks, Amy! XO
Wow Susan! You did a fantastic job! Thanks for the instructions too! Maybe I’ll even get adventurous…and tackle something like this! 😉
Go for it, Donnamae! 🙂
I am very impressed with your new building skills, Susan. I would imagine it can get quite addictive, just like most hobbies. I can see that a cubby project like the one you built would be useful in several rooms in the house, even a bathroom. I am also familiar with the problem of crooked, split, warped wood which is sold at all lumber yards. If you are working on a really important project, I wonder if it would be feasable to look in your local telephone book, (silly old me…I meant Google it) to see if there is a “professional woodworking” store in your area. Just be aware, it will be like sending a kid into a candy store to just look around!! Do you own a tool belt yet? Did you know there is such a thing as a girly pink tool belt? Might be right up your alley. Keep up the good work, and be safe,…I’m impressed.
Thanks, Linda! It really is addictive…there’s something about taking a pile of lumber and watching it turn into something you can actually use! That’s a great idea…I bet they have some beautiful wood in places like that! A pink tool belt…oh my gosh, I have to see that! lol I think I might just need a pink tool belt! 🙂
Hey Susan, I originally heard about the pink suede tool belt from a Canadian blog I subscribe to. Karen writes a killer blog, and her readers are every bit as funny and sharp-witted as she is. Karen has a sister whom she frequently refers to as “pink tool belt Sister”.That way we can distinquish her from her other sister, Pam. The name of Karen’s blog is theartofdoingstuff.com I would highly recommend it. One of her readers mentioned that she found her own pink leather tool belt by going to http://www.pinktoolbelts.com I checked out the site, and it does appear to be the same belt, and I’m pretty sure I noticed it was on sale.
OMG! I love cubbies of any sort and have lusted over the one in the PB catalog. Never, ever has occurred to me to make one! I am taking some drawing lessons right now, but I think I’d rather be taking woodworking classes! You are truly an inspiration! 🙂
Aww, thanks Jane! Your drawing is beautiful…loved your bunny! Anyone can learn to build/woodwork, I think drawing like you do is an innate gift! I could take drawing classes and I think my rabbit would still be a stick figure. lol It would be fun to take a woodworking class. I checked into it a few months ago and there was a place in Atlanta that had classes but they were super expensive and the classes seemed geared for serious woodworkers who were making really nice furniture.
Susan, love what you did! I have been wanting a compound miter saw for a while now, I use every tool, but the saws scare me to pieces. When I saw you had a circular saw, I thought maybe I can…… If you get a miter saw, I will too. Maybe we can hold our own class!! And a biscuit jig would be the best!!!
Sounds good! I love seeing the biscuit joinery…like in the animated bookcase video I posted recently. I’d just be happy to understand how/when to use a kreg jig. 🙂
Susan my Dad was a builder – but at the time, he didn’t think “girls” should touch any tools. Wish I was more interested back then….
Susan, you did a fantastic job on your cubby! I would love to make one- and I just might. I think you should make two more… just make all your cuts at the same time and then assemble each one. I have a compound miter saw that I got for Christmas last year! I don’t think hubby paid more than $125 for it on sale so keep your eyes peeled (I’m the handy(wo)man around our house and I’m always asking for tools for gifts. I think I’ll ask for a Kreg jig for Mother’s Day this year!) Great job on your build! 🙂
Great idea! Mass production assembly line technique. 🙂 Lindia, I want to learn to use a Kreg Jig too. The video on You Tube make it look so easy!
You make my heart feel good. I thought I was the only one, that run into measurement problems, when I built something. I never seem to measure right. Guess I need to measure twice, cut once. Thanks for the inspiration. Love your Blog. Read it ever day! Loved the house tour of Savanna. Would love to go back & tour the houses. I have read the book, & seen the movie, Midnight in the Garden of Good and Evil, my fav. Keep bring us wonderful stuff…
Thanks, Judy! Love Savannah…one of my fave places to visit! 🙂
I love both your recent wood working projects. Since the cubby is painted perhaps you could caulk the spaces where the warped boards leave a gap . A little fudging goes a long way. You are an inspiration. I’m looking forward to future project reveals. sally
I wondered about that. I don’t know if the gap is too big. It isn’t really noticeable unless you’re looking for it. Thanks, Sally!
Thank you for this. I will have to put it on my list of future projects (once I garner a few more power tools). I can already think of some places I could put it. Check it out if you’re interested:
http://sangstersurfaces.blogspot.com/2013/07/going-greenpaint.html
Loved the instruction and your finished product was beautiful. I am going to try it this weekend!
Great idea! I used your plans to make a coffee mug rack and it came out great!
What a great use for it, love that! 🙂 Thanks, Dan!
I’d be happy to send photos- let me know if interested and how (I didn’t see that as an option?)
That would be great, I would love to see it! You can mail them to [email protected]. Thanks, Dan!