I should have known when I purchased a book nook kit I wouldn’t be able to leave it alone until it was finished. I’m the same way when doing a puzzle. I’m always so eager to see it completed, it calls my name and haunts me until it’s done. When I last shared this Bookstore Book Nook that I had just started, it was only this far along: a few pictures and a couple of shelves on one side wall, and a cute window scene on the back wall.
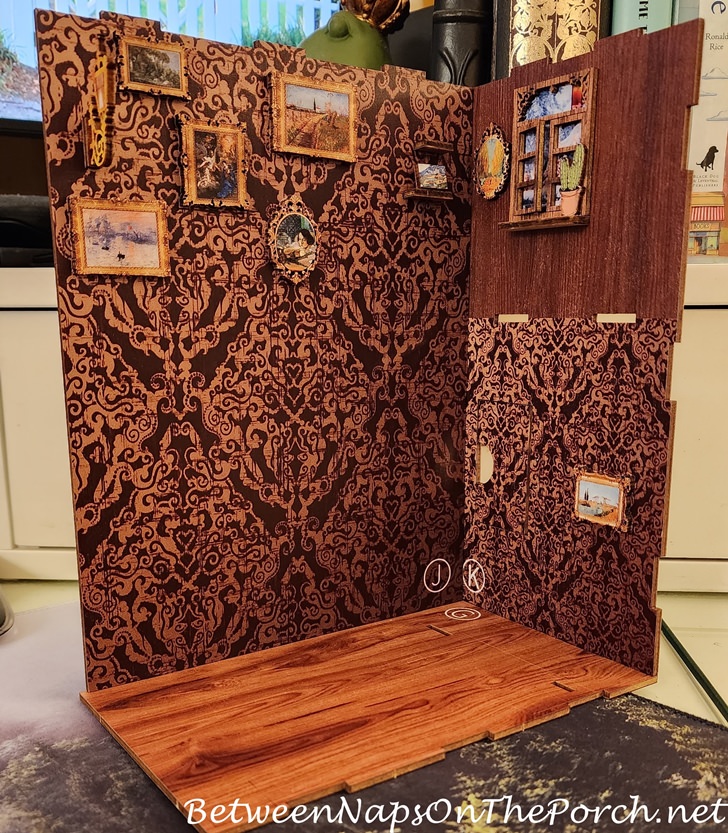
I had just a few more parts to go. Ha!
Progress was made and in this photo, the wiring was well underway, a desk and bookshelf were finished and installed upstairs, the fireplace downstairs was assembled and in place, and the staircase visible through the arched opening was built. I also had a few pieces of furniture assembled. The small bookshelf (sitting on my desk just off to the right) was also complete.
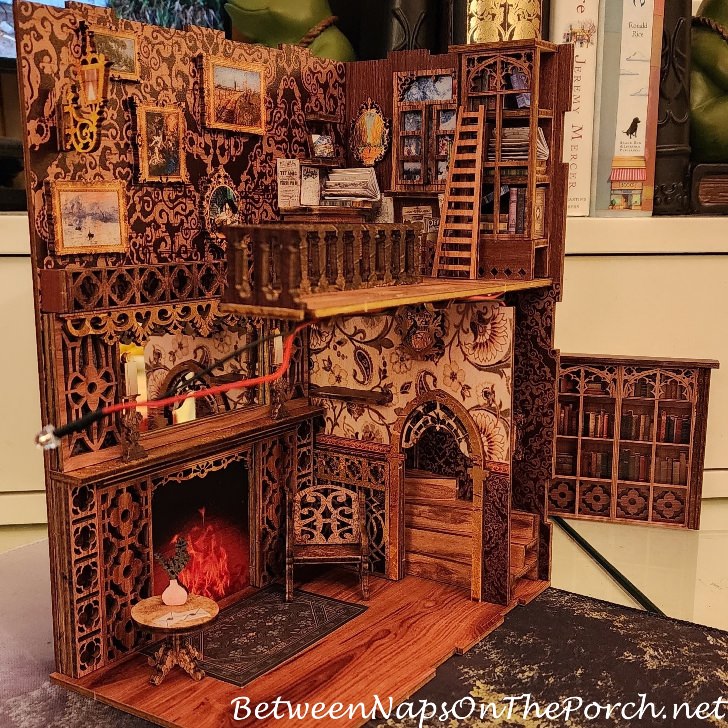
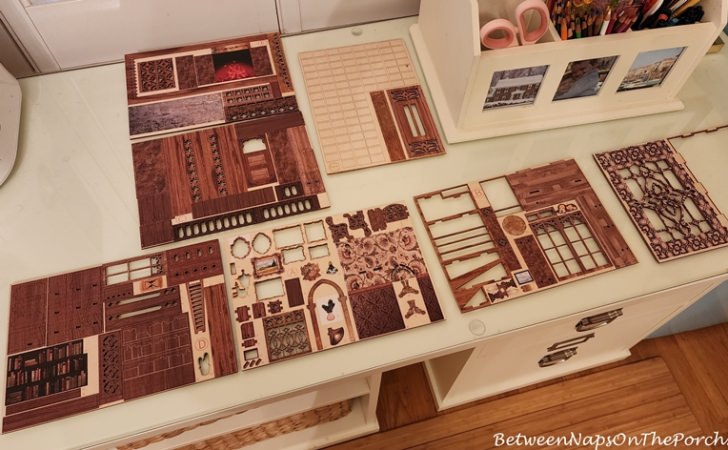
This may not look like much, but it represents quite a few hours of work, especially since I was super picky about sanding (and restaining) the raised white spots that show from where the pieces are snapped out of the kit. That may be the most time-consuming part. I don’t think most people would take the time to do as much sanding/restaining as I did, but those white spots were bugging the heck out of me, so they had to get hidden. See that black/red wire sticking out in the center of the photo? Man, I wish I’d known then what I think I know now. More on that in just a sec.

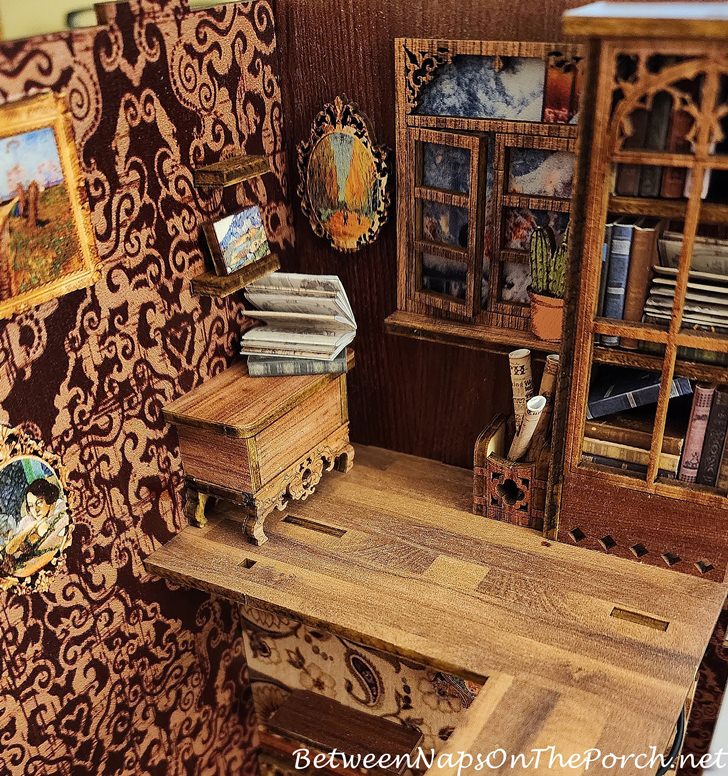
Here’s another little close-up of the upstairs, mid-assembly. I should have taken a close-up of that bookshelf on the right. I put my heart and soul into making and arranging all the books in that bookcase. I found the parts where you get to decorate and arrange things yourself to be the most fun part of creating a book nook.
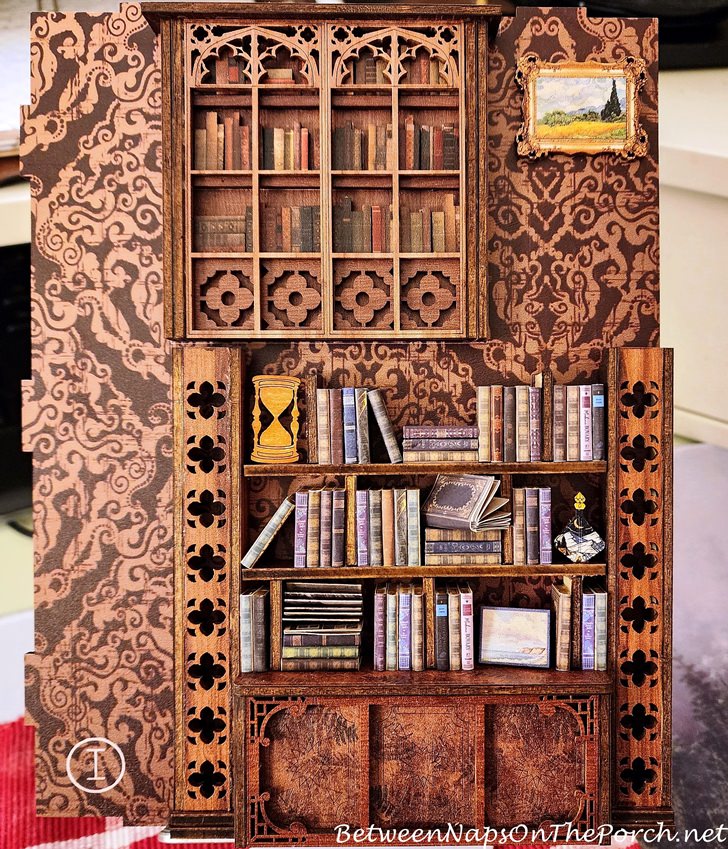
This section/wall ends up opposite the fireplace. The top bookcase comes with the books already fixed in place, but the sides, top, bottom, and doors all have to be assembled and attached. The top portion actually ends up being in the upstairs part of the bookstore when the book nook is pulled all together at the end. After putting together the bottom bookcase, it was a lot of fun to arrange the books and add decorative pieces to the shelves.
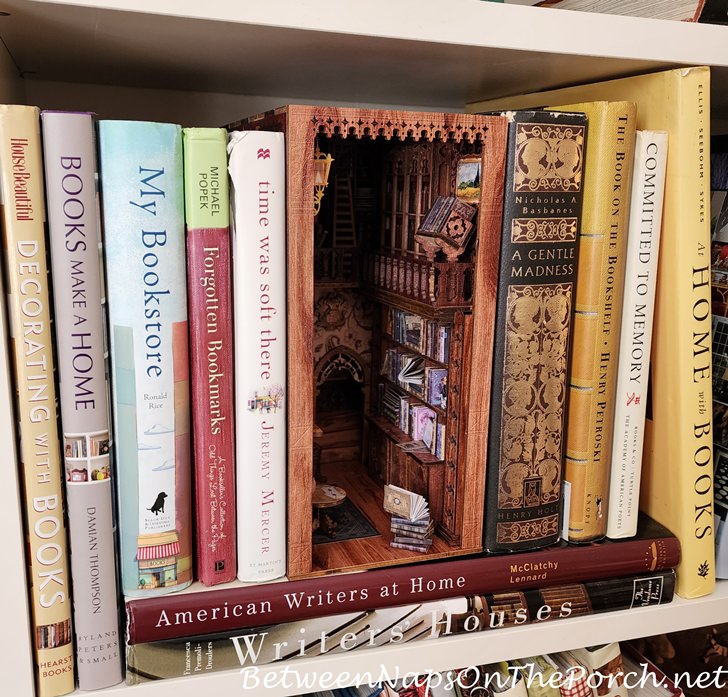
Here’s how this cozy bookstore book nook looked tucked into one of the shelves here in my office during the daytime with the lights turned off inside. It is surrounded by some of my favorite books–books that are all about books, bookstores, book collectors, and decorating with books. (At the end of this post, I’ve linked to where you’ll find all of these books available.)
Let’s take a peek inside with the lights on.
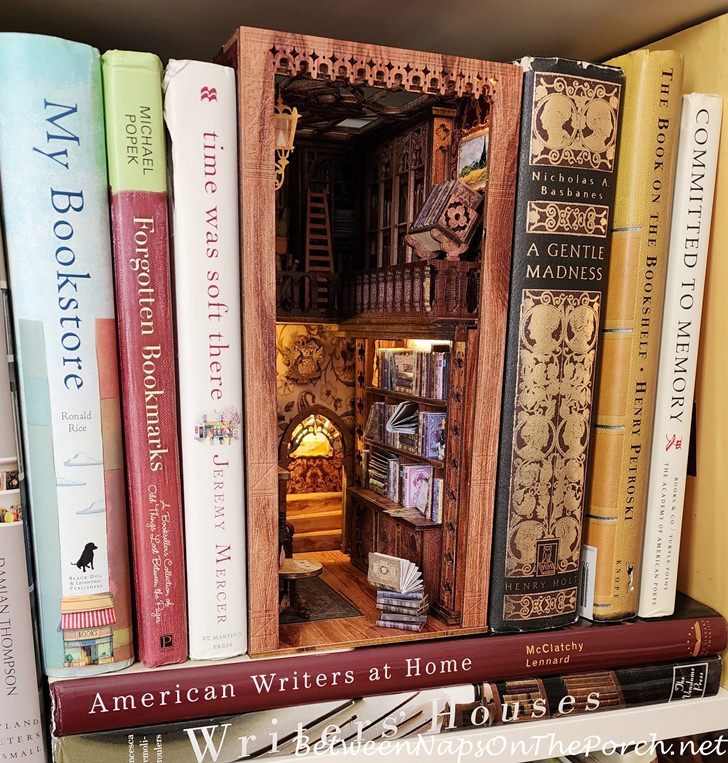
It’s like an opening or portal to another little world, isn’t it? I wish I could shrink myself down to the size of a fairy or an elf and meander right inside.
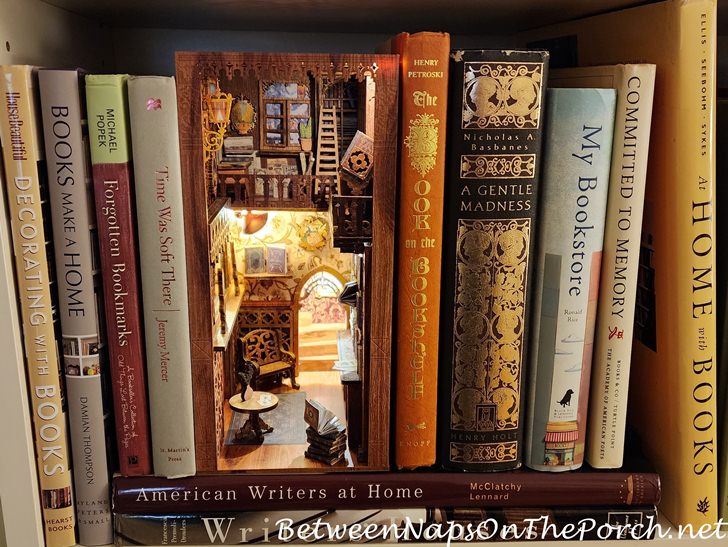
This photo below was taken while the book nook was still sitting on my desk. You can see my monitor’s wallpaper through the beautiful ceiling and it almost looks like there’s a house just across the street from the bookstore.
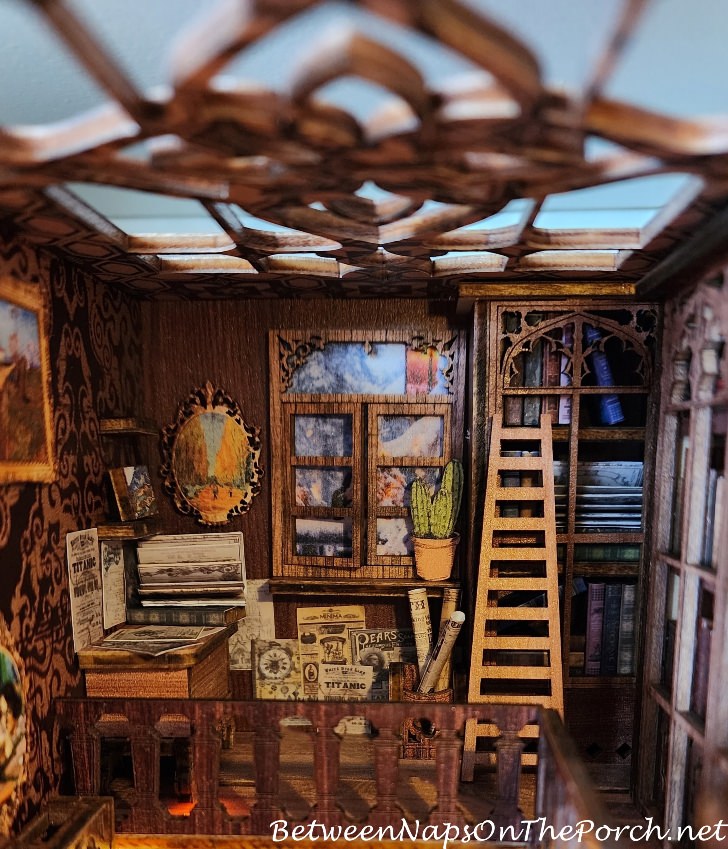
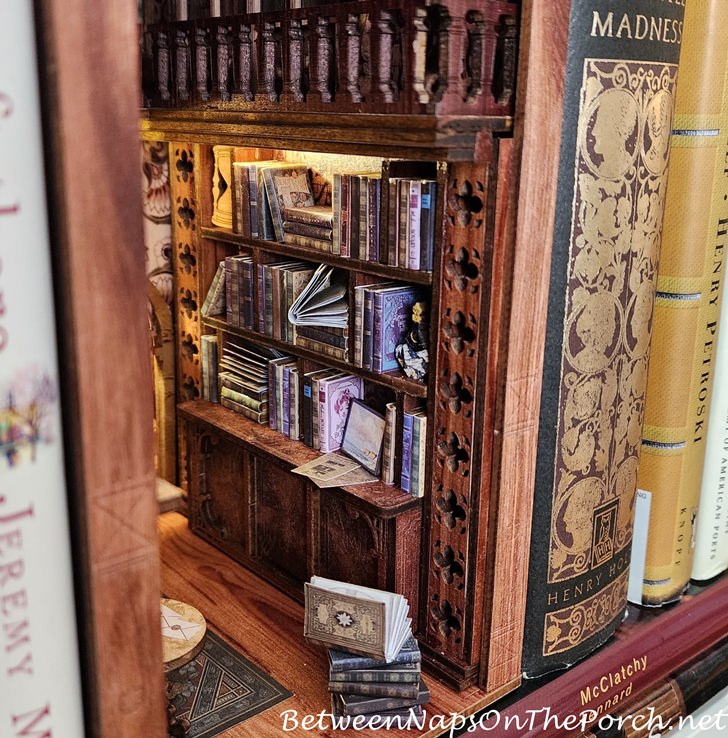
Here’s a closer view of the upstairs where you will see the bookcase where I painstakingly chose the placement of each book. In this kit, you actually make all of the books and there are two styles that you create. One style is a small, slender book that is formed by covering a hard block of wood with a book cover. The other type of book that gets made is the style where the book fans open. You can see one of the fanned open-style books atop the desk on the left and another just inside the bookcase on the right about halfway down. The fanned open books look so much bigger in these photos but they are actually the same size as the closed books because they both get the same size cover when making them.
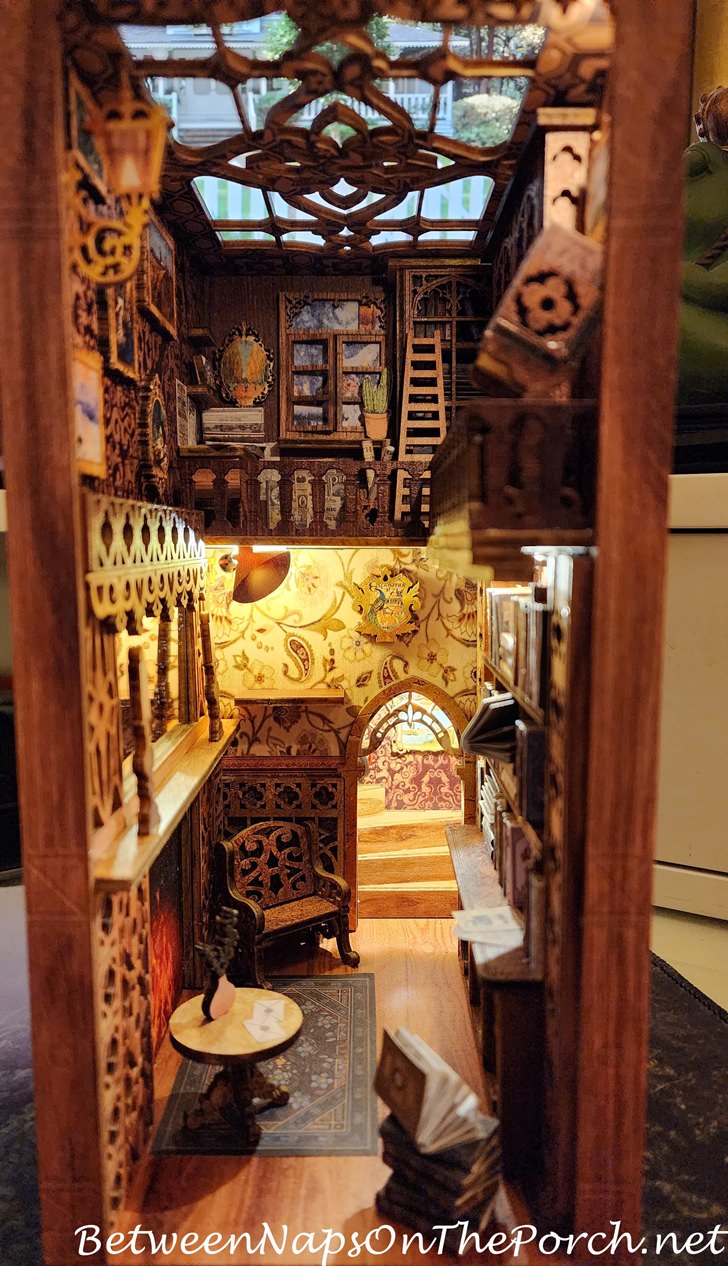
So about that wiring that you saw sticking out: Either my kit was defective or I somehow goofed–because that wire ended up being too short to reach where it was meant to go. It ended up in the top right corner front of the nook and it was supposed to stretch all the way over to the center of the front opening–so about another 2 inches. By the time that became apparent, I had already added the final side wall so it was too late to attempt to fix it. I almost want to buy this kit again just to see if I could have separated/ripped that wire away from all the shorter wires to which it was attached–then it def would have reached a lot farther. I’m lucky it at least made it all the way to the front of the nook. This was my first time creating a book nook. If I ever do another one, there are a number of things I will know to watch for and can hopefully do better.
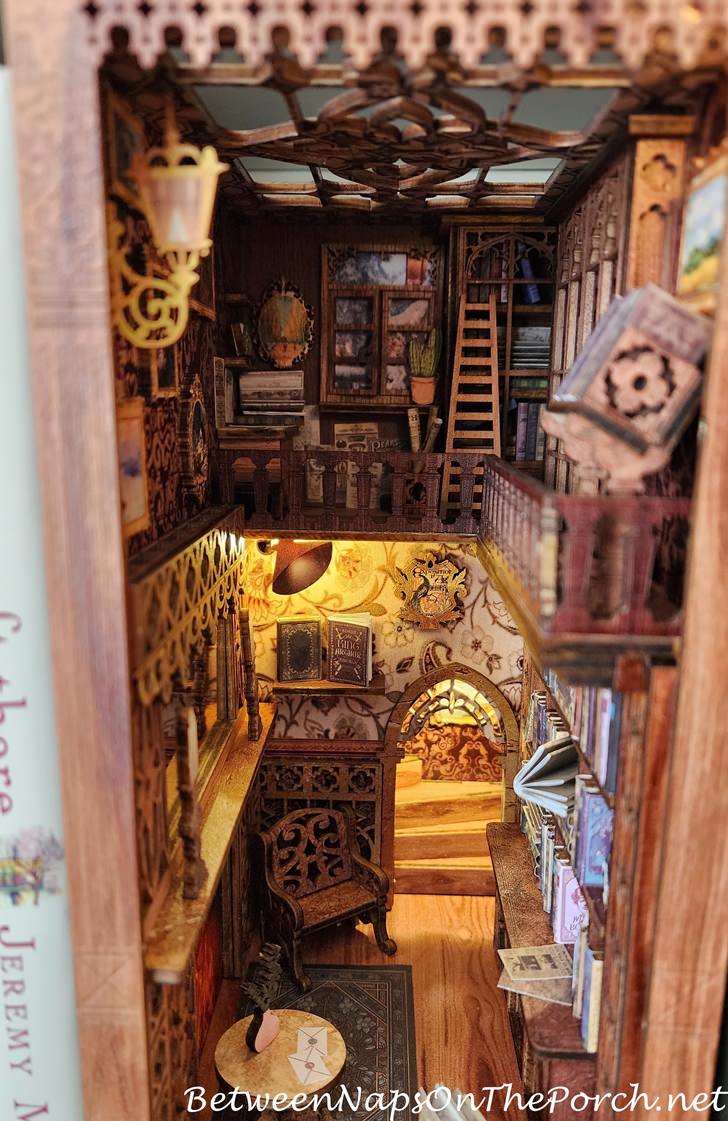
In this photo, you can see the light I’m talking about over in the top, right front corner. That light was supposed to end up in the center of the opening, not over in the corner. In the center, I think it definitely would have better lit some of the bookcases further back.
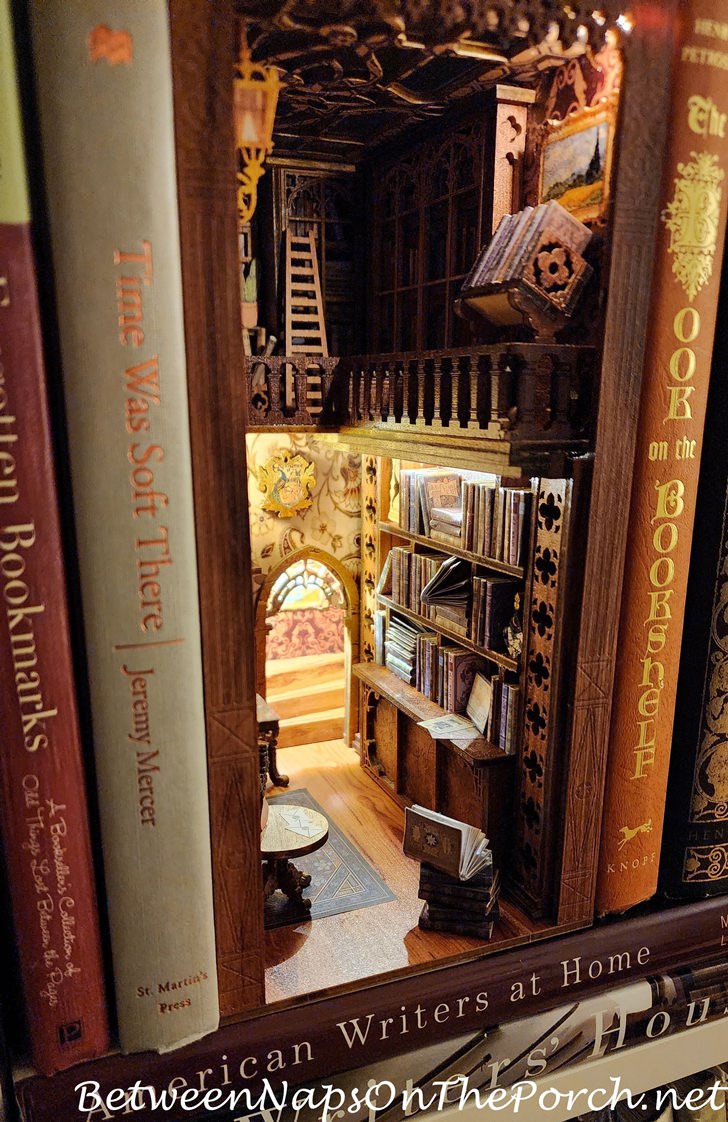
I think this nook really needs a cozy, red wingback chair there in the corner near the fireplace.
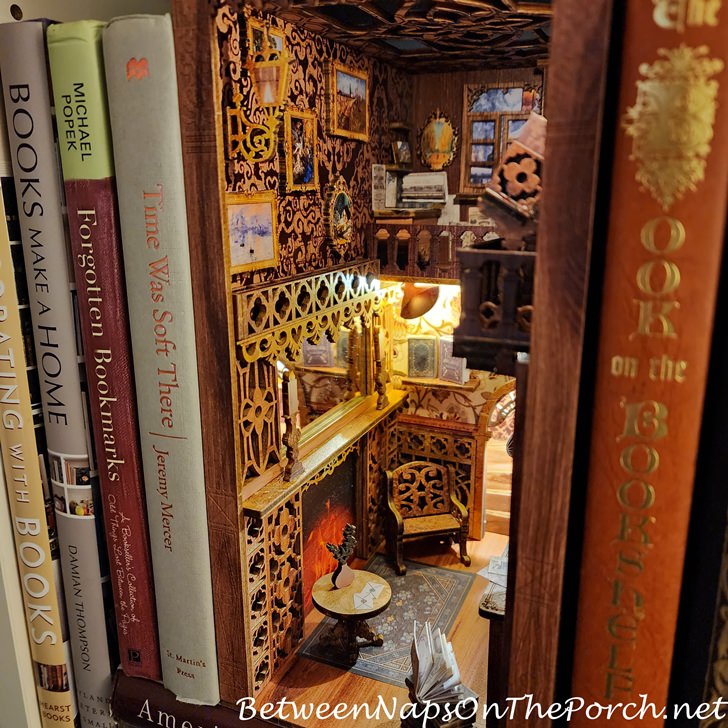
I may have to make a tiny seat cushion and pillow to soften up the existing chair. lol

One more look toward the right wall…love the little standing bookcase upstairs under the painting. The books in that stand are more of the books that get made during the book-making process. I think I ended up making around 75-80 books.

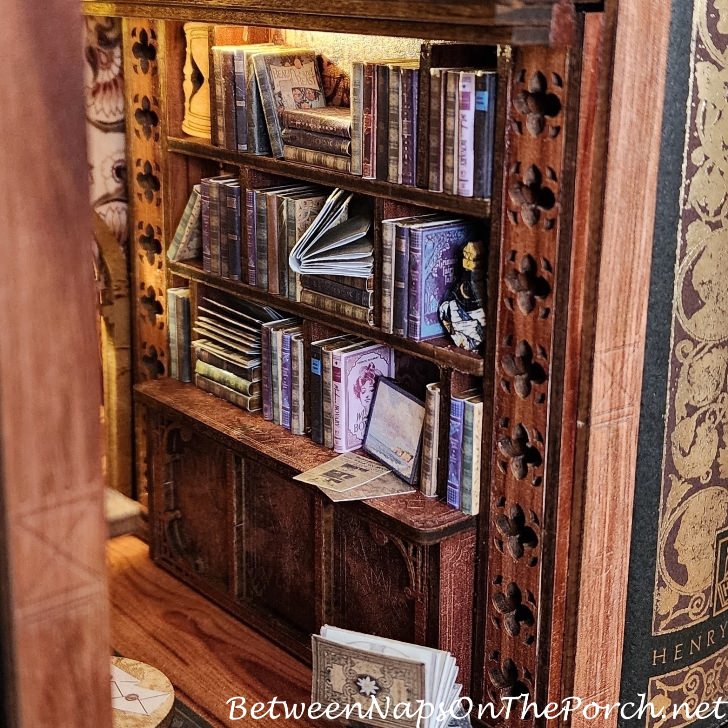
Remember these lower bookshelves that were so much fun to arrange and decorate?

Here’s how they looked once inside the nook.
When you’re putting the nook together, some things are a bit of a mystery, but once assembled, it all comes together and makes sense.
So what do you think? Would you enjoy making a book nook for your bookshelves? I think it’s a great project for those cold winter days when we just want to stay snuggled up and warm inside. (This bookstore book nook is available here: Bookstore Book Nook.)

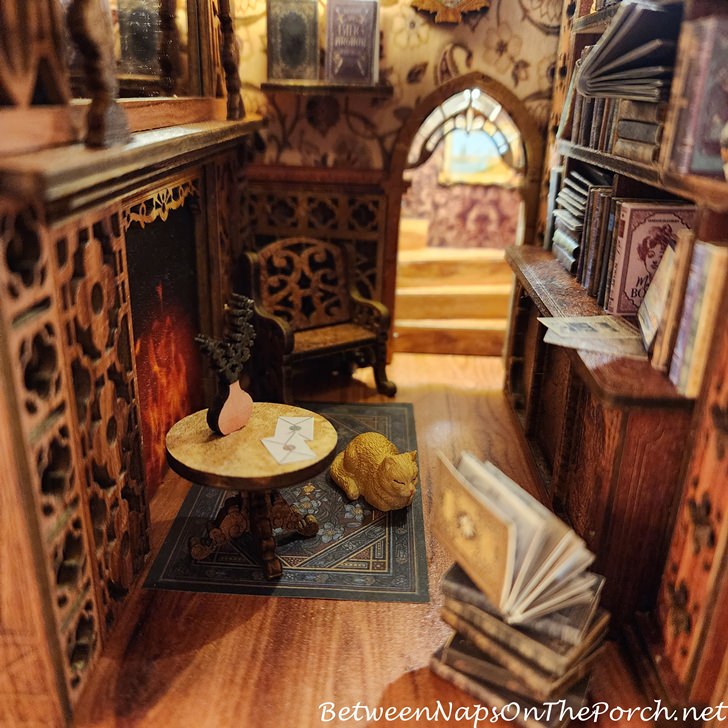
Update: A sweet kitty came by the bookstore one day and made himself right at home in front of the fire. He liked it so much here, he decided to stay. We named him, Hemmingway. 🐈
Books Surrounding The Bookstore Book Nook
My Bookstore: Writers Celebrate Their Favorite Place to Browse, Read, and Shop
A Gentle Madness: Bibliophiles, Bibliomanes and the Eternal Passion for Books
Decorating with Books (House Beautiful)
The Book on the Bookshelf
Time Was Soft There: A Paris Sojourn at Shakespeare & Co.
At Home with Books: How Booklovers Live with and Care for Their Libraries
Writers’ Houses
American Writers at Home
Books Make a Home: Elegant Ideas for Storing and Displaying
Forgotten Bookmarks: A Bookseller’s Collection of Odd Things Lost Between the Pages
Committed to Memory: 100 Best Poems to Memorize
Wishing you a cozy warm weekend!


All. Those. Books! Looks like it was meant to be a winter-long project. Love the artwork here and there too. And great description about feeling like a portal–back to a previous age before all this technology. Definitely needs a wingback chair instead of the wooden one. You’ll probably think of other things to add for more ambiance.
lol It probably was, but I couldn’t stop once I started. I agree about the wingback. I looked and looked and couldn’t find one in the correct scale, 1:24. I’ll have to check again from time to time. When I glued the chair down, I only glue one foot so it should be easy to remove if I find the right wingback.
I’ll bet Hobby Lobby would have all sorts of things you could use in the Book Nook! I bought some Christmas Wreaths (tiny) to use on some of my carolers and on a decorative bird house! Check them out. You did a great job putting it together.
This is going to sound nuts, but I saw an ad pop up a while back (on Pinterest I think) for this little library, and the first thing I thought is that “Susan from BNOTP would so enjoy this”! I love anything miniature, and this looks so beautiful! Do you think you could add things to it, or would it ruin the look? Like a little kitty curled up on the rug by the fireplace, or a teacup and saucer on the little table? Is it mostly wood or does it have any cardboard walls or furniture? It looks very realistic, but sometimes things look better on the computer screen than in person. I love it, but I don’t think I have the eyesight or dexterity to complete something like this!
This is going to sound nuts, but I saw an ad pop up a while back (on Pinterest I think) for this little library, and the first thing I thought is that “Susan from BNOTP would so enjoy this”! I love anything miniature, and this looks so beautiful! Do you think you could add things to it, or would it ruin the look? Like a little kitty curled up on the rug by the fireplace, or a teacup and saucer on the little table? Is it mostly wood or does it have any cardboard walls or furniture? It looks very realistic, but sometimes things look better on the computer screen than in person. I love it, but I don’t think I have the eyesight or dexterity to complete something like this! Enjoy it!
So funny you say that Elena because I first saw it in an ad on Instagram and then did a search to find it. You know me well! It came with a little flat dog but I didn’t like how it looked so I ordered a kitty on Etsy. It has shipped but not sure when it will arrive. I hope it doesn’t look too fake or out of place. It is pretty much all wood and a little paper. I like your idea about a teacup and saucer. The scale for this book nook is supposed to be 1:24, or at least that’s what they answered when someone asked in a video on YouTube, so I would need to find a teacup and saucer in that scale. Love that idea, though! I even thought about looking for a red wingback to replace the wood chair…and maybe a real rug instead of the paper rug. So far I haven’t been able to find a red wingback in the correct scale, though.
All it needs is a cat curled up on the rug. This is so cute!!
Thanks, Susan! I agree! I ordered one on Etsy a couple of days ago. Hopefully it will arrive soon. 🙂
So charming!! You did a wonderful job, enjoy!
Thanks, Rosie!
XXX
Susan, I’ve never heard of a kit like the book nook. Your finished project shows a lot of love and attention to detail. It is adorable. Maybe one of Santa’s elves will visit it this Christmas 🙂
Rachelle
lol Maybe! It’s a bit like a little fairy house, just needs a bed.
This is a very attractive decorative item. I have to admire your patience in completing it. I know myself well enough to know I am too restless and impatient to ever do this type of detail on a project! You did a good job.
Thanks, Nicki! It definitely takes some time–longer then even I imagined.
Bravo to you, Susan, and thank you for sharing such an extraordinary effort! You should be so proud of this latest challenge. I most certainly would not have the patience or dexterity to complete this amazing project. I applaud your commitment . I stand in awe!
Thanks, Rosie! I wish I had skinner, longer fingers. Ha!
I think you did an amazing job. I don’t think it is a project I could do at this time in my life. In my senior years, I am finding putting things together more and more difficult. But I love it. Thanks for sharing.
I understand…my fingers don’t seem to have as much flexibility as I think they once did. I was just determined! Ha!
This is so cute! The attention to detail, so much detail is what makes it so great. I love the upstairs and downstairs and like you Susan, I wish I could shrink down and go visit that book store! lol You did a great job, but as with so many things, we learn as we go. There might have been some issues, but one would never know it looking at this beauty. I would be like you and would have to sand off the nubs too and stain over them. I do it with paper, can’t stand paper nibs on chipboard pieces if you punch them out. Anyway, that is why your book nook looks so great, it is because you took the time to make sure everything looked amazing! There is a gal in Instagram that is building in miniature, Elvis Presley’s Graceland home and OMGosh, is she ever doing a amazing job on it! I think it is called tinygraceland, go check it out I think you will appreciate her work. I’m so impressed with her skills and she is improving on them more and more as she goes. Your little book nook building kinda reminds me of her. Love your book nook Susan and it looks great on your shelf. I hope you do another one!! Hugs, Brenda
Thanks, Brenda! Yeah, those nubs drove me crazy. In the videos I watched on YouTube, they just left them and that’s all I could see when I looked inside the nook…those blaring white lines/nubs on everything. When you sand them off, you inevitably sand a little stain off the surrounding areas, thus the need to restain them. Thankfully, I already had some Minwax touch-up markers and they worked great.
I will look for that on Instagram. My hats off to those who do these projects because there’s a little element of frustration if you don’t have the right glue or you miss a step. The directions could have been better for the nook, but I think now that I’ve done one, it would be a lot easier to do another one.
XXX
THAT IS INCREDIBLE, SUSAN!!! OH, MY, GOSH!! SHHhhh! franki
Thanks so much, Franki!
XXX
It’s charming! How thoughtful to surround it with similar themed books. You really thought of everything. Bet your grandsons will be intrigued when they see it. Your attention to detail just shines! Thanks so much for sharing this project.
OMGosh, I laughed out loud when you mentioned making a little cushion and pillow for the chair by the fire! That’s exactly what I thought when I saw it … I would run and get a scrap of velvet out of my sewing stash and stitch up a pillow! You did a beautiful job and always have such fun ideas for projects.
I KNEW you’d finish it right away! Haha just knew it. How could you not? It really is the ultimate puzzle though, right? Susan, it is just so cool. Looks like a part of the shopping area near Hogwarts for sure. What a NEAT thing to have found. Thanks for sharing.
How lovely!!!! This is darling! One of my hobbies is dollhouse miniatures, maybe you can add a LED battery operated light in the area that is darker, where the light didn’t reach? They sell lamps or ceiling lights, you can find them online or at Hobby Lobby in the dollhouse miniature section. I love this so much, I need one now for my home library!
That is just darling Susan! I want to be a tiny fairy too, and go curl up in there with my cocoa and cookies! After you get the cozier chair of course! 🙂 Thanks for sharing, and Happy Monday!
Just darling!!! What great work you do with details!! Love it! I’ve thought about getting one but a bit pricey! May rethink it if I finish my other winter projects I have planned. Great job Susan!
First time visitor to your blog (via Pam at Everyday Living). This little book nook is amazing. What a fun project. Thanks for taking the time to show your readers how its done.
Thanks, Cindie! It was a lot fun, definitely a learning process.
Happy Holidays to you!
XXX
Have you been to Daunt Books in London? If not, google it and you’ll see how it looks so much like your book nook! You did a great job and it’s always fun to follow along on your projects.