Welcome to the 146th Metamorphosis Monday!
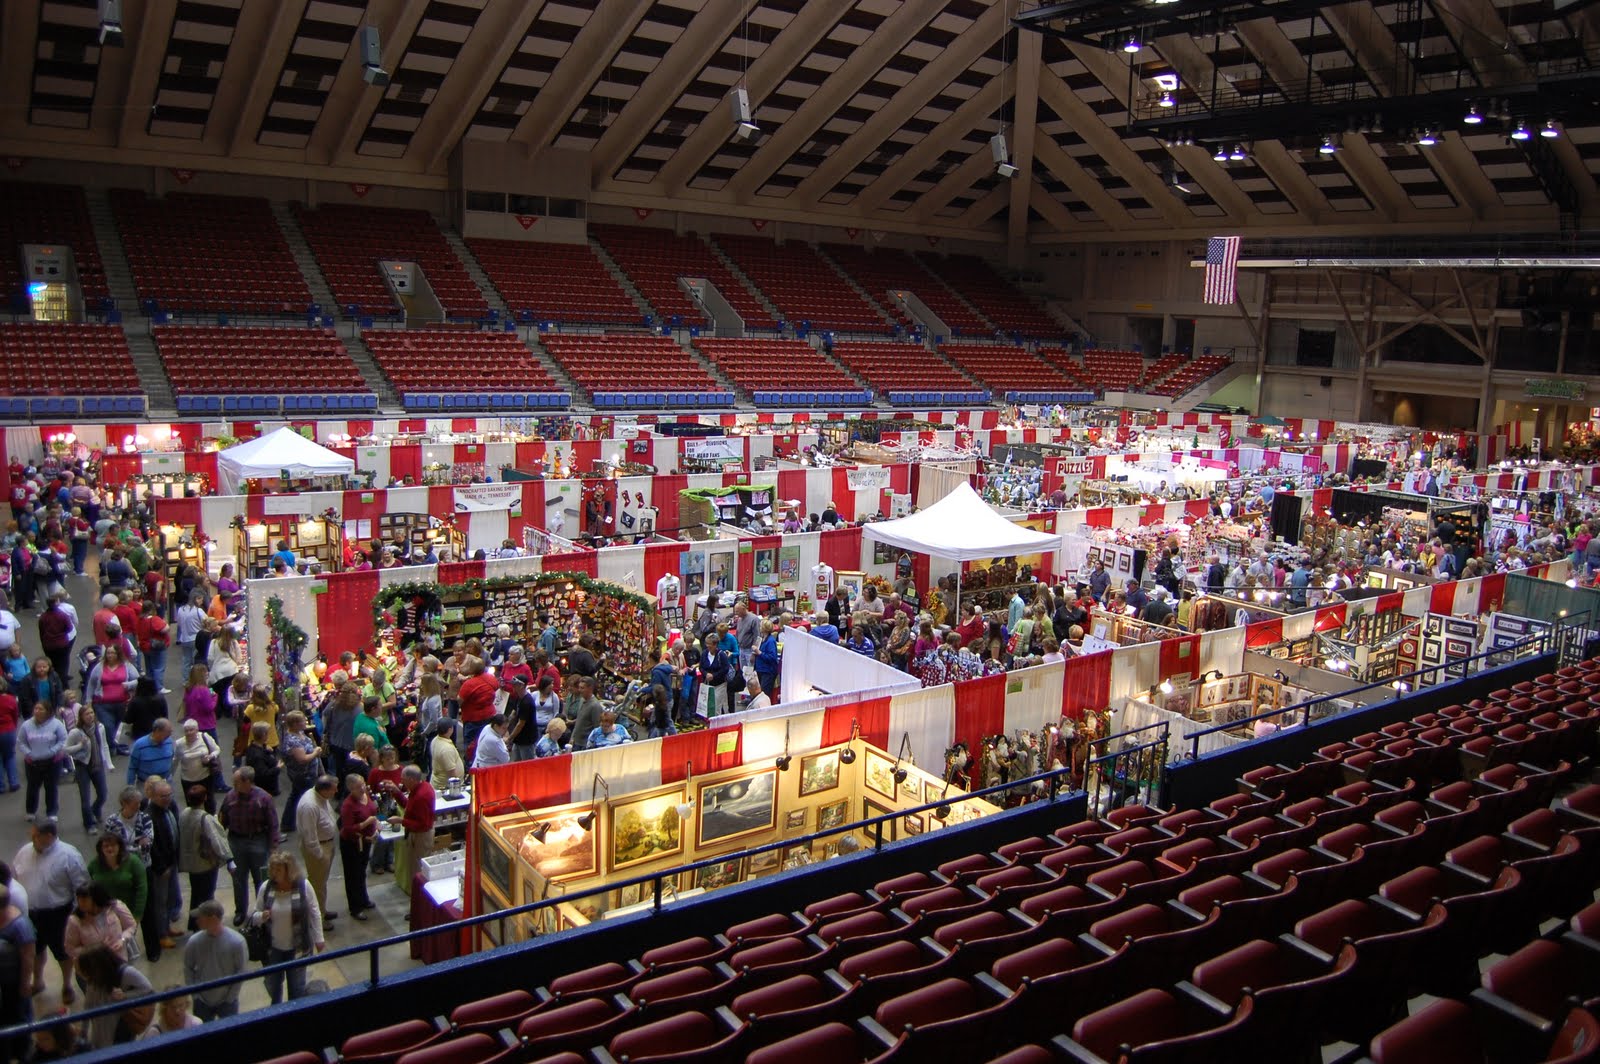
Greetings! How has your weekend been? I hope you’ve had a fabulous one! I spent Saturday down in Macon, Georgia with my sister and niece at the Christmas Made in the South Fair. Mark Ballard was there and it was so good to stop by and chat with him a bit. Did anyone else go to Christmas Made in the South? It was packed with folks as you can see in this pic below.
Make a Pincushion!
A few weeks ago, I attended an amazing crafting event. During this fabulous crafting soiree, one of the crafts we made was an adorable pin cushion. I was thinking today about what a cute Christmas gift it would make, especially if it were tucked down inside a little sewing box.
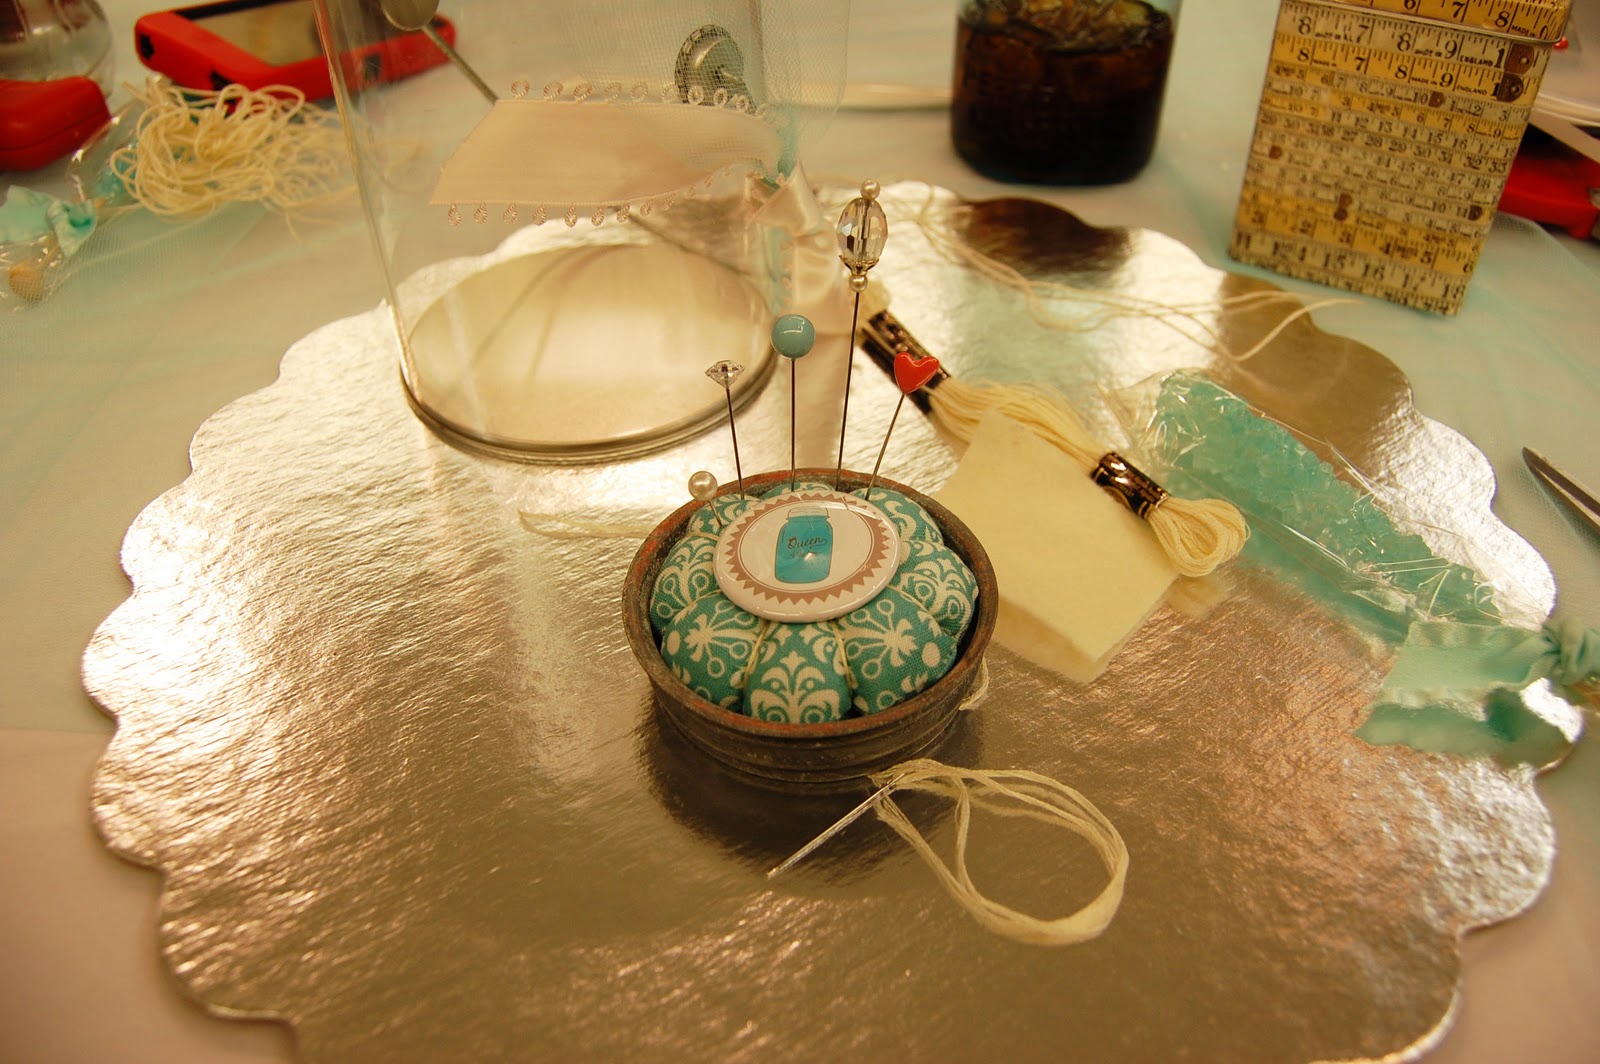
Today I created another one and took pics along the way in case you would like to make one for yourself or a friend. To make your pin cushion, you’ll need:
Poly fill
Jar lid (medium size lid works well and you can spray-paint your lid if you like)
Embroidery thread or narrow yarn
Embroidery needle
Scrap fabric
A button that looks pretty with your fabric
Do you recognize my scrap fabric?

It’s some of the fabric that was left over from when pillows were made for the dormer window seats…

…located in the upstairs family room. It’s also the same fabric that’s on the chairs in this room.

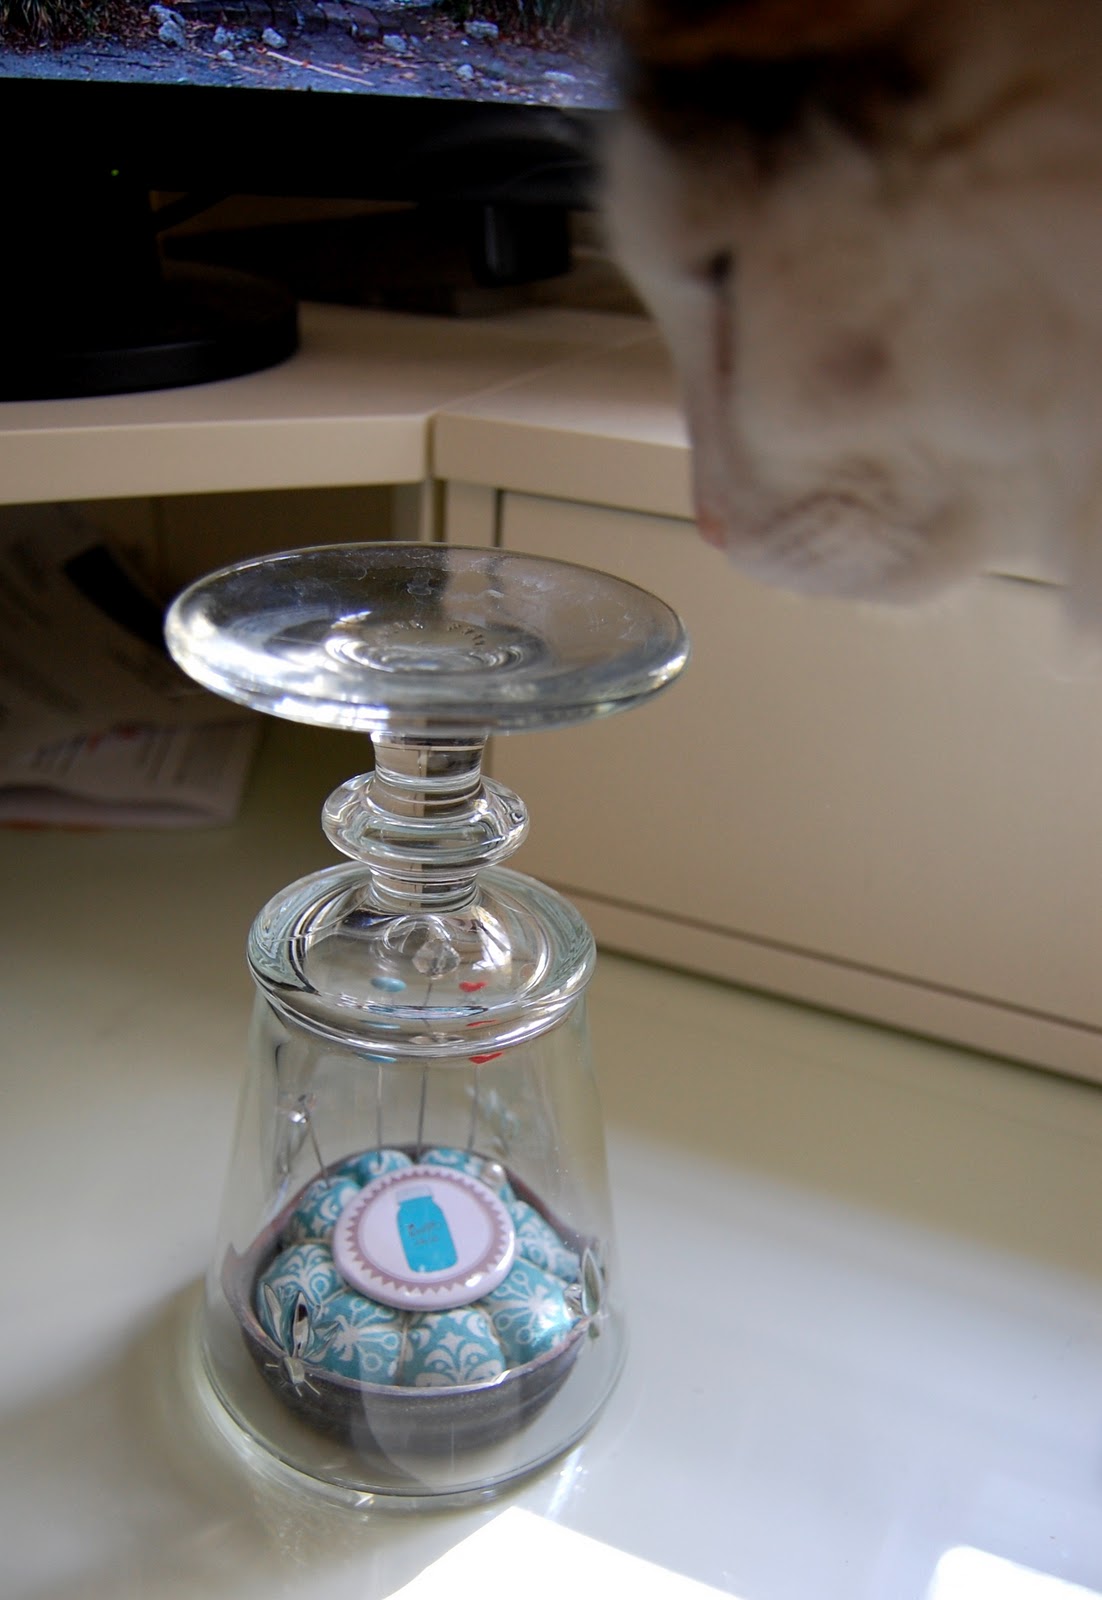
To make your pincushion, you’ll want to find a glass or some round object that’s a little bigger than your jar lid. I used a La Rochere bee glass. I placed the glass over the lid to see if it was a little bigger than the zinc lid. Max inspected and declared it to be the right size.
Next, using a pencil, draw around the glass onto the “back” side of your fabric, twice. Cut out both pieces/circles of fabric.

Here’s how my fabric circles looked in comparison to the size of my lid. My lids were 3 inches across at their widest, and the fabric circles measured around 4 inches.

Sew the pieces together with the “right” sides of the fabric together. Cut a little slit in one side, being careful to NOT cut through to the other piece of fabric. Turn your cushion inside out where the “right” side of the fabric is now facing outward. Stuff it with a generous amount of the poly fill.
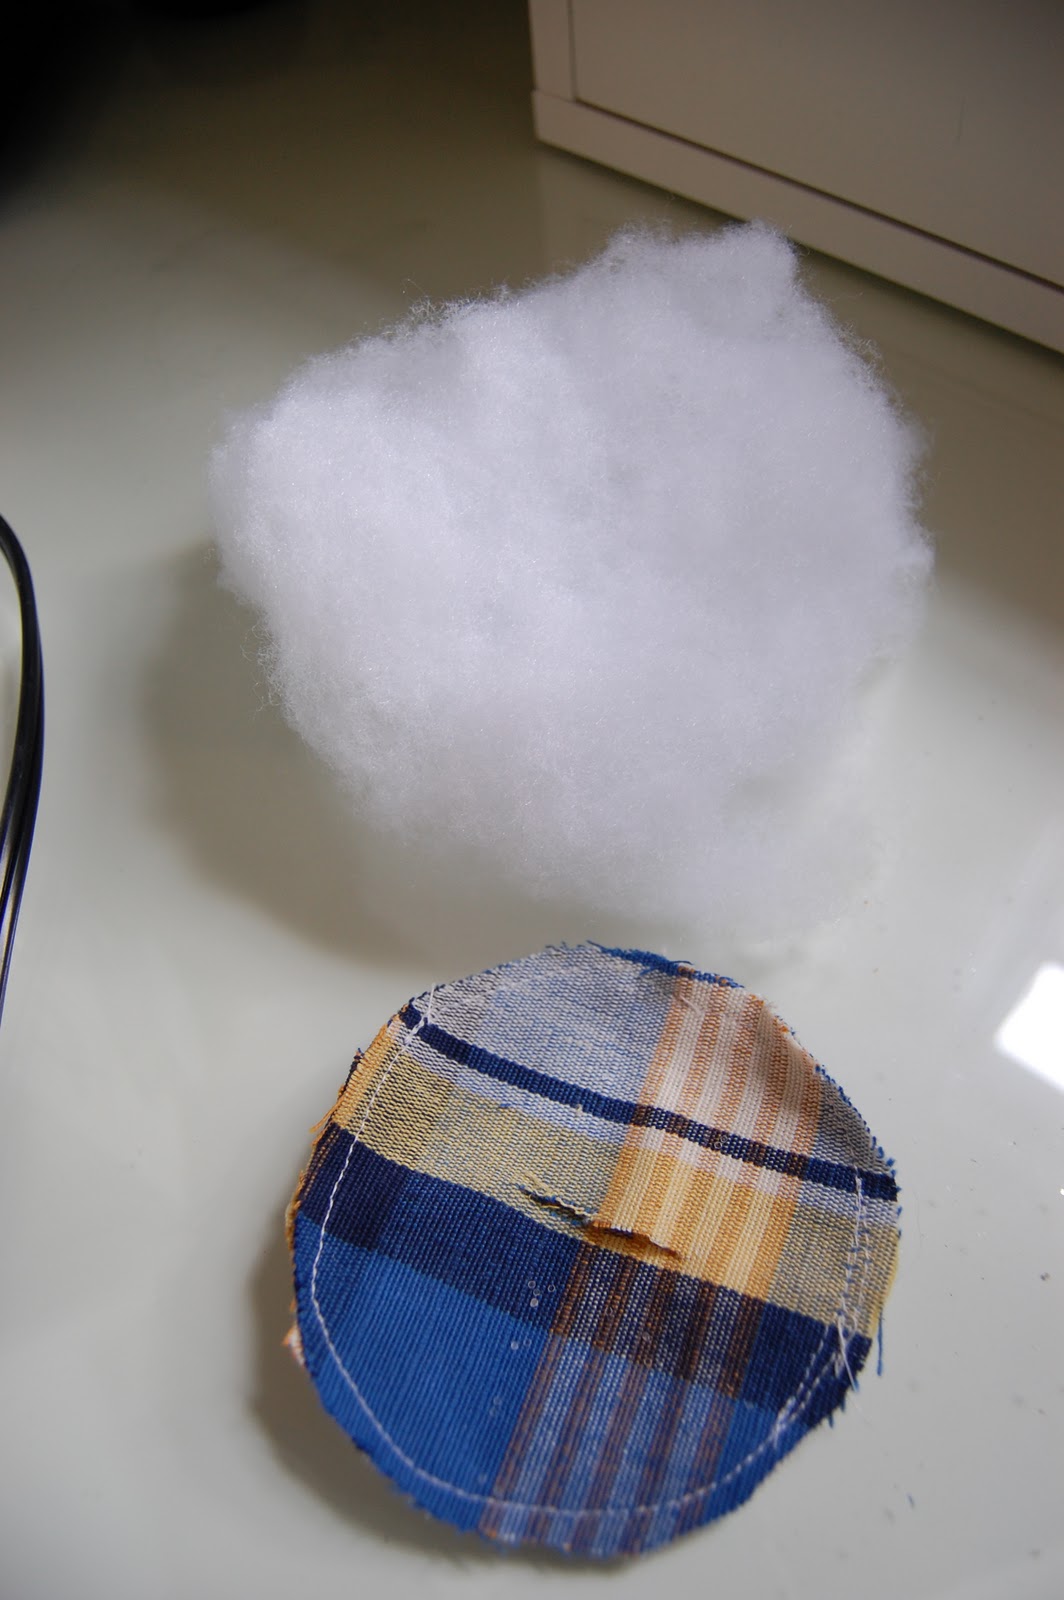
Here’s how it looked stuffed. I didn’t do the greatest job of making it perfectly circular, but don’t worry, it will all work out fine in the end. Perfection is not a requirement for this craft. 🙂

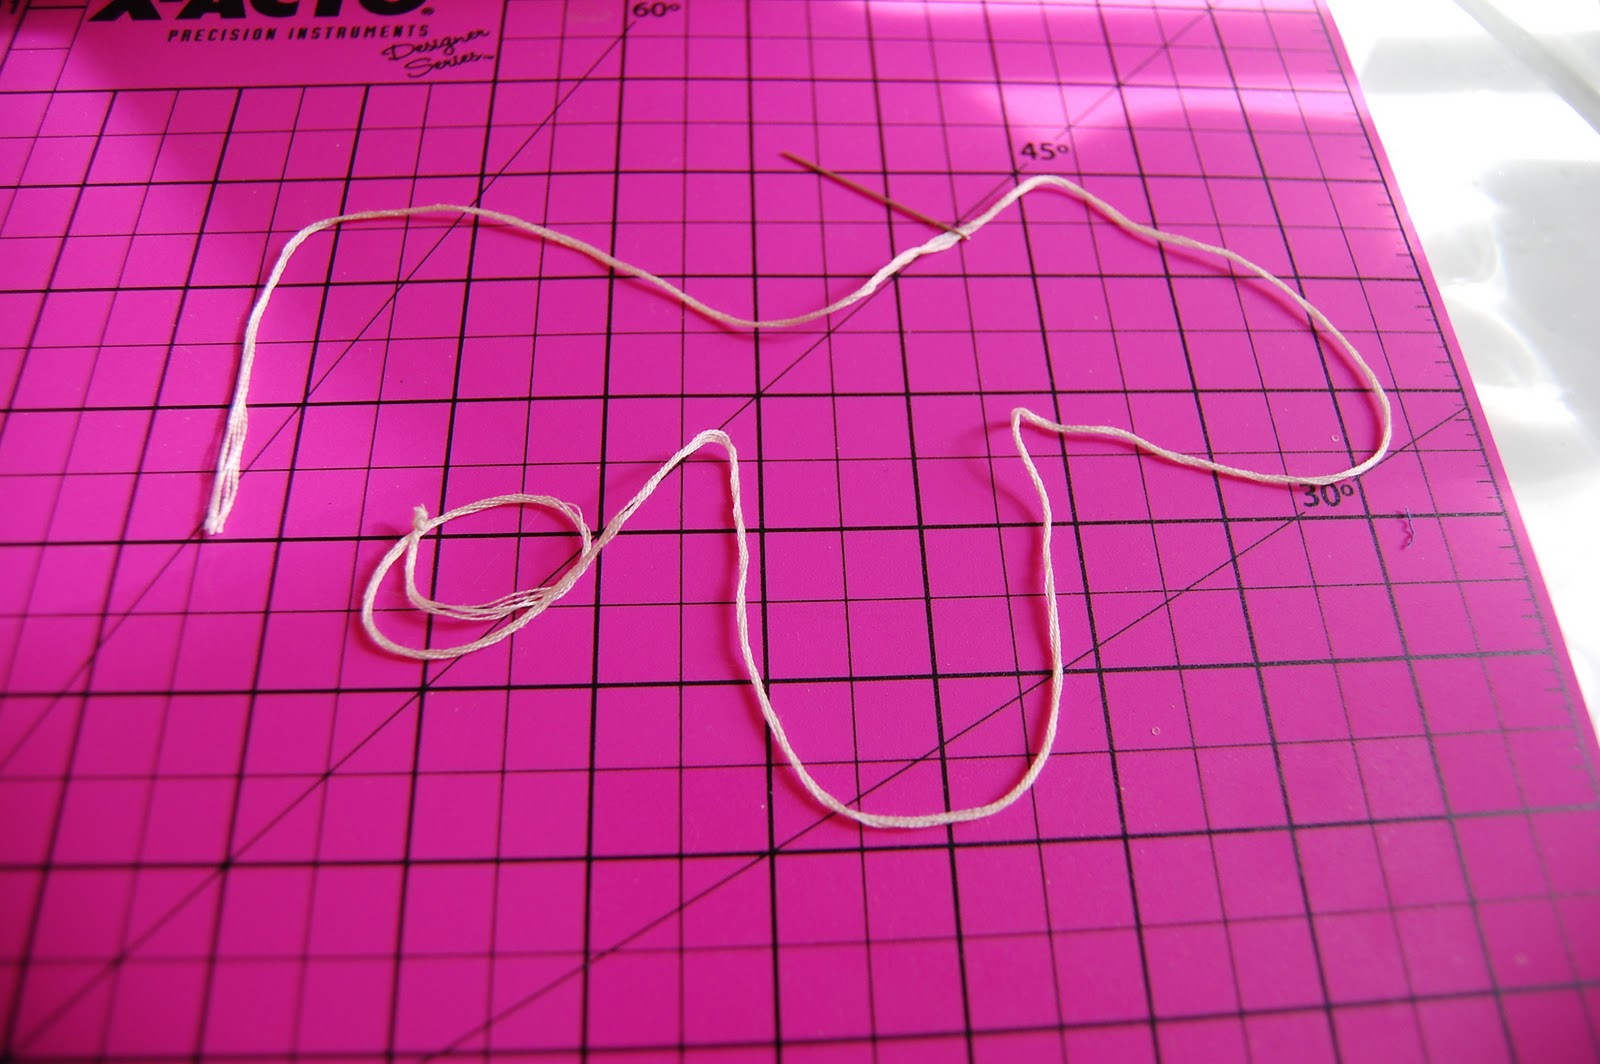
Thread your embroidery needle, knotting it on just one end. I used the full thickness of the embroidery thread, which was all six threads.
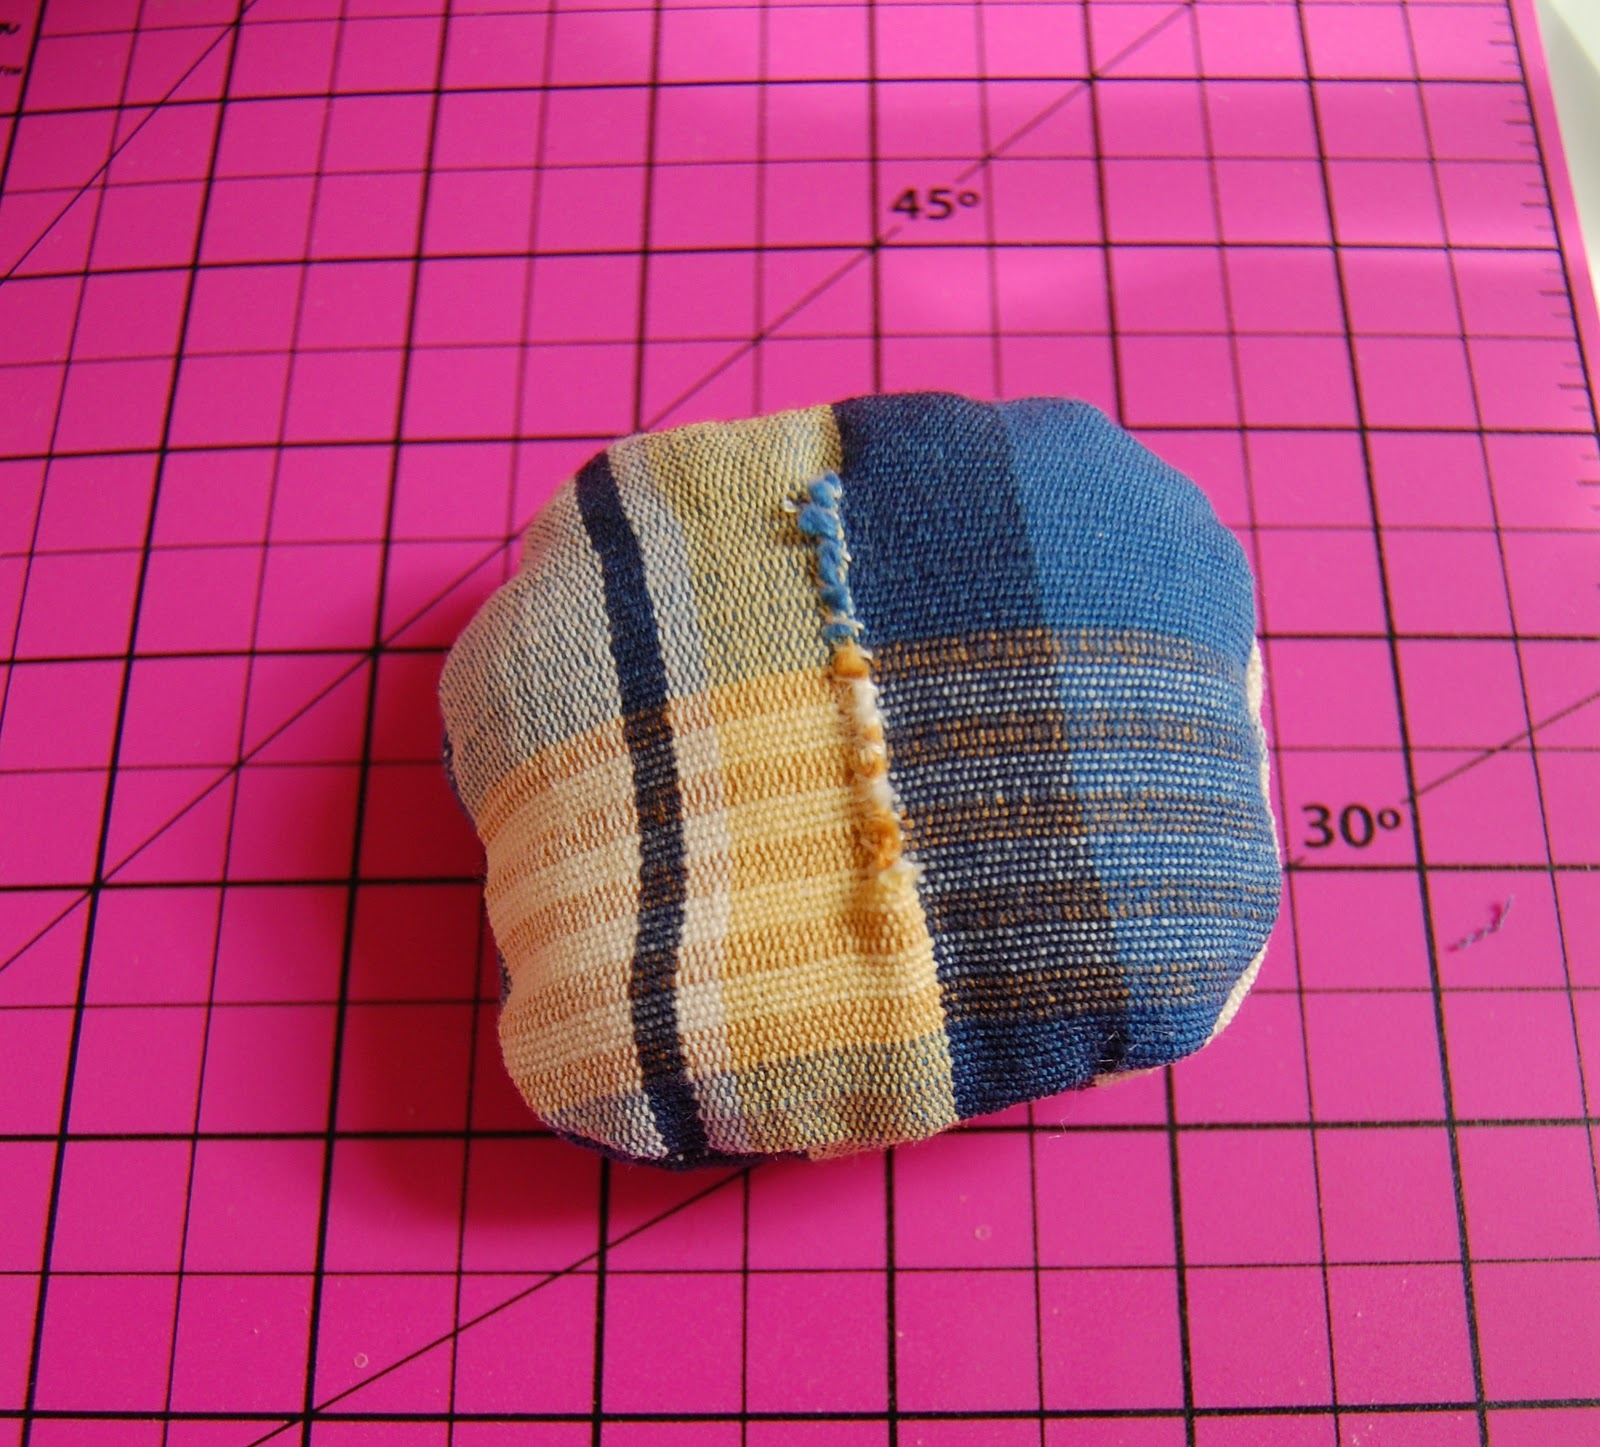
Stitch up the little slit.

All sewn up. My pin cushion looks more square than circular here, doesn’t it? lol
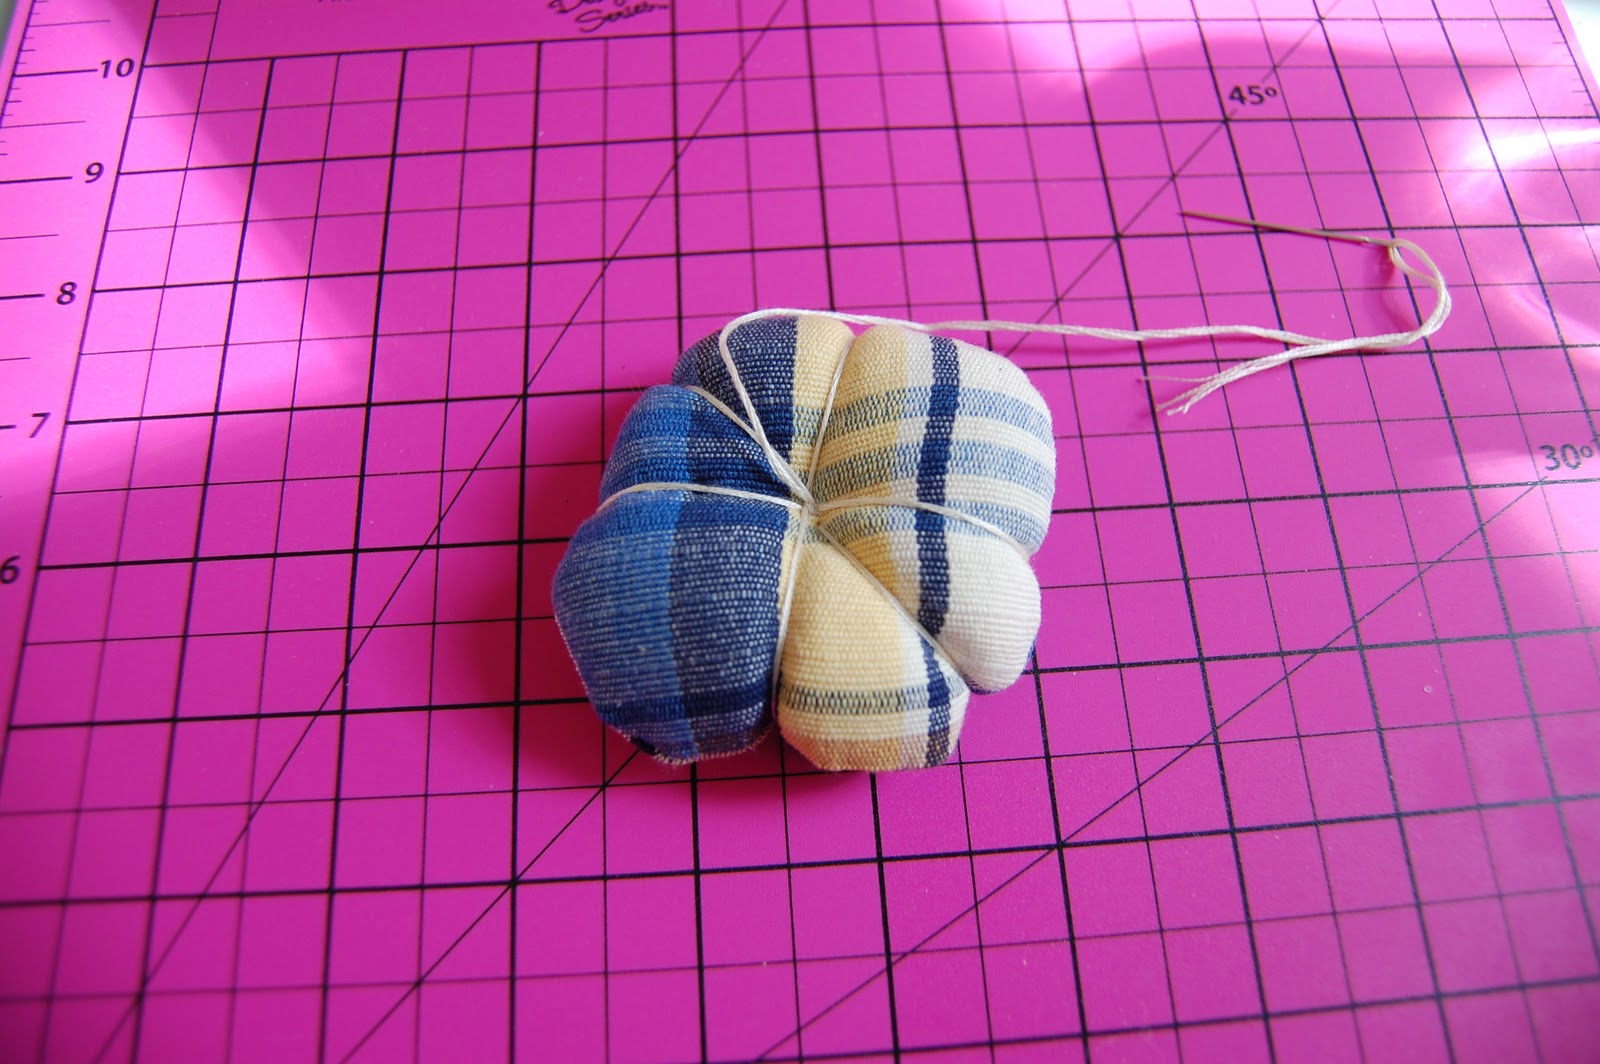
Okay, getting to the good part. Next take your needle and insert it through the dead center of the back of your stuffed cushion.

Bring it out the center of the top and loop it over one side.
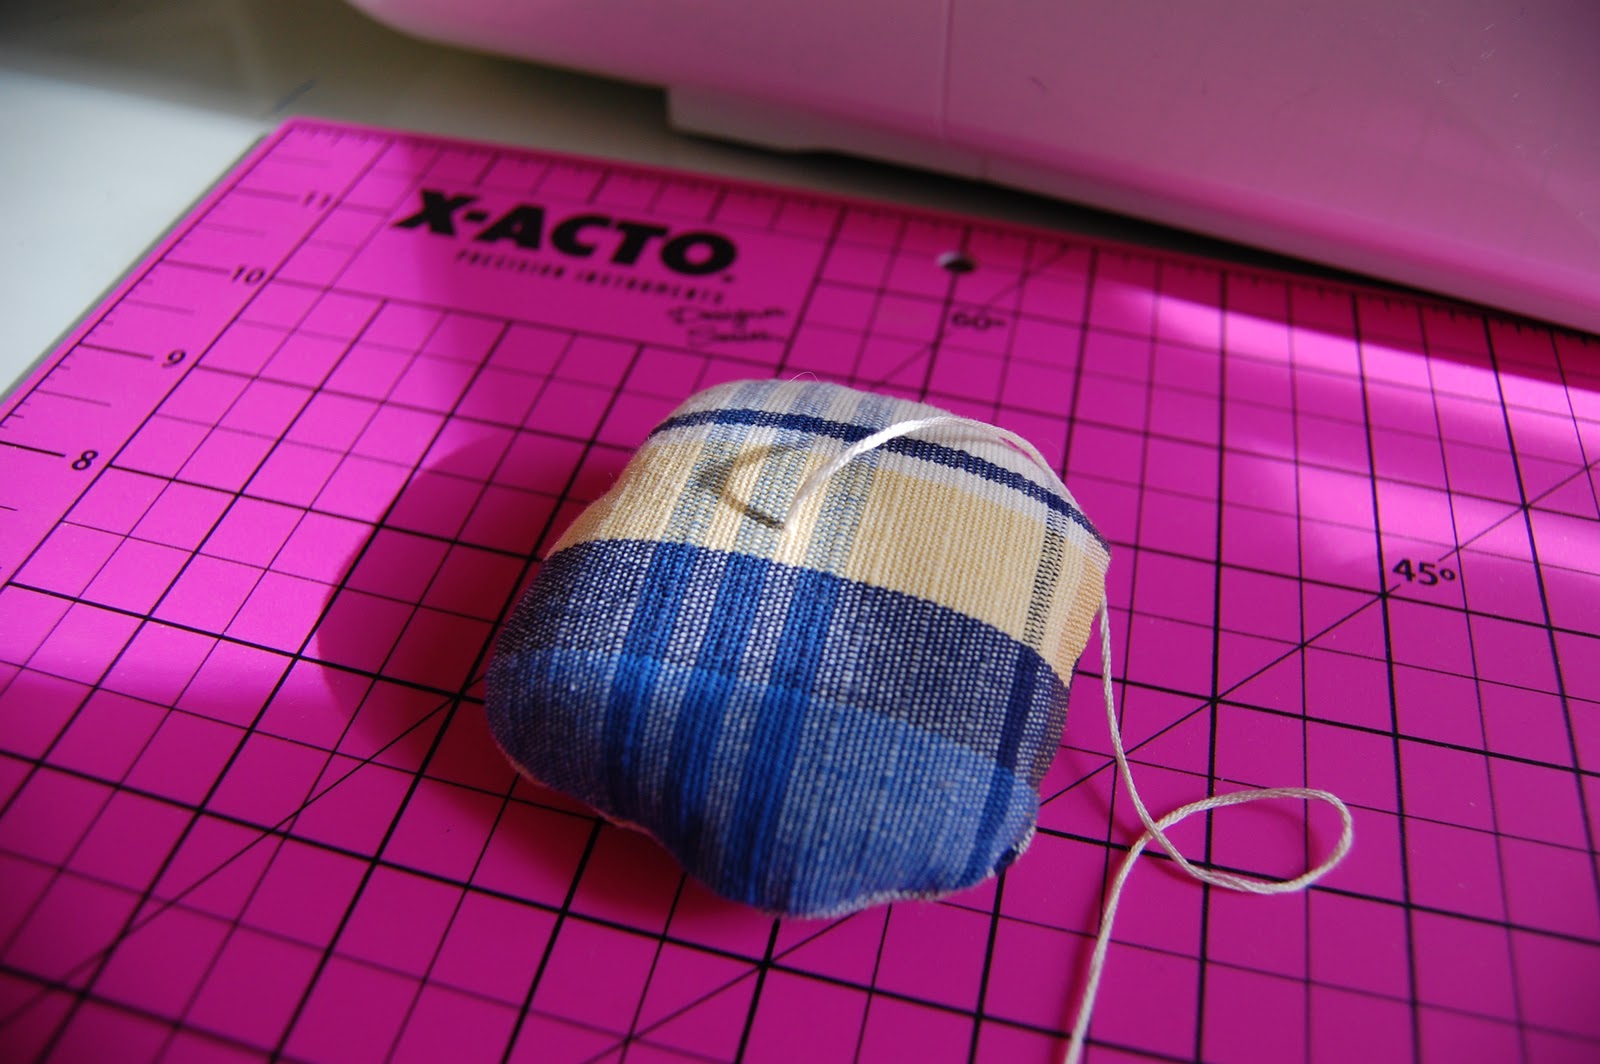
Stick it back through the center of the back and pull it through the top center again

…looping it over the section of your cushion that is directly opposite from the loop you made the first time. Pull the thread tight enough to make your cushion a little poofy.
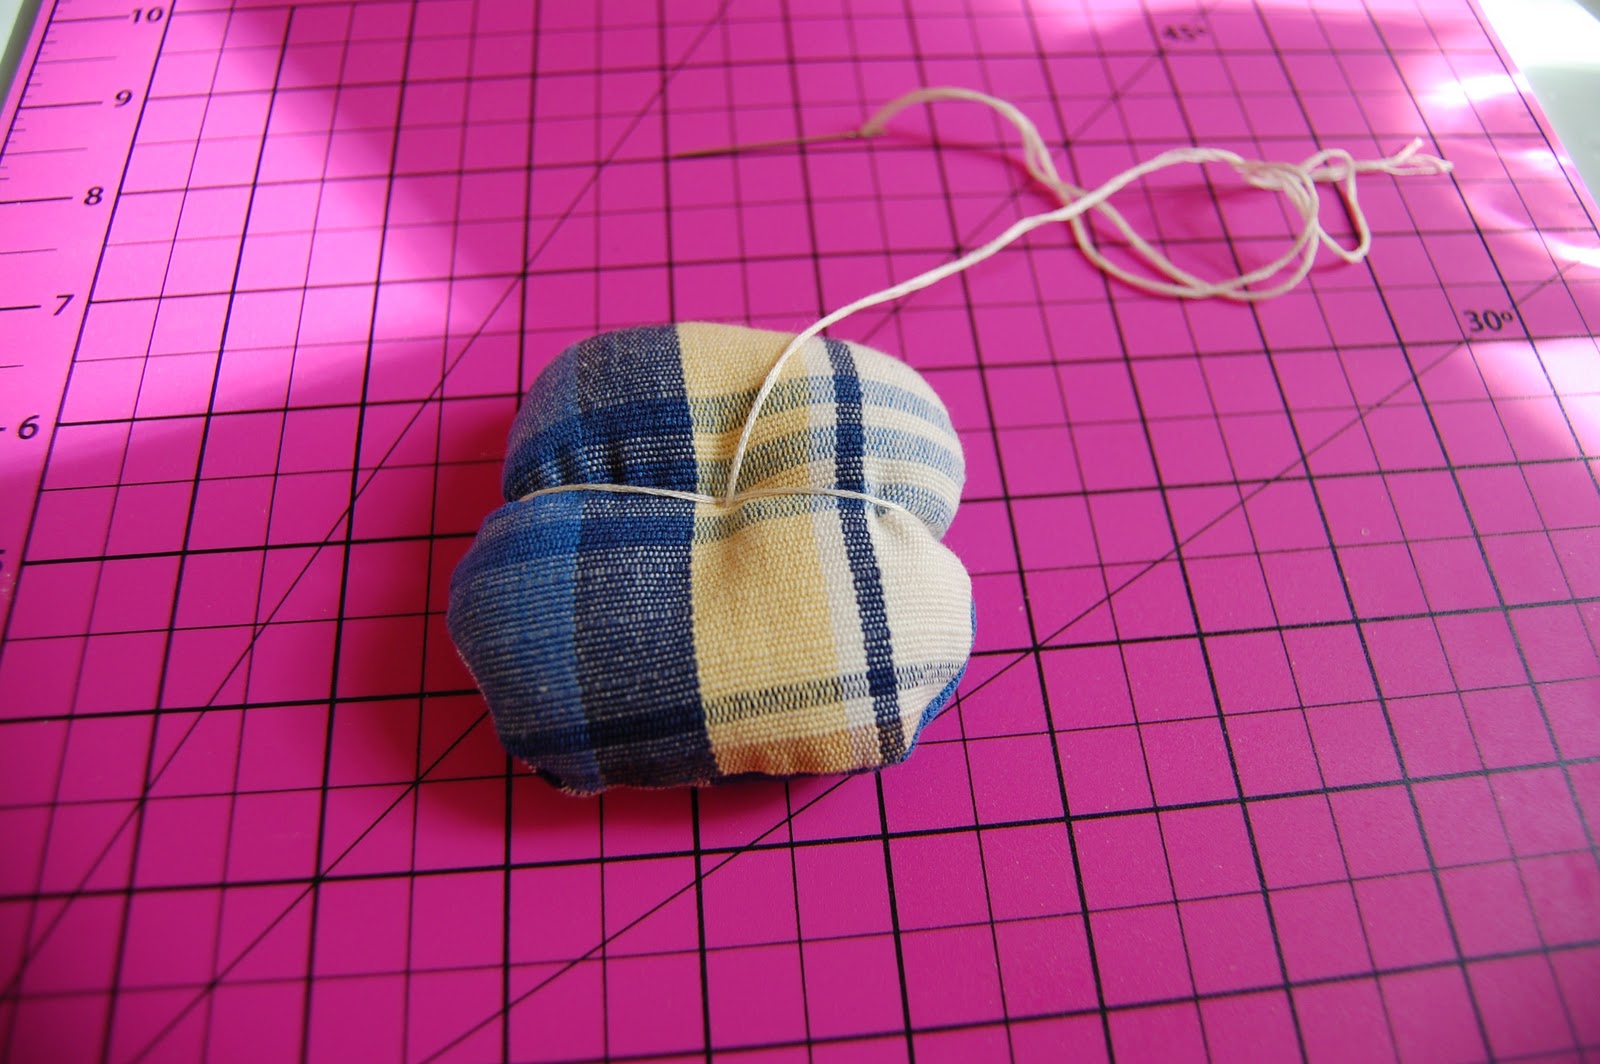
Do the same thing again, but on opposite sides of the cushion.

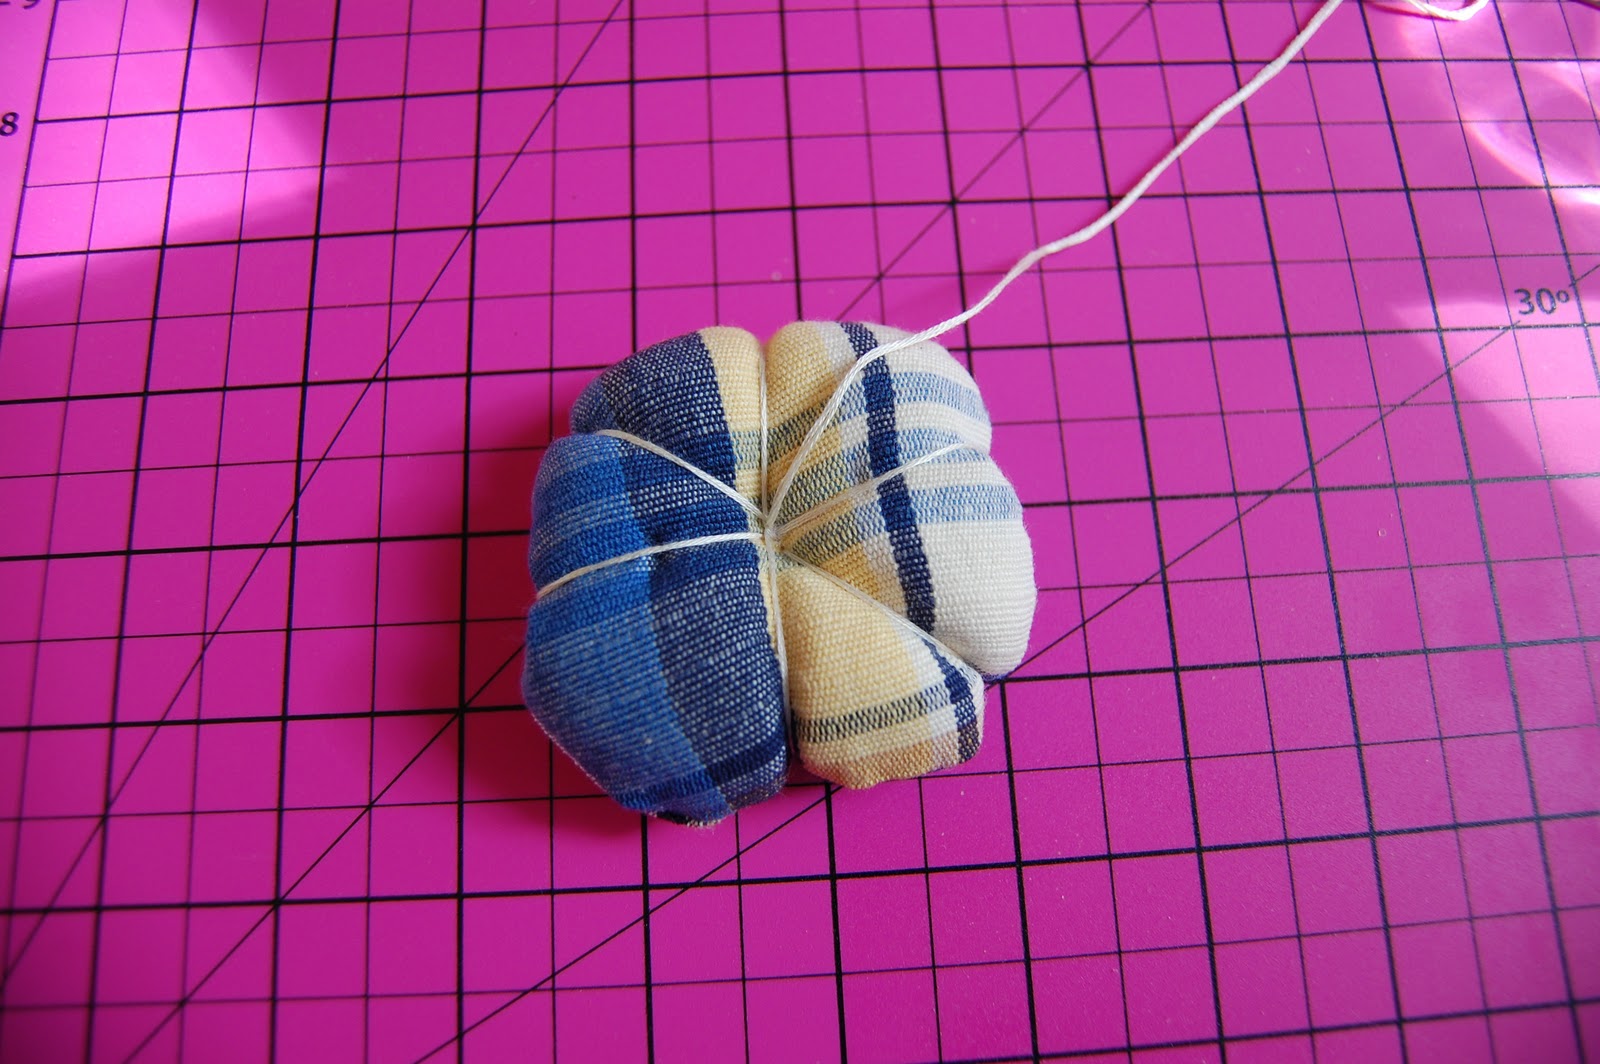
This divides your cushion into four equal parts. Again, pull your thread taunt enough to make your cushion poof up a little, as shown below.

I chose to divide my cushion into 8 equal parts. You could do just six, if you like.
Here’s how it looked on the back when finished.
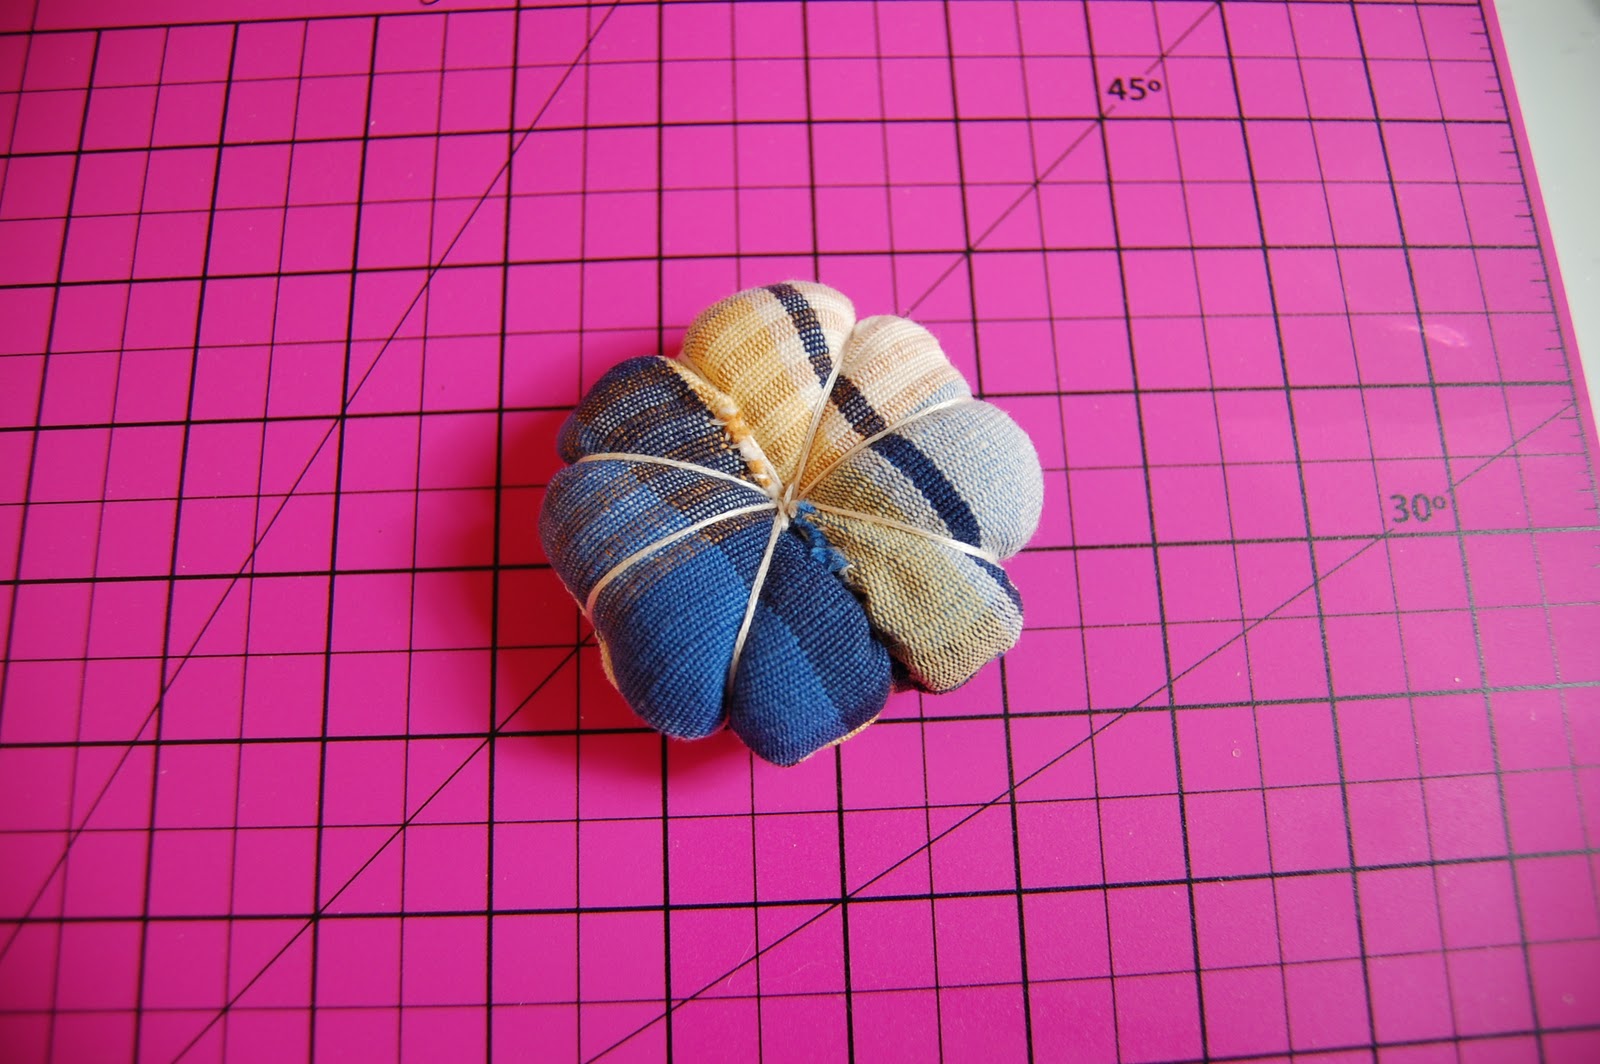
And, here’s the front. You can adjust the little pieces of thread to make your poofy sections more equal in size. I kept stopping midstream to take pics so I didn’t do the greatest job of pulling my thread taunt each time. Yours will look more consistent if you’re not stopping a lot.

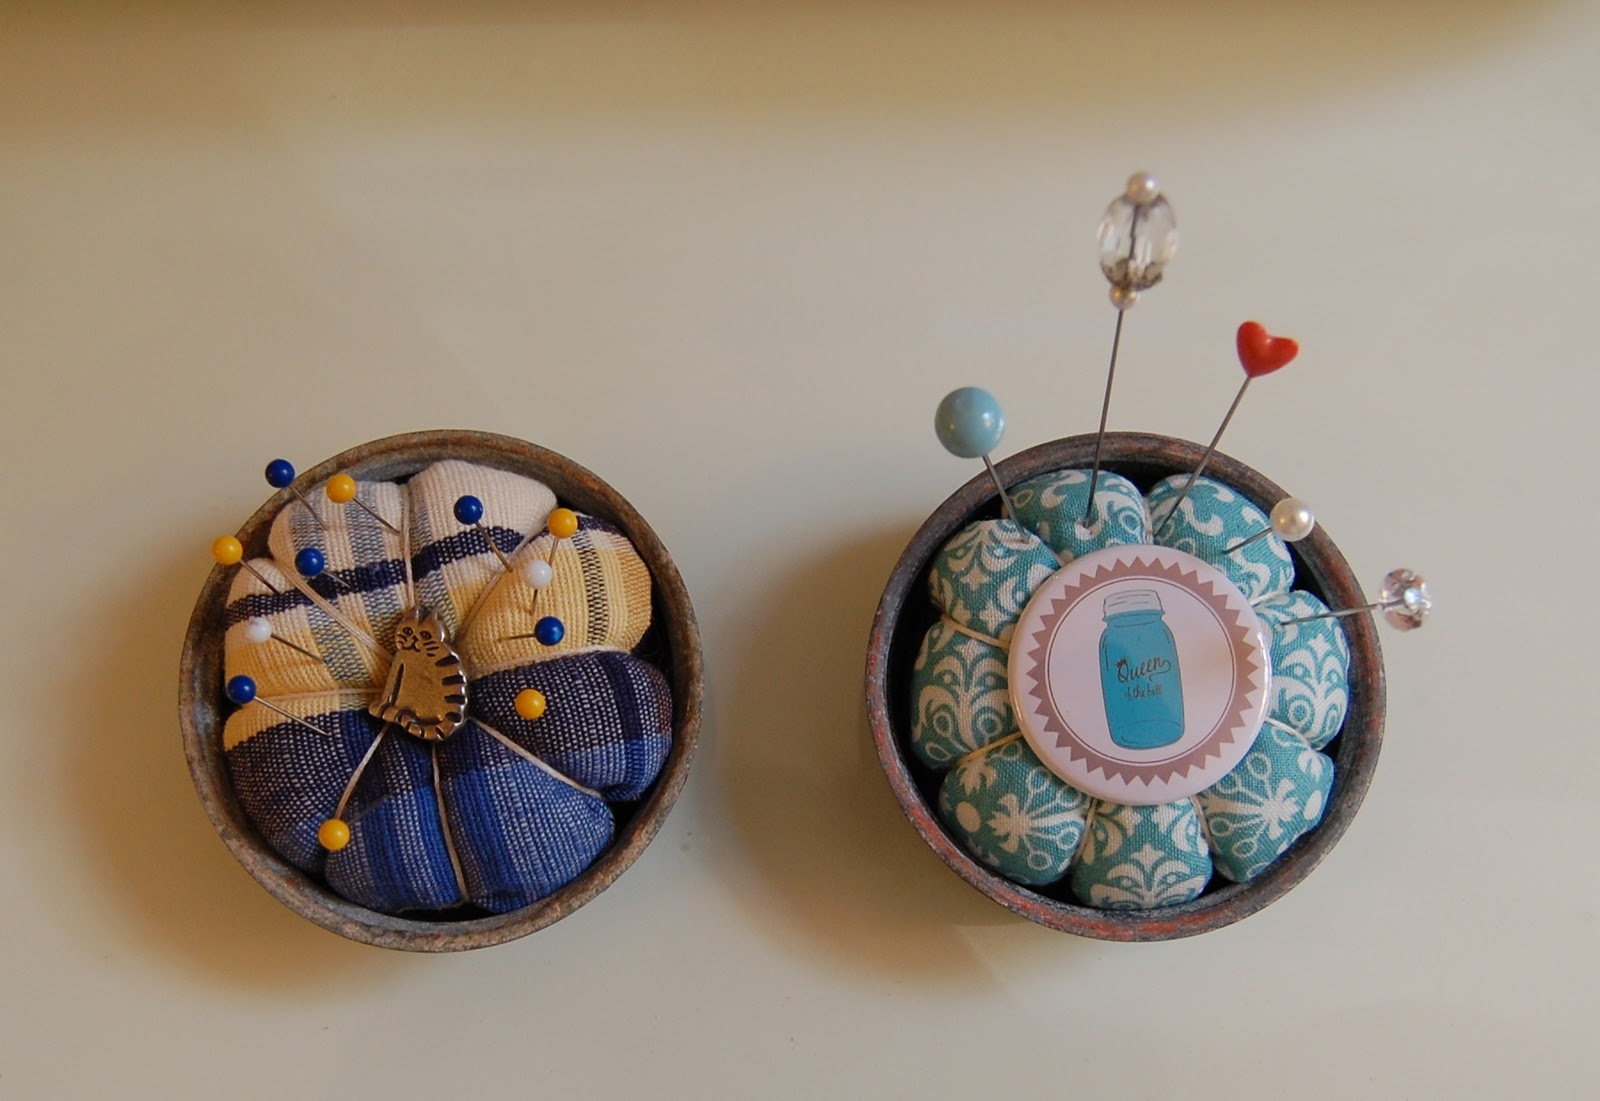
Here’s how it looked inside the lid.

I dumped out the buttons from my button jar and tried different buttons on top.
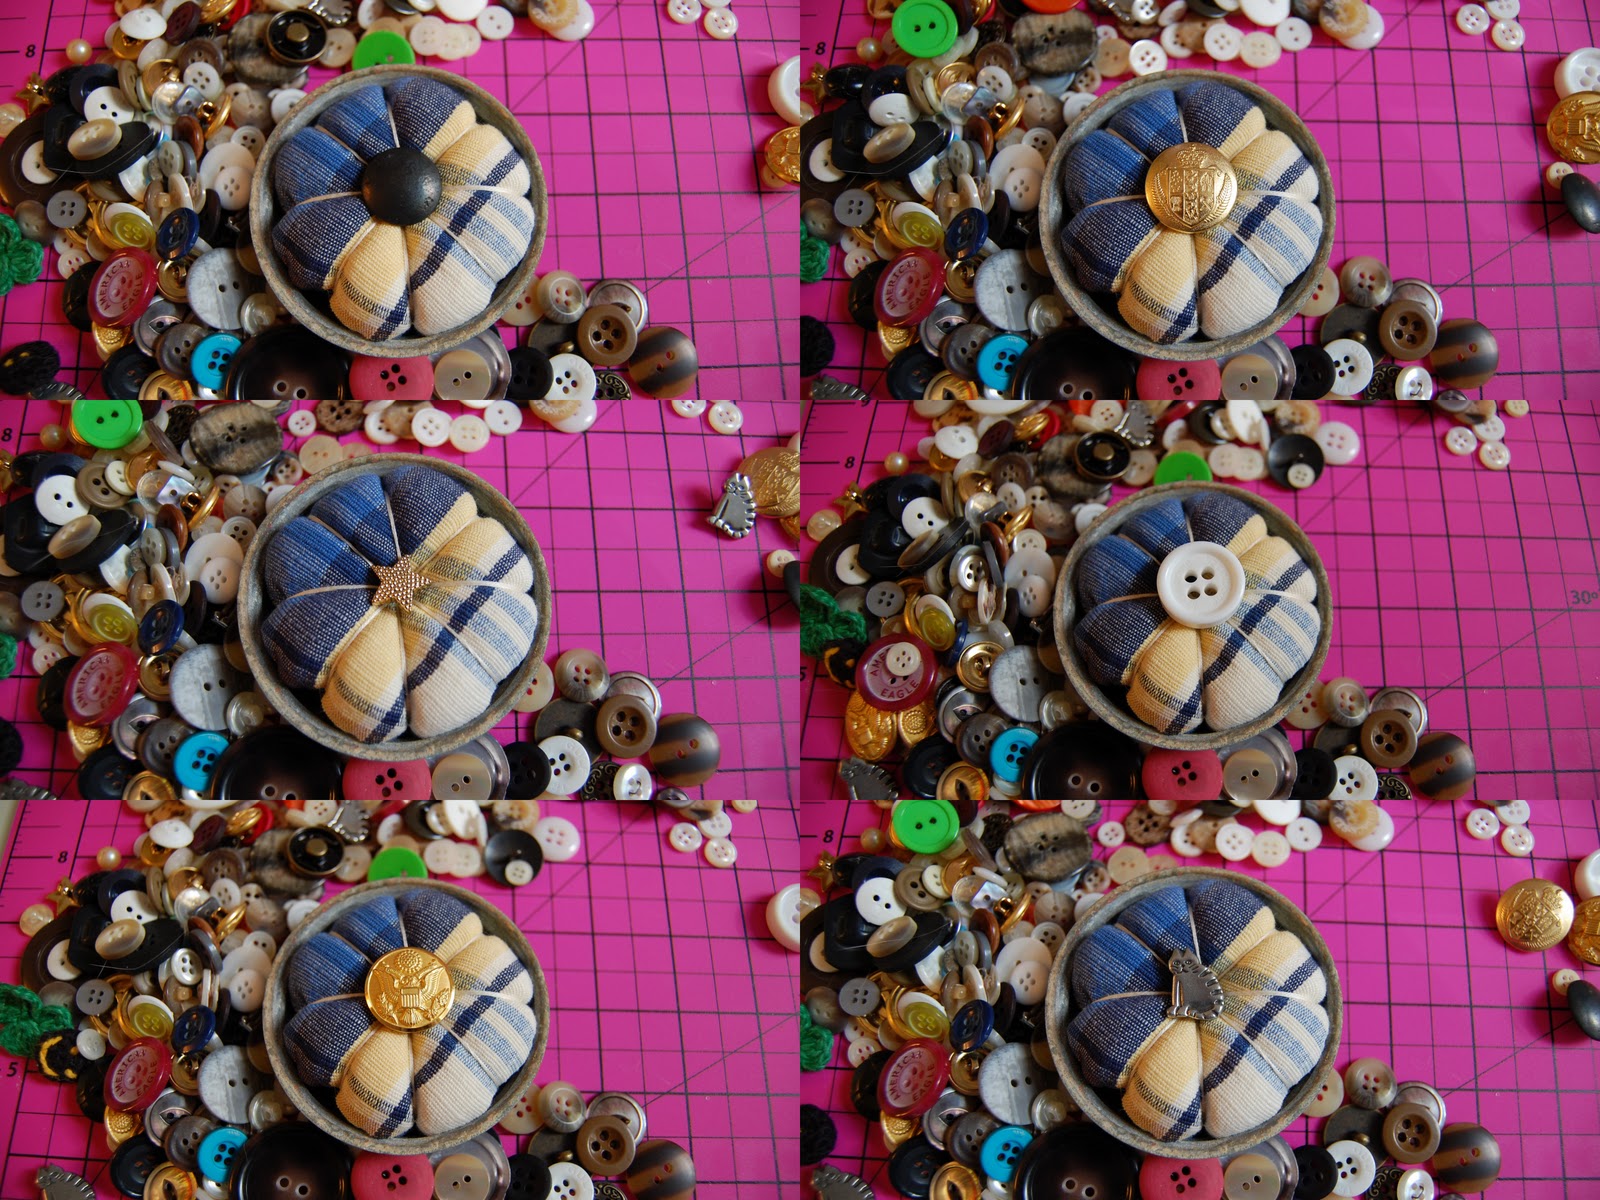
I ultimately went with this cute little kitty cat button. Predictable, right? lol Once you have sewn your button onto the center of your pincushion, you can hot glue your cushion into the lid. My cushions fit snugly enough that I didn’t have to glue them in. They stayed in just fine on their own.
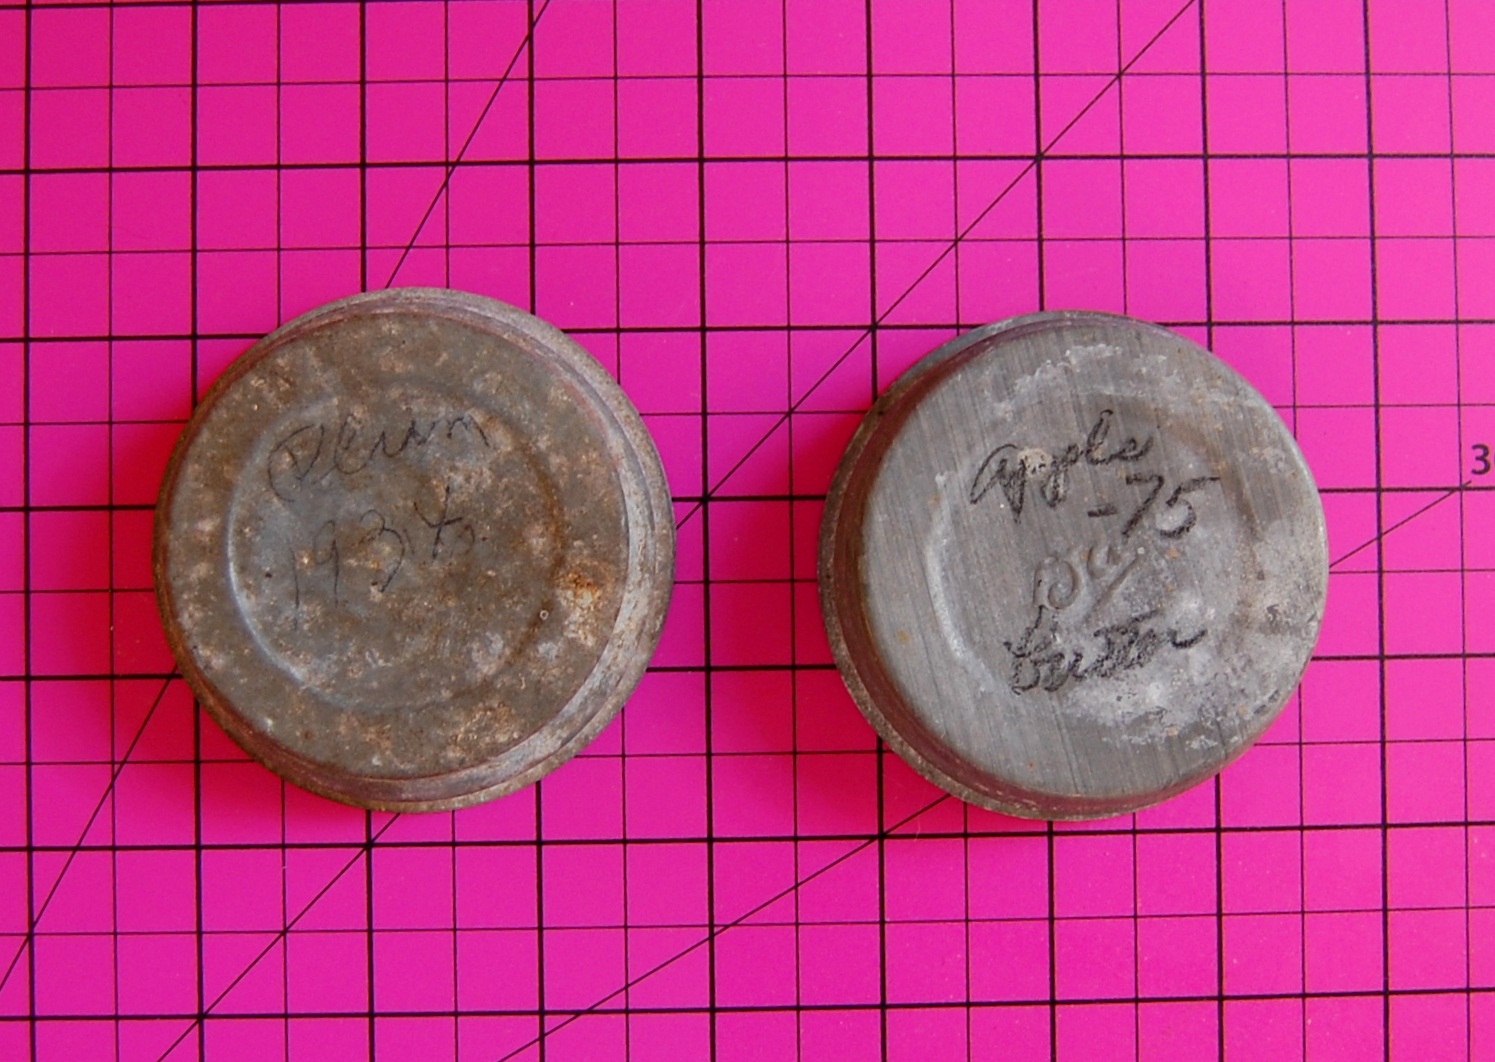
You’ll find the old Ball zinc lids on eBay, without the jars. Just search for “Ball Mason Jar Lids.” I love these two lids. They still have the old writing on them. One says, “Plum 1934” and the other one says, “Apple Butter -75.” 🙂
This little pin cushion is super easy to make and very forgiving if you make a boo boo along the way. You saw my cushion didn’t look that circular, but in the end, it looked just fine once it was inside the lid.
Imagine tucking it inside a little sewing box or kit as a holiday or shower gift for a budding seamstress…or even a seasoned seamstress. 🙂 Happy sewing!
To receive the latest posts, as well as updates about blog parties, subscribe via an RSS Reader or have BNOTP delivered right to your Inbox. You’ll find links to subscribe via RSS and Email on the sidebar to the right. Thanks for reading; so glad you are here!
Looking forward to your Before and After!
Reading this post via e-mail or RSS feed?
*If you are reading this via email or RSS feed, to view all the Before and Afters posted for today, click HERE.

Metamorphosis Monday:
If you are participating in Metamorphosis Monday you will need to link up the permalink to your MM post and not your general blog address. To get your permalink, click on your post name, then just copy and paste the address that shows up in the address bar at the top of your blog, into the “url” box for InLinkz.
If you’d like to include the MM button in your post, just copy and paste the Met Monday button to your computer or grab the html code from underneath the MM logo under the “BNOTP Parties” header at the top of this blog.
In order to link up, you’ll need to include a link in your MM post back to the host blog, Between Naps on the Porch so your regular readers will be able to find the Met Monday party which ensures your friends and fellow bloggers will receive lots of visits, too.
PLEASE DO NOT type in all caps…it spreads the links waaaay out. Thanks!
Let’s try something fun today! Please visit the person who linked before you and after you…that way everyone will get some visits. Hope you’ll visit more, of course.
Welcome! Thanks for coming to the party!


awww now I totally want to make my own pincushion! Only I don't even sew! =) Thanks for hosting!!! <3
They both look great! Thanks for hosting!
Sherry
Great tutorial! I love how you can make these with the little fabric scraps that I refuse to toss. Thanks for sharing and for hosting this party each week.
That is the cutest pin cushion ever. I have several of the zinc lids, I will have to give it a go:)
Susan,
What a darling project! Your project inspector is adorable in the pic! The writing on the lids reminded me of the homemade apple butter my Grandmother made! Always the best flavor from home canned foods packed with love!
Fondly,
Pat
Great pincushions. Thanks for hosting.
What great features! Thanks for hosting each week! Glad to link up!
Very nice, Susan! I like both of them. Thanks for hosting!
Love your pincushions! And making myself a note to LIKE your pumpkins tomorrow!
Jeanine
It's been in the back of my mind for some time to make a pin cushion, and this is cute and simple enough for me! Thanks for sharing!
Darling pincushion!! Thanks for hosting!
I love your decorated pumpkins! The pin cushions are adorable too. What a brilliant idea to place them in the mason jar lids. Great tutorial!
Those are darling Susan. Thanks for hosting.
Holy cute pumpkins!
Thank you for hosting!
Kerry at housetalkn.blogspot.com
What a cute idea! Thanks for hosting Susan!!
Those pincushions are the cutest things! Definitely going on the "to do" list.
That is the cutest little pincushion and sew easy. With the sections created by the floss it is just what I have been needing for my different sizes and types of sewing machine needles.
Love the pin cushions, so cute. I have lids waiting for a project. Thanks for sharing and hosting again this week, Laura – Cottage and Broome
What a fun project! LOVE it!! Thanks for showing all the steps, too! 🙂 Loved the kitty in the one. My cat is always nosey to what I'm about, too. 🙂
Very nice blog.
Regards from Sweden
Elna
Looks great Susan! Thanks for hosting 🙂
I am making me another pin cushion today . thanks for the ideas
your pumpkins are just beautiful
guess you could use a plastic pumpkin so we could leave them out year long? LOL
Morning!!
WOW..so many great links to check out this week!
Love you pincushion tute..I will be making some of these for gifts for sure.
Happy to be joining you this week.
Janet xox
http://theemptynest-janet.blogspot.com/
What a fun idea! I think it a wonderful gift idea….and it is Max approved so how could I go wrong making one?! Thanks for sharing.
What a great way to give an old jam jar lid a new life 🙂 These pin cushions would be great little stocking stuffers at Christmas 🙂
That craft event was very beautifully decorated! Wow! I need a pincusion. My cats stole the last one (tomato) the minute I took it out of the packaging. I need one they cannot steal!
xoxo
Andie
I really do love your pin cushions… I have made several, One for function and the others for looks….
Great post!
Sany
Great tutorial as usual Susan. these are so cute. Love your pumpkins.
Thanks for the tutorial. I have a very special pincushion similar to yours. My mother and daughter made it for me over 35+ years ago. The fabric is yellow and white gingham with little red flocked flowers. Scraps from a little dress I had made my daughter. Mama and #1 granddaughter were inseparable! This pincushion is just one of the sweet reminders of a grandmother's patience and love.
Susan, that is such a sweet story. Thanks for sharing it. That is one very special pincushion!
Love the pincushion and thanks for the tutorial…I recognized the fabric from your chair right away! I went to LIKE your great pumpkins, love them both and will go like again. I'm here in MM because my yellow tablecloth was made out of my moire draperies I changed last month. Have a great week Susan. FABBY
Thanks so much for this. I am going to make one. I have a childs teacup that has been broken and poorly fixed but it will make a cute pincushion. Your tutorial was fantastic. I have never joined it on Met Monday…but..maybe I will when I get mine done. Stand by for some HIGH praise if I can do it!
LOVE this idea!
Mona
I have always loved Christmas Made in the South!! It was a yearly tradition for my mom and I. She use to drag me to it when I was a little girl and as I grew up I just adored that time spent with her. If we make it home at the right time mom and I still try to go though it is not a large as it use to be. We always went to it in Augusta.
I have always loved Christmas Made in the South!! It was a yearly tradition for my mom and I. She use to drag me to it when I was a little girl and as I grew up I just adored that time spent with her. If we make it home at the right time mom and I still try to go though it is not a large as it use to be. We always went to it in Augusta.
Susan,
Thanks for the tutorial on the pin cushin! It's adorable! Did you also write a post on the "crafting soiree"? I seem to remember seeing pictures of the entire spread and would like to see again… just can't remember where I saw it?
Love reading your blog… beautiful home with beautiful ideas!
Thanks,
Karen
Karen, I can't find the post now, but I still have the pics saved on my computer, I think. I'll be happy to mail some to you. Just email me at betweennapsontheporchatgmaildotcom and I'll forward some to you.