Welcome to the 315th Metamorphosis Monday!
Last year I saw these cute burlap bunny-ear napkin rings in a cataglog. Ummm, that started the wheels a-turning. I saved the picture to my computer thinking I might try to DIY them some day.

With spring just 5-6 weeks away, I decided to start working on them now so they will be ready for a spring or Easter tablescape.

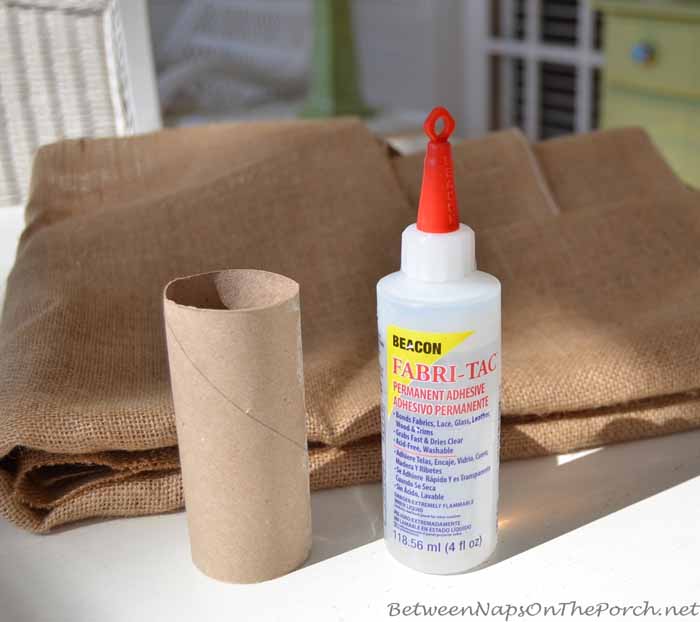
I already had more than enough burlap fabric, purchased for another project I never got around to doing. The only other thing needed for this project was some strong fabric glue and an empty tissue roll. I already had the glue so I didn’t need to purchase anything for this Easter craft. BTW, I really love this Fabri-Tac glue. It can be a tad stringy to work with but it dries quickly and is super strong, all of which more than makes up for the occasional stringiness. It beats the heck out of burning my fingers on a glue gun!
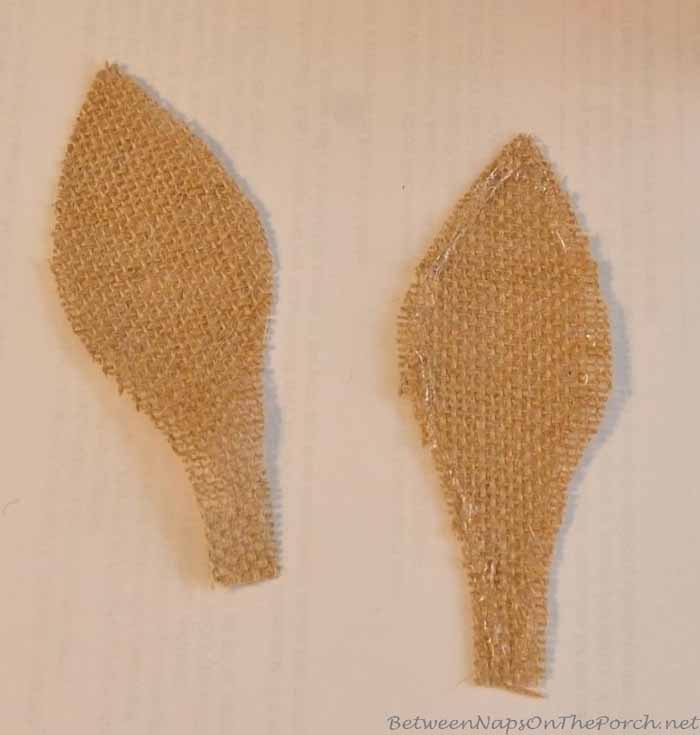
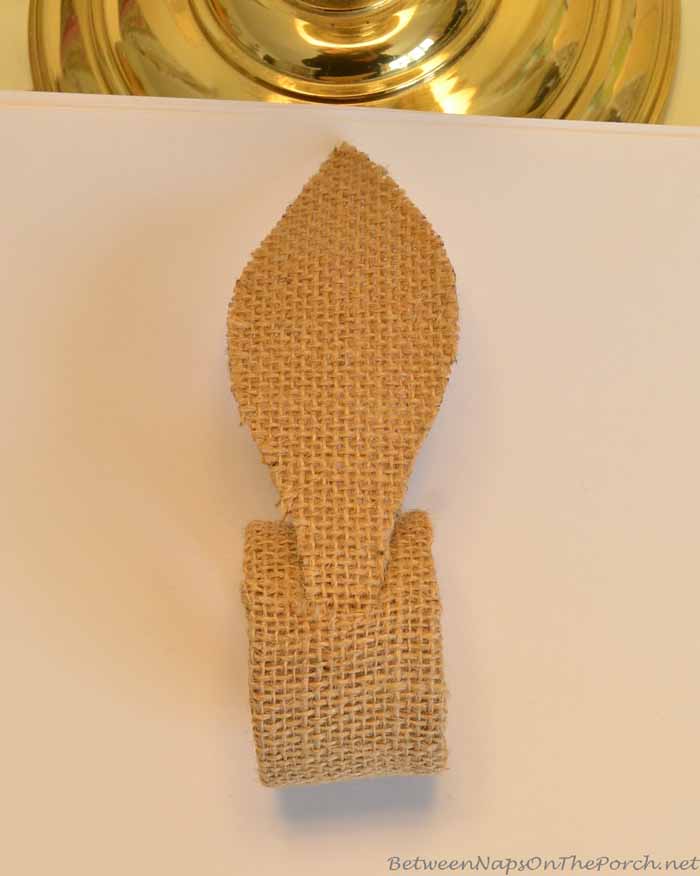
To make burlap bunny napkin rings, I made a cardboard template for my bunny ears, cut out two burlap ears using the template, then glued them together with the Fabri-Tac glue. My ears/template ended up being 4-1/4 inches long, including the long stem at the bottom and 1-5/8 inches across at the widest part of the ear.

To glue them together, I ran a tiny bead of the fabric glue around the outer edge. The burlap fabric I have is pretty course which was great for giving the bunny ears some stiffness. Using two pieces of burlap and gluing it around the outer edge gave the bunny ears even more substance and the glue helped to seal the edges of the burlap to prevent any unraveling.
If you’ve been reading BNOTP for a while, you may remember when I made Starfish Napkin Rings a couple of years ago?
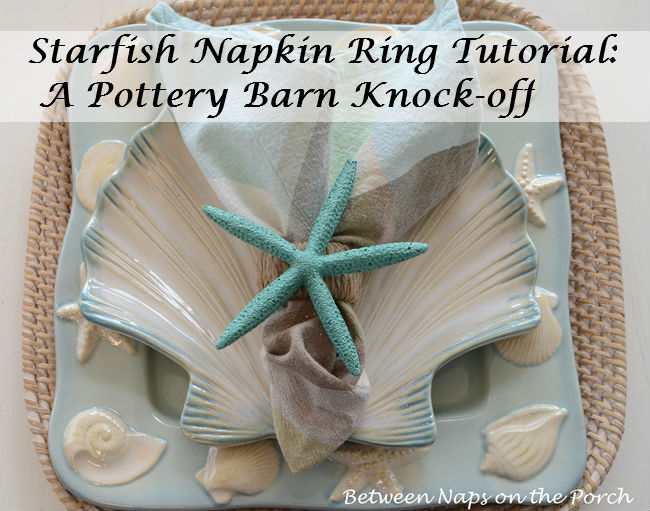
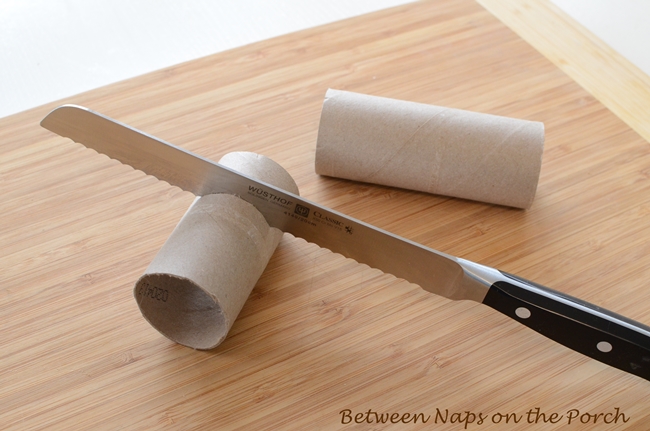
Those were made from tissue rolls, too. To make those, I cut off 1-1/4 inch sections of the tissue roll to use as the base of the napkin ring. I did the same thing again this time. You’ll find the tutorial for the starfish napkin rings here: Starfish Napkin Rings for Summer Dining
Next I cut a piece of burlap fabric to fit my tissue roll. The size that worked for the tissue roll I had measured approximately 5 3/4 inches x 3 1/2 inches. Using my fabric glue, I glued the burlap onto the ring and wrapped it all the way around the outer circumference of the ring.

Then I ran a bead of glue inside the napkin ring, all the way around the inside center. Then I just folded the edges of the burlap over. My edges matched up to each other exactly since I had pre-measured what I thought I’d need. If the burlap overlaps a little inside when you make these, don’t worry about it, it will be fine.
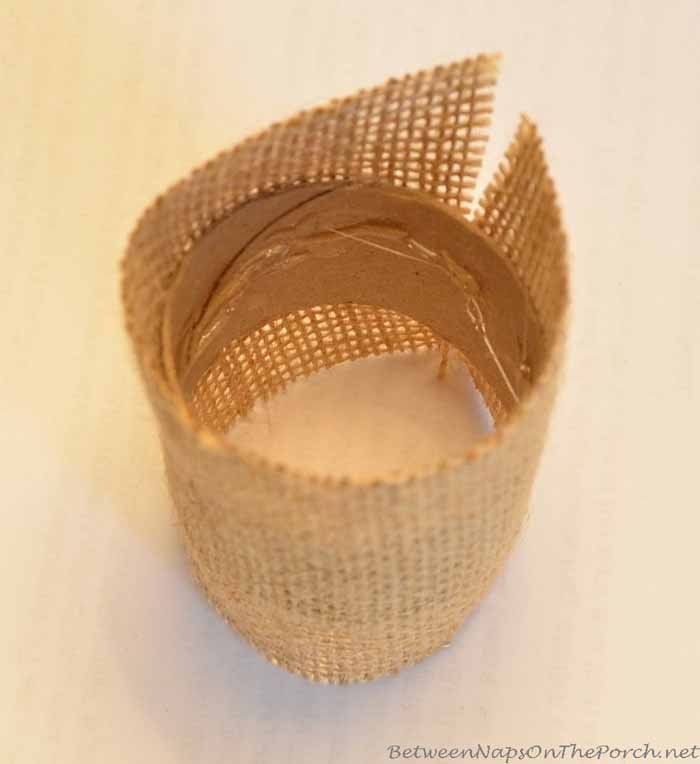
The glue again dried very quickly. Next, using scissors, I cut a small slit in the burlap running across the top of the napkin ring. An x-acto/craft knife would probably work well for this, too.
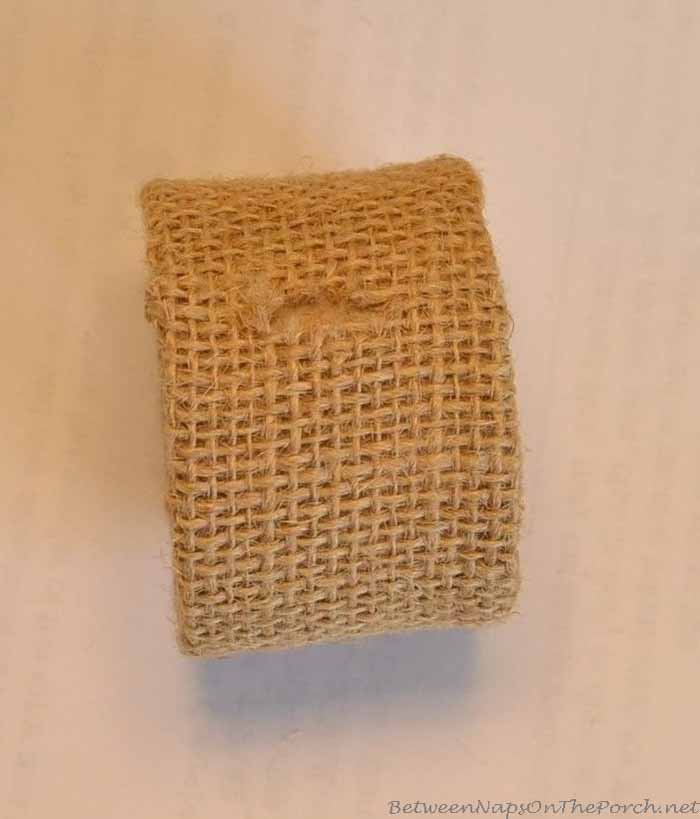
Remember that long skinny end on the bottom of my burlap bunny ears? I tucked that long end inside the slit I had made. The first one went in very easily. I used a metal fingernail file to gently lift up the burlap to slide the second one underneath. You can add a drop of glue on the bottom end of the ears before inserting them under the burlap, if you like, but I didn’t use any glue and the ears stayed in place with no problem.
When I tucked the end of the ear up under the burlap, I stuck one end underneath going to the left and tucked the other ear up under the other side, going toward the right. If you had x-ray vision, you would see the long ends of the ears running along the top of the napkin ring in opposite directions underneath the burlap fabric. If you look closely, you can see a little lump under the burlap where the ends of the ears are hidden.

I wanted to dress up my bunny ear napkin ring a bit so I added a tiny decorative flower to the top. For another variation, before cutting the slit for the ears, you could run a thin piece of lace all the way around the ring, gluing it on with the fabric glue. Then you would just cut the slit through the lace and burlap fabric to insert the ears.

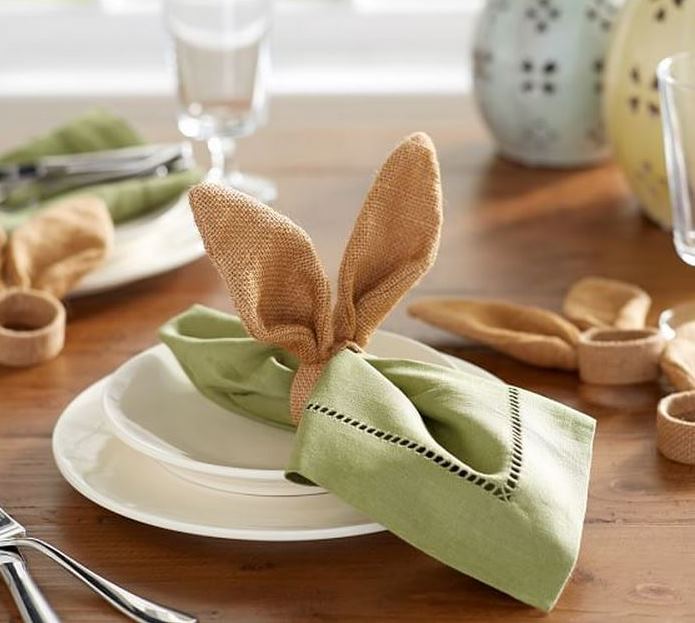
Here’s how they look in a little impromptu place setting.

Wouldn’t it be cute to make little hats to place on top, then the ears could be sticking out through the hats. I didn’t try it with this first set of ears, but you could bend the top of one ear down if you wanted one ear to be flopped over a little.

There are so many different ways you could design your burlap bunny-ear napkin rings. You’re only limited by your imagination.

I noticed Pottery Barn had them for this year and even though Easter is still two months away, they are already sold out online. These ears would also be easy to make, although it would involve a little sewing. You could just cut out the ears, stitch ’em together leaving the ends open, turn them inside out , tuck in the open ends, and glue the ends to the burlap ring with fabric glue. You would need some pretty flexible, soft burlap or heavy linen fabric to make these.
It’s still a little early, but I wanted to share this tutorial now so you would have plenty of time to make these bunny ear napkin rings for your spring or Easter table settings. I think you’ll find them super easy to make but let me know if you have any questions. I’m hoppy happy to help. 😉
Looking forward to seeing all the wonderful Before and Afters for this Met Monday!
If you are participating in Metamorphosis Monday, you will need to link up the “permalink” to your MM post and not your general blog address. To get your permalink, click on your post name, then just copy and paste the address that shows up in the address bar at the top of your blog, into the “url” box for InLinkz.
In order to link up, you’ll need to include a link in your MM post back to the party so the other participants will have an opportunity to receive visits from your wonderful blog readers.
Please observe these few rules:
Only link up Before and After posts that are home, gardening, crafting, painting, sewing, cooking, DIY related.
Do not link up if you’re doing so to promote a website or product.
Do not link up a post that was just linked last week since a lot of readers will have already seen that post.
Please do not link up more than 2 or 3 Before and Afters each week. Thanks!


Thank you for hosting, Susan. Those bunny ears are too cute!
Love your bunny ear napkin rings Susan, especially with the addition of the little flower!
These are so cute! You are one crafty chickie!!!
Don’t hold a candle to you! 🙂
I’m already getting the spring fever as well! I’m planning some things I want to do to the deck already in my head. Thanks for hosting and have a great Valentine’s Week!
Thanks Shannon!
I love your cute bunny ear napkin holders, they came out great! Thanks for hosting, have a great week!
You did a great job on your bunny ears Susan, I tried making those a couple years ago but my ears are more of a floppy style 🙂 Thanks for all the fun today, a great way to start the week!
I think these stood up because this burlap is so scratchy/stiff. I bet that fusible lining stuff would help. I thought I might need it but the fabric did okay on its own.
Hi Susan, this is the cutest idea I have seen in a while. I am definitely going to try this. Thank you for hosting!
What a very cute project, Susan! Can’t wait to see them on one of your tablescapes. The new style PB has this year is very cute too! Thanks for hosting us!
I liked those, too!
Cute!!
Thanks for hosting!!
Hugs,
Deb
Hi Susan! This is so cute. Hope you’re doing well and thanks for hosting your party.
Be a sweetie,
Shelia 😉
Oh Susan, I just purchased eight Burlap Bunny-Ear Napkin Rings at Pier 1 for $2.95 each. However, I will take your embellishment idea, if I may. They look so much cuter then my plain ones!
Nancie, I think the picture I originally said was from PB is actually from Pier 1. I saved it so long ago, I forgot where I’d seen them. Yeah, they just look like they need a little something extra, don’t they. 🙂
Oh those are adorable!!! My kids would love them too. Thanks for hosting Susan!
So cute, Susan! Pier 1 also had a version last year….which makes me think of those bunnies on a stick from several years ago….and those Target birdie S&P shakers! lol lol You may have started something! 😉 Hugs…Debbie
I think that’s where I found that picture, the one I designed mine after. Initially I thought it was from PB but I think I found it online at Pier 1 last year. lol I remember the Target birdies…we all had to have some of those. lol Good times! 🙂
Those bunny napkin holders are amazingly cute!
Thanks, Kathy!
Adorable!!
Super cute bunny napkin ring. Love your blog!!
Thanks, Michele! XO
Well those are just too adorable for words !
They’d be so cute for a little one’s birthday party ( Peter Rabbit themed ! ) also 🙂
I can’t get warmer weather out of my head – as I sit here looking at a mountain of snow outside lol
Have a wonderful week Susan and thanks so much for another great party!
Hugs,
Suzan
Oh, they would…and they could be made of any fabric…with some of fusible lining stuff in between. Can you believe it’s been in the upper 50/low 60’s here! The birds were singing outside my office window like crazy yesterday. The sun was out and I think they thought spring had arrived. Enjoy your snow view, Suzan…it will be gone before too long for another year. 🙂
Well, I went and bought them. Yours are perfect! And alot less $$$ for free:):) Thanks again for hosting!
Did you get the PB ones? I love those, too!
Super sweet, Susan! Thanks for the party!
Cute, cute, cute! Thanks for sharing, and thanks for hosting us all, Susan. Have a great week.
Rita
Oh Susan…these are way too cute and thanks for giving us this great tutorial and making it look so easy to make!….Looks like I have a project to do soon!!
Love it!
🙂 They are super easy…easier than I expected. Hardest part was cutting the tissue roll because my serrated knife has gotten dull…probably from cutting tissue rolls. LOL
Your bunny ears turned out so cute! Thanks for sharing your tutorial.
Thanks, Brandi!
very cute idea… you might be able to find little carrots to put on the ring.
Hi,Susan! I bought these bunny ear napkin rings for the grandchildren’s table last year (I should have known you’d do a tutorial! I should have waited!) But, I love your idea of adding lace and will look into embellishing them before Easter. Thank you for the wonderful ideas, as always! Rosie
Thanks, Rosie! Have fun…send me a pic so I can see what you add. 🙂
Well how cute are those! What a cute result 🙂
Thanks, Liz!
Hi Susan! Thanks for sharing that adorable napkin ring tutorial with us and for hosting this fun party .
Those bunny ears are too cute! Thanks for the party and the tutorial. 🙂
You can bet bunny ear napkin rings will be on a spring table. They are just to cute not to copy!
Thanks, Linda! 🙂
Now you are going to have me in Michaels or Hobby Lobby to make the bird’s nest napkin rings myself. This should be fun!
Jeri, I love your bird’s nest napkin rings. I want to look for the goodies to make those!
Susan, the bunny ears are so cute! Thank you for sharing and thanks for hosting. Have a lovely week. Toodles, Kathryn @TheDedicatedHouse
Thanks, Kathryn…hope your week is wonderful!
Extremely cute. I can see them made from other fabrics as well. Maybe a short-napped plush? Or tiny flower print? Or…?
Love that idea! Would be soooo cute!
Cute bunny ears, Susan! You need my painting or I need your plates. They go together so well. Especially the larger one on the bottom. Have a great day!
🙂
So cute Susan! Thanks for sharing and for hosting. Hope you have a great week.
They are so sweet Susan,*no-bunny* could resist them!! 🙂
You are just too cute with your clever bunny ears. I love the tutorial (as always) You are so good at presenting a “how to.” I guess I better HOP to it and make some!
Love the plates and flatware. I would be thrilled to have a set of flatware like yours.
Thanks, Mary! I just looked and the flatware is currently on sale at Horchow. I can’t remember if I bought it there or Tuesday Morning…but this looks like a great price: http://www.horchow.com/HAMPTON-FORGE-20-Piece-Sophia-Flatware-Service/cprod55320002___/p.prod?icid=&searchType=MAIN&rte=%252Fcategory.service%253FNtt%253Dflatware%2526pageSize%253D30%2526No%253D120%2526refinements%253D&eItemId=cprod55320002&cmCat=search
Great party!! xo
Susan, what an adorable idea! I bought these a while back from Pier One, and yours look just as good! I love, love the idea of the little decorative flower and may have to see if I can find some of those. I continue to be amazed at your ingenuity! Your blog is one of the first stops for me each morning. =) I ordered some preserved boxwood placemats for Easter and spring/summer tables and am anxious to see how they do at Easter.
Really cute. I noticed that Sur La Tab has them in white.
Oh, I just googled and found them. You know what I love about ’em…they have a wicker look! I may have to make some from the burlap and spray paint them white to see if I can get that wicker look. Thanks Abbie for telling me about them! 🙂
I love them!! I am going to have to try making them. Thanks so much for sharing. Kay
Those are the cutest bunny ears Susan! Oh boy, I’d better take down my winter decor this week! Thanks for hosting and blessings,
Patti
Susan, these are adorable! I bought two of the “Golden Rabbit” figurines from Pier One; they are absolutely gorgeous, are covered with a “glitter burlap” finish, check them out on the Pier One web site. These napkin rings will go perfectly with the Golden Rabbits on one of my Easter dinner tables. Have a great day! :0)
I had pinned the bunny ears with a thought on trying to make them this year too. I appreciate the tips and ideas you have here. I think little straw hats would be really cute too….. Candy