Welcome to the 217th Metamorphosis Monday!
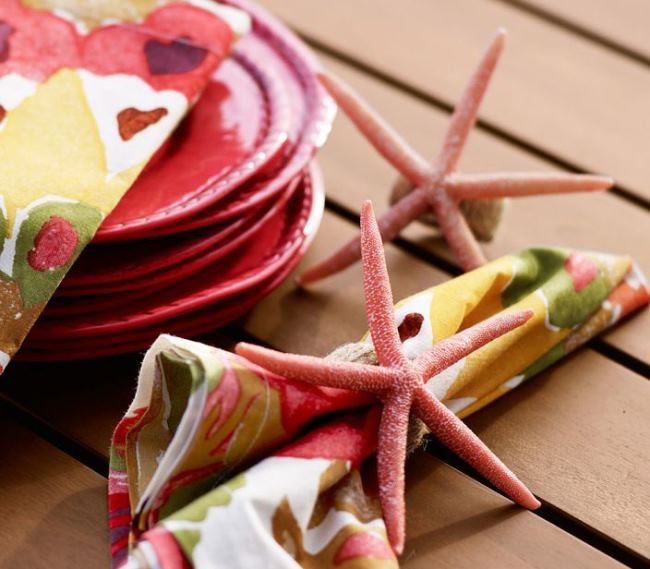
This week for Met Monday, I’m sharing a crafty Before and After. I made a quick pass through Pottery Barn a few nights ago and spied some cute starfish napkin rings. It’s kind of hard to see in this pic I snagged from the PB site here, but the ring part of the napkin ring is covered in jute yarn. I couldn’t tell what the yarn was wrapped around while in the store. Upon returning home, I read online at the PB site, it’s wrapped around a metal ring. A little idea sparked and I thought, “I can make that.”
I wasn’t crazy about the red color for the starfish so I made mine in blue, aqua and white.
If you wish to make some of these for your summer dining, here’s what you’ll need.
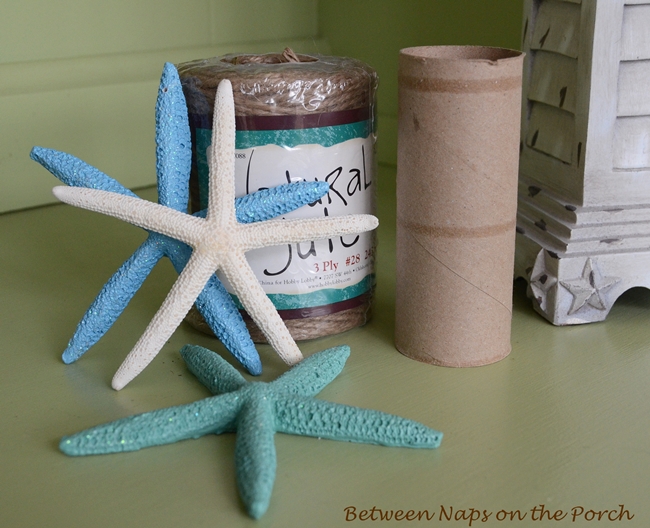
Supplies Needed:
- Jute Yarn (95-120 inches of yarn per napkin ring, depending on how wide you cut the ring)
- 2-3 empty bathroom tissue rolls (The ones I used were 1 7/8 inches in diameter. Paper towel roll may work, also.)
- Starfish (The least expensive place to find starfish is in Dollar Tree and Big Lots. If you don’t have those stores near you or they are out of them, check Marshall’s or TJ Max)
- Glue gun or Fabri-Tac
- Scissors
I didn’t buy anything for this project since I already had everything I needed. Since I wasn’t crazy about the red color of the starfish on the PB napkin rings, I decided to use the pretty blue, green and white starfish I already had. The blue and green starfish are resin and are from Big Lots last year. I bought the white starfish years ago on eBay.
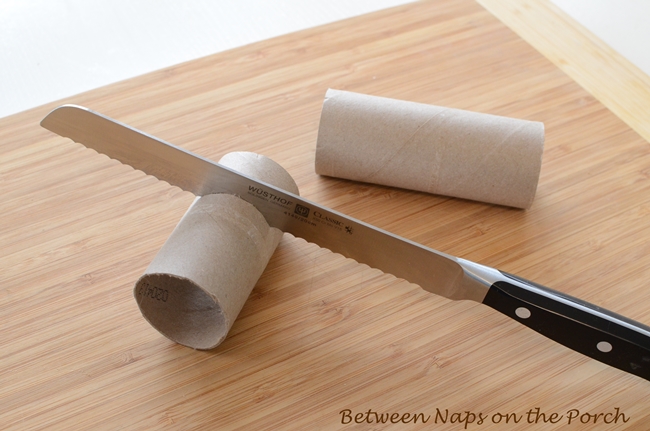
Step 1: Cut your tissue rolls the width you wish to make your napkin rings. I just eyeballed mine and they ended up being approximately 1 1/4 inches wide. The PB napkin rings are skinnier, but I like a fatter napkin ring so I cut mine a bit wider.
I thought all tissue rolls were probably the same diameter, but they aren’t. I had two kinds of bath tissue in the house and I noticed the tissue I bought a while back was on a bigger roll. If I had used those rolls, the hole part of the napkin ring would have been bigger than I wanted for my napkin rings. So, I used rolls from the tissue I purchased the last time I was in the grocery store since they were smaller.
I can’t remember the brand now since I always take the tissue out of the packaging and store it in the bathroom cabinet. I measured a roll and it was 1 7/8 inches in diameter, from outer edge to outer edge. Hopefully the size you have will work fine for this project. Paper towel rolls would probably work fine, too…so if you have some of those laying around, you may want to try using those.
To clarify, the rolls I used were 1 7/8 inches in diameter and I cut the napkin rings approximately 1 1/4 inches wide.
I cut my tissue rolls using a sharp, serrated bread knife. If your cuts end up being a bit off, you can trim up the edges with scissors to make them more even. I was able to get three napkin rings out of each roll but it’s probably safer to just cut two from each roll. If you cut three, you have very little to hold onto as you make the cut for the third napkin ring. So I recommend only cutting two from each roll. Be careful to not cut yourself. If you don’t feel comfortable cutting the roll with a knife, use scissors instead.
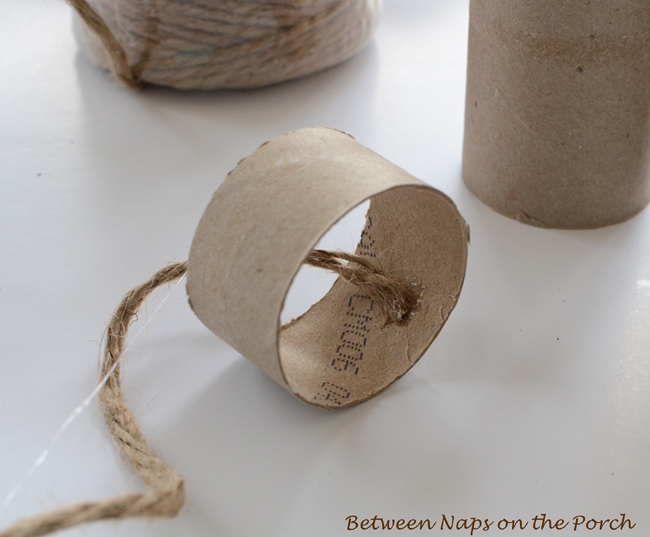
Step 2: Once I had all the rings cut, I began by putting a drop of hot glue inside a ring. I pressed the end of the jute yarn into the glue. It dries quickly so you can get busy wrapping/making your napkin ring right away.
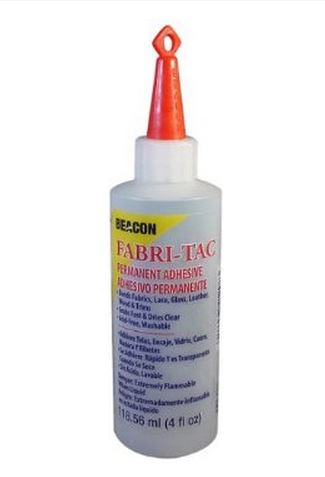
7-11-13 Update: I just discovered a glue called Fabri-Tac that’s known as “the glue gun in a bottle.” If you don’t want to fiddle with a hot glue gun, this glue is amazing. When you use it, it dries very quickly so it should be great for making these starfish napkin rings.
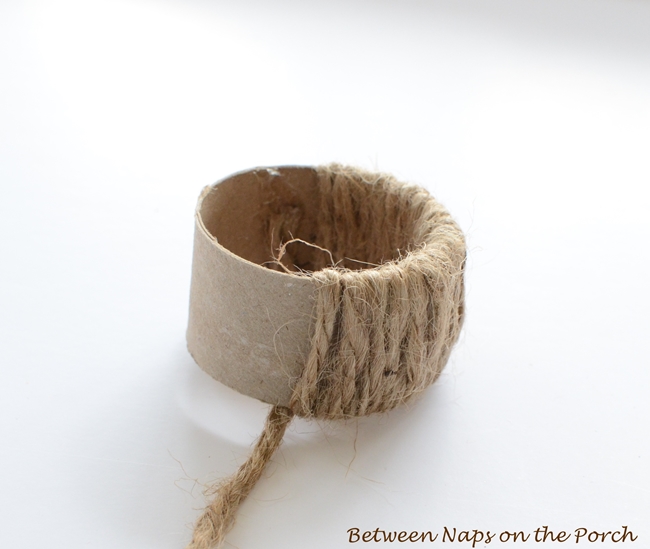
Step 3: Start wrapping the jute yarn around and around your ring, squishing each loop against the last loop so there won’t be any big gaps where the cardboard ring will end up showing through.
Tip: Since the yarn was sooo long (120 inches) I cut it in half and wrapped the first half of yarn around the ring, glued the end down, then repeated this for the other half of the yarn. You are doing all of your gluing inside the ring where it won’t show. I didn’t use big drops of hot glue, since I didn’t want the napkin to get hung up on a bulge created by a big drop of glue inside the ring. It just takes a tiny bit of glue to do the job.
When I made the first ring I guessed how much yarn to use and ran out. So close and yet, so far. You should do fine if you cut your yarn around 120 inches long and your napkin rings are around the same size as mine. You’ll probably have some yarn left over each time if you cut the yarn 120 inches, but better to have some left over than run out so close to the end.
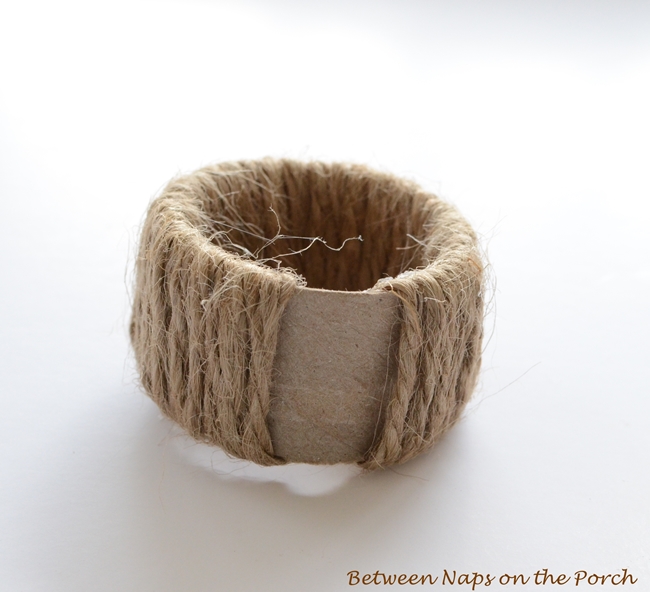
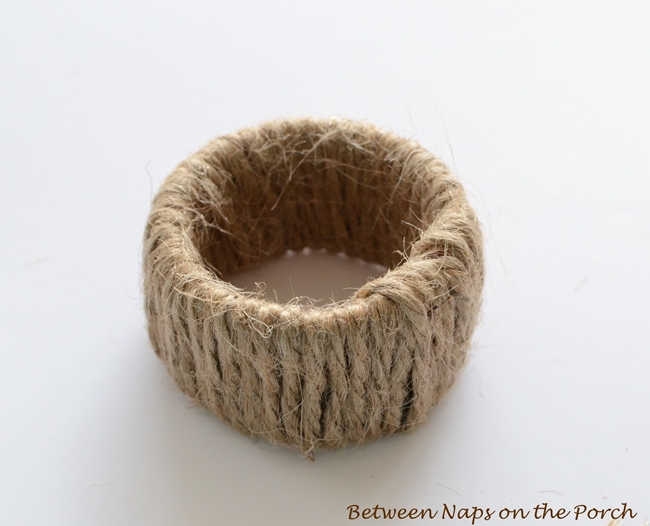
Here’s how it looked all wrapped up. If you have any little jute threads sticking out, just trim those off. Be careful that you don’t cut your wrapped yarn.
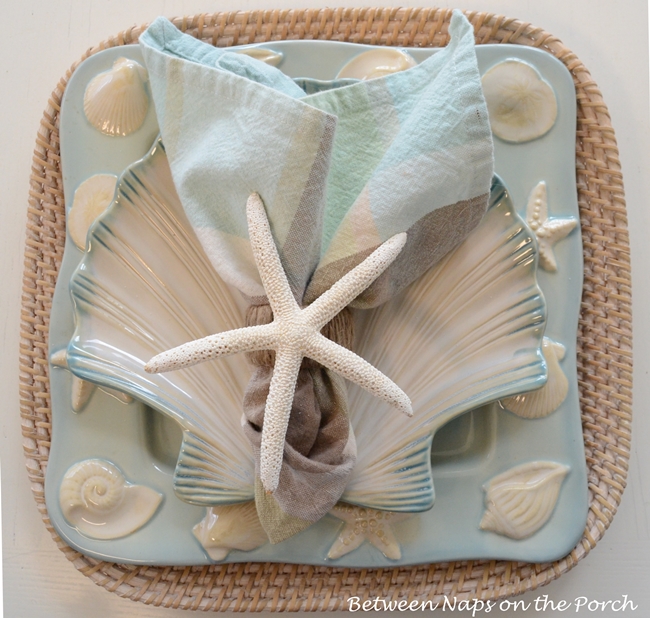
Step 4: Hotglue the starfish (or a shell, if you prefer) to the jute ring. Here’s how mine looked with a white starfish.
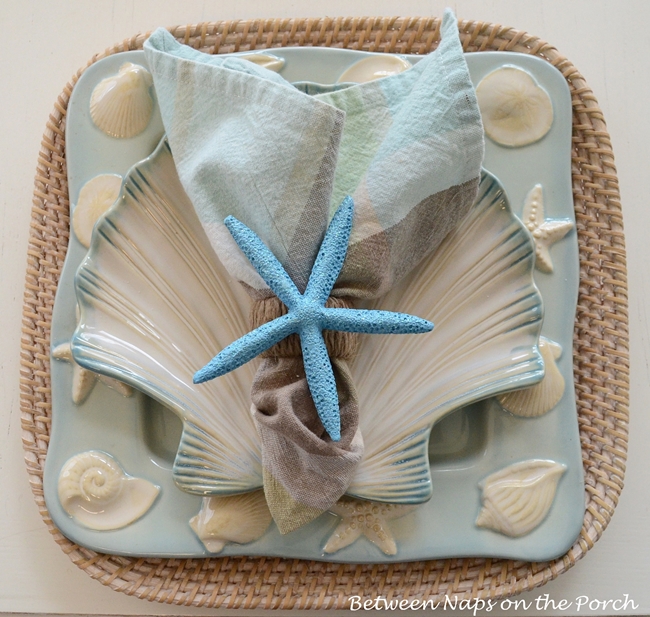
Here’s the look with a blue starfish.
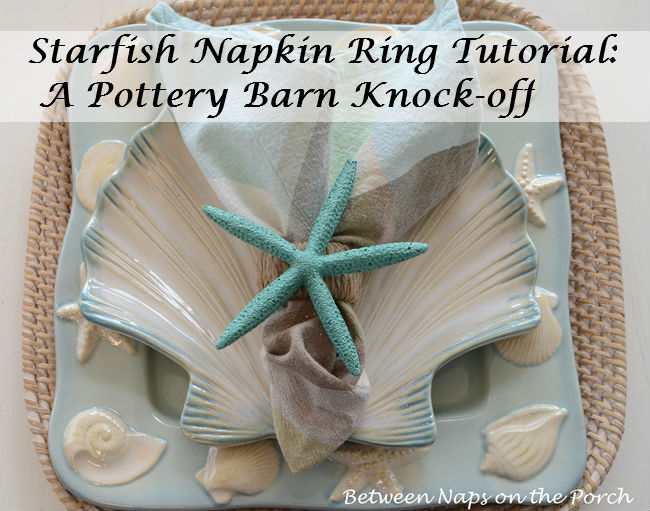
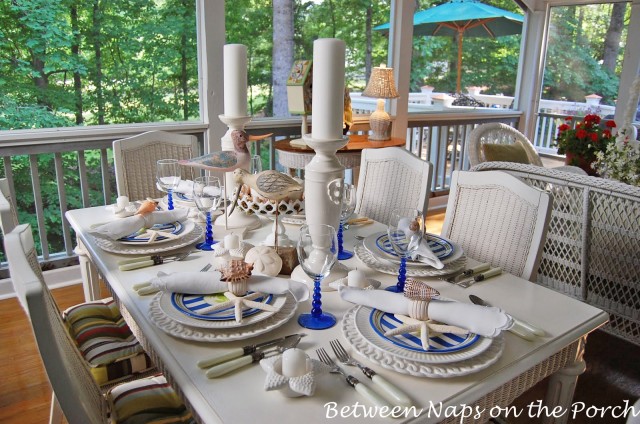
And here’s how it looks with an aqua-colored starfish. I’m not sure which color I like best; I really like them all. If you prefer the look of the Pottery Barn napkin ring with the red starfish, you could spray paint your starfish red or any color you like.
These napkin rings are super easy to make and you can completely change the design for any themed table setting by just changing up the item you choose to glue on top of the ring. Wrap the ring in red ribbon and glue on hearts for Valentine’s Day. Wrap in pastel-colored yarn or ribbon and attach bunnies or little eggs for Easter. The possibilities are truly endless!
To view another DIY beach-themed napkin ring, check out this beachy table setting: A Beach Escape Table Setting
Looking forward to the Before and Afters linked for this Metamorphosis Monday!
Metamorphosis Monday:
If you are participating in Metamorphosis Monday you will need to link up the “permalink” to your MM post and not your general blog address. To get your permalink, click on your post name, then just copy and paste the address that shows up in the address bar at the top of your blog, into the “url” box for InLinkz.
In order to link up, you’ll need to include a link in your MM post back to the party so the other participants will have an opportunity to receive visits from your wonderful blog readers.
Please observe these few rules:
Only link up Before and After posts that are home, gardening, crafting, painting, sewing, cooking, DIY related.
Do not link up if you’re doing so to promote a website or product.
Do not link up a post that was just linked last week since a lot of readers will have already seen that post.
Do not type in ALL CAPS. It spreads the links waaaay out.
Let’s try something fun today! Please visit the person who linked before you and after you…that way everyone will get some visits.




Hi Susan, thanks for always entertaining us with a great party on Monday! Horror of horrors, my post blew away a few minutes ago. Thank goodness, I had clicked save a few times. Take care!
Helen
That is not a good feeling, Helen. Glad you had it saved!
What a neat idea and you could put anything you like on the ring part! My grandchildren would love making these! A great teaching tool on reusing And being frugal and having a fabulous look in the process!!
Great idea, Sandi! Have fun making them with the grands!
What a FUN idea, Susan! You & I BOTH used cardboard paper towel holder rolls in our posts today. LOL
Your photos are absolutely GORGEOUS! Don’t know what you did differently this time, but they look wonderful. Must be that Southern sunshine! *wink*
Happy MM & thanks for hosting…I’m glad I have something to contribute this time.
fondly,
Rett
Thanks, Rett! The light on the porch helps but also I had something done recently to my camera that has helped a lot. I need to share that in a post in case it’s helpful for others. Thanks for the reminder. 🙂
I actually like your version better. Your colours are more “sea-like” according to me. I’m going to keep the idea in mind as, you mentionned it, the possibilities are endless!
Thanks a lot.
Thanks, Magali!
Love these…thanks!
And thanks so much for hosting!!!
Blessings,
Cindy
Hi Susan,
Thank you for sharing this great idea and also for hosting.
Carolyn
Thanks so much for hosting this great party!!
Hugs,
Debbie
Susan – this is BRILLIANT! We aren’t starfish people, but to use the toilet paper roll with the jute yarn… this is exactly the napkin ring holder I’ve been looking for. EASY AND FREE!!!! Thanks so much for the inspiration, and have a great day. ~ Holly
Thanks, Holly! You’ll have fun thinking of all the fun things you can add to your napkin ring. I kind of like it with just the jute, too.
You know, I absolutely will. I have lots of fun linens, but only 2 sets of napkin rings and I struggle at the creative/crafty/DIY so this will be fun to see where I can take it. The other day I was working on something in the house and actually found myself saying… now what would Susan do to make this beautiful. You really are a great inspiration, and especially with your parties. ~ Holly
Love your napkin rings! Thanks so much for hosting! Life to the full, Melissa
Thanks so much, Melissa!
This starfish napkin ring is gorgeous, I want to try and make some for my table, it looks so beautiful! xxx
Thanks, Gwen! ♥
Susan…I have not seen those napkin rings at Pottery Barn yet, but I am definitely making these beauties!…Thanks so much for the wonderful idea and thanks for hosting!…Have a wonderful week!!
Thanks, Shirley! They are so easy. I’m thinking paper towel rolls may be an even easier route to go since they would be easy to hold and cut, if they aren’t too wide. 🙂
Those are so cute Susan! I recently did some knock off napkin rings with burlap and the burlap was a little awkward to glue on the card board, so I am loving this technique with wrapped twine. I made a shell charger last summer from you tutorial so now I will get busy on some napkin rings! Thanks SO much! Love the pale aqua color too.
Jenna, that’s so funny you should mention that. I bought some burlap fabric recently and I was thinking I might try that, too. I decided it was too bulky for the little rings, although they may make burlap fabric that’s a lot lighter weight and easier to deal with than the kind I had. I am so ready to pull those chargers back out. We’ll have fun using those this year, won’t we? 🙂
Ohmigoodness, that is simply gorgeous! Love the idea for the napkin rings too. Never thought of that!!
Thanks, Erin! ♥
Thanks so much for hosting, have a great week! Love the Star Fish Napkin-Ring tutorial…thanks for sharing!!
Thanks, Susan! I’m with you on the color of Pottery Barn’s starfishes, too. Yours are much prettier!
Thanks, Becky! I guess they were trying to match the napkins. 🙂
Love the napkin ring, Susan…so summery! Thanks for hosting!…hugs…Debbie
Susan,
Your napkin rings are darling! It always bothers me to throw away toilet paper and paper towel rolls, and you have found a perfect use for them! Thanks for hosting!
I know, I think that every time too…figure there must be something we can do with them. Thanks, Jane!
That is such a great idea and you make it look so easy! Thanks again for hosting and for all your lovely ideas!
Liz
Great tutorial – definitely want to try it ou! Many thanks for hosting, too! Jane
Thanks for the party and I love those napkin rings! You would never guess they are made from a toilet paper roll! Might have to save a couple…
XO,
Christy
Thanks for hosting. Love the starfish napkin rings! Have a great week.
Blessings,
Nici
Your napkin ring tutorial is such a great idea and it looks gorgeous there with your place setting. Thanks for the party~~hope you’re having a happy day. This week’s Homemaking Linkup is live and ready for whatever you’ve got to share!
Blessings,
Mrs. Sarah Coller
Love it! Projects using what you already have on hand are the most rewarding. As always thanks for hosting such a great party.
Hi Susan! Oh, this is great! The napkin holders are easy to make and look so cute. Thanks for hosting your party and I hope you’re doing well and having some Springy weather.
Be a sweetie,
Shelia 🙂
Thanks, Shelia! Yes, we are…unfortunately had tornadoes today to go with it. Yuk.
Oh my! I love your version way better than the PB ones! The aqua colored is my favorite! Thanks for hosting the party!
Thanks Cristina!
These are fantastic! I still remember your beautiful seashell chargers but I think I’ll actually make the napkin rings. 🙂
Thank you for hosting.
Thank you for hosting! Little Bit from http://www.DecorateWithaLittleBit.com
Thank you so much for hosting Susan! What cute napkin ring holders! LOVE this idea!
Anne
You are SO clever! This is a “grandkiddo’s and Nana” project for certain! Thanks! franki
Those starfish napkin rings are so adorable, Susan! Thanks so much for hosting!
Those are so pretty Susan. Thanks for the tutorial…Christine
Susan you sure are a no end entertainer, as you always come up with such fabulous posts for us to get inspired and to learn so much..like in this one. Thank you for sharing this great sea side table, loving all the dishes and the napkin ring tutorial..great!! Have a lovely week.
FABBY
Aww, thanks Fabby! Hope your week is awesome!
This such a cute idea, and I like your’s better than PB’s. Thanks for letting me participate today.
Susan,
I love this project and your beautiful plates. You just can’t beat a good ole’ fashioned t-paper roll can you? I use them to create some Christmas napkin rings and no one ever knew. LOL Thanks for letting me share my project. xxoo
Barb, way to go! 🙂
I love your blue starfish napkin rings – I think I might be making some of these for summer!
Thanks
Rhonda
Those turned out so pretty, and your tutorial was great! laurie
I love this idea. And I think I will be trying it later in the season. First I must do some beach-combing. I have many tiny sand dollars, but they break easily. I may be able to find enough similar shells. And I’ll look at Big Lots for starfish the next time I am there. I like setting a seaside theme tablescape on my back screened-in porch, but it will be awhile before it is warm enough to use that space.
Great knock off! Who would have thought a toilet paper roll could work for a napkin ring.
Thanks so much for hosting!
KC
I know…surprising how strong they are!
I just found your party. Thanks for hosting. I love the starfish napkin rings.
Have a great week,
Bev
Thanks, Bev! Welcome! Glad you’re joining in!
How cute are those! You did a great job- love it!
Thanks, Liz!
Susan,
THanks for sharing those are so cute, and will go perfect with the Sanibel dishes I found at Big Lots weeks ago!
(went to Sanibel Island years ago and love it!!).
Have a super Monday!
Paula
IN.
Ooooh, I love Sanibel Island! Haven’t been there in 30 years! What do the dishes look like, Paula? You have me intrigued!
Wow, aren’t you a clever lady!! I love the photo with you taking a knife to the toilet paper roll! Love it!! You did a fantastic job!! And thanks for hosting this week 😉
Jamie ~ somuchbetterwithage.com
lol Seemed like a better idea than scissors. 🙂
I love this idea! Will have to add to my to-do list!! thanks for sharing. Cara – http://caralyndesigns.blogspot.com/
What a PERFECT copycat!!! Thanks so much for sharing…and hosting!
Susan,
I absolutely love those napkin rings. I will be definitely be making these. I certainly have all the fixings.
Thanks for hosting your parties for so long. You are a trooper.
~~~~~~~~~~
The tissue tubes reminds me of a joke I heard on Johnny Carson Show. Jimmy Dean (country singer, sausage maker) was on. It was the Christmas season and he was telling Johnny how desperately poor his family had been. He said the only thing they every got for Christmas was a doot de doo. Johnny asked Jimmy what that was. Ole Jimmy pulled a toilet paper tube out of his coat, held it up to his mouth and said,
“doot de doo”. We nearly rolled off the bed laughing. Ever since, that phrase has been used in our family anytime we could make it fit.
That is funny! I used to love his show, he always made me laugh. Great memory! 🙂
Great napkin holders! Thanks for sharing and hosting. Wishing you a pretty day. Toodles, Kathryn @TheDedicatedHouse
What a great little project! I really liked the pink starfish, all very festive. Thanks for hosting, Laura
I love the blue starfish, classy! (The red one reminds me of Spongebob’s buddy, Patrick! hehe!) So genius to use the tubes and cover! Love it! Thank you for sharing!
HA! Too funny! I didn’t like the red, either. Thanks Gloria for making me laugh! 🙂
Hi Susan,
I LoVe your creative napkin ring, so charming and inventive!
Thank you for hosting all the creative ideas, it’s always a pleasure to view the shared inspiration!
I love that you made the napkin rings out of TP roll! As a previous commenter mentioned, they are referred to as “doot de doos” in our house and usually transformed into trumpets! Very cute {and resourceful} craft! Thanks for hosting. 🙂
Funny! I never heard that until today. 🙂
That’s such a cute idea. Thanks for hosting the party again this week.
Susan, I love these napkin rings. Leave it up to you to spot something and create your own. May have to try these myself. Susan @ throughmyporchwindow.com
Thanks, Susan!
Really cute! We live on the coast of NC so starfish are really easy to find. I use them in my crafting and decorating all the time. I am not crazy about PB’s red either. Love the colors you chose. Too cute 🙂
Thanks, Lisa!
So cute! Love the napkin rings, and “Thanks” for the tutorial!
What a pretty table setting! I would feel so special being invited to a party like that. Everything from the jute charger all the way up to the napkin looks so nice. (Love those shell shaped plates!) Fun project and a great look. Thanks, Susan.
Oh Susan…those are fantastic! I think I could actually do this one! Thanks….now I just have to find some starfish or shells! 😉
Donnamae, you definitely can. It was super easy!
Your knock-off is amazing!! I love it. Thank you so much for hosting each week. Have a wonderful evening. 🙂
love the starfish napkin holders, they look beautiful and i love that you can make them so cheaply!
Thanks!
omg…Susan!! You are awesome! My husband and I just spent four days landscaping around our brand new pool in Texas Hill Country trying to make it feel like the beach. I made a dozen red and white napkins from the old traditional red and white checked tablecloth material and wanted to find a really quick simple napkin ring to go with them and here you are, fantastic! I am from Myrtle Beach and this just brings me closer to home and you know I have a ton of shells that I can use…I especially love the Olive shell which I have hundreds of…thank you thank you thank you!!! Pamie G.
Oh, Pamie…you are going to enjoy that pool this summer! I’m so jealous! Glad the napkin ring tutorial came at the perfect time. 🙂
LOVE your napkin rings (I really have a thing for starfish…. They are so amazing!……)
hugs x
Crystelle
Thank you so much for hosting Susan, your starfish napkin rings are wonderful!
xo, Tanya
Hi Susan – I can’t believe of all days, today is the day you post these napkin rings. A co worker is getting married this August, we just decided to make her theme starfish/shells — and I was searching for starfish napkin rings — wow! We will be making 300 starfish napkin rings now!!! They are beautiful!
Wow! That’s a bunch of napkin rings! You could use ribbon or jute or anything you like to wrap them. You may want to test to see if paper towel rolls work better. The tissue paper rolls I was using were good and sturdy, so they worked great, but just mentioning that in case it’s helpful. You could probably get a lot more napkin rings out of the paper towel rolls, too…if the hole isn’t too wide to use for napkin rings. Bonnie, when you get them done, please take a pic and share. I’d love to see what 300 starfish napkin rings looks like! 🙂 I’d love to see pics of the tables, too! (Hint, Hint) 🙂
Bonnie, In case you’re interested, you’ll find some additional beach themed/shell themed ideas on this page: https://betweennapsontheporch.net/beach-themed/
Thank you! I will check out the other ideas too. I will post pics in August.
Awesome…let me know so I don’t miss it. 🙂
I try not to even tease myself with stuff from Pottery Barn, but occasionally I’ll peak! I saw those napkin rings and thought they were really cute, but I really like yours MUCH better! Love the colors!! Gonna pass this along to my bestie, she’s gonna die when she sees this lol.
That is really cool, Susan; what a great idea! I love how you can really change it up or any of your needs or holidays! A really clever, crafty project that is very versatile! Love it!!! Thanks for sharing this wonderful idea!
Excellent job Susan! You’re so clevA. ☺ Thanks for sharing the idea. -Brenda-
Hello Susan,
5-15-15 This is so much fun!! I’ve made 3 already and now on to the 4th one. Mine are requiring about 235″ of jute, I believe my jute is narrower than yours. So after I measure and cut, I roll up the jute in a tiny ball and pass it back and forth through the tube as I go around using a small dot of hot glue on the inside as you mentioned. Instead of the star fish for the decoration, I am using some smooth colored beach glass and tiny fresh water shells that look like miniature Diary Queens. Can’t wait to use them at our beach picnic this summer! Thank you!
Cyndi, those sound sooo cute! lol at miniature Dairy Queens. I’m trying to picture that. :)I LOVE sea glass! Take a picture of them and email it to me if you get a chance, I’d love to see them! [email protected]
Oh, and in case you missed it, here’s a spring/Easter version: https://betweennapsontheporch.net/diy-pottery-barn-burlap-bunny-ear-napkin-rings-for-your-spring-table/
🙂
I actually made this for my daughter’s wedding in October of 2015, before I had seen this post. I made 150 of them and used different shells, including starfish. People were able to take them home as part of the favors on the tables. I have had people ask if I would make some for them to use on there tables.
They were sooooo easy to make. It was so fun to see this post.
Thank you
This is so adorable! These napkin rings turned out amazing, Susan! I love the napkin rings that you have added!! So clever!
Thanks, Rebekah! XX
Nice job Susan!
Your work is amazing, love it.