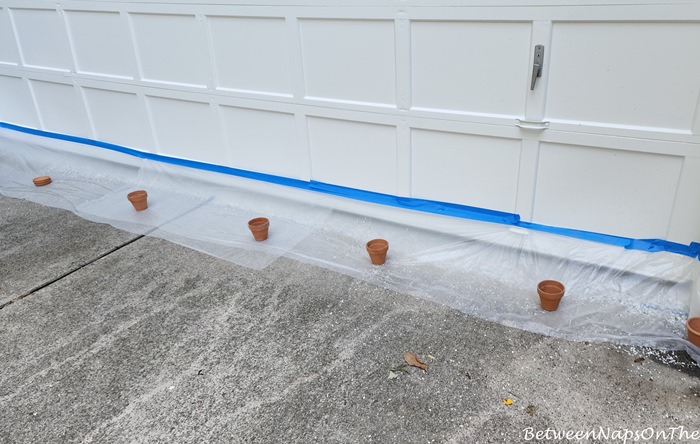
In yesterday’s post, I shared the first day’s process of having a new floor installed here in my garage. You may remember we ended here with the garage door left a few inches open to prevent the door from damaging the newly installed floor. The flooring was left to dry and set up overnight during which time the colorful flakes that had been broadcast out over the floor, would have time to meld with the epoxy base.
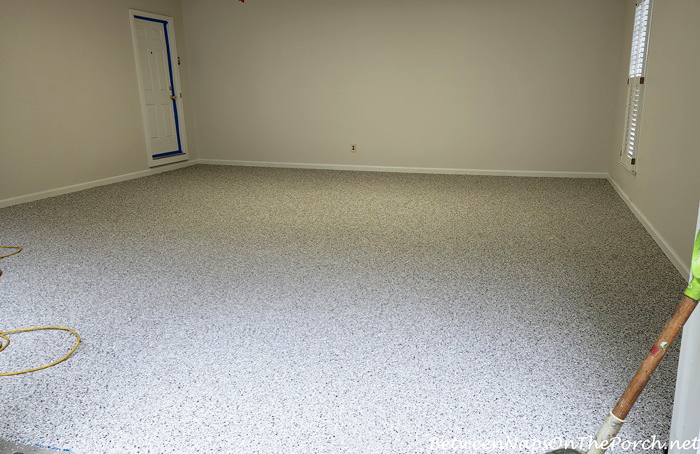
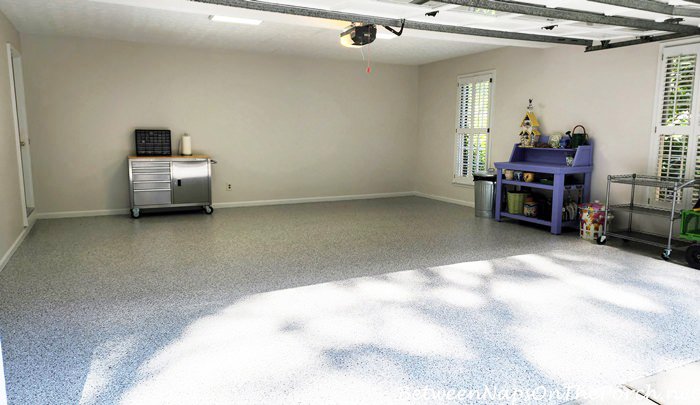
This is how the garage looked when the door was raised the following day.
The next step in the installation process involved removing all the excess color flakes. From yesterday’s post, you may recall that the flakes are hand-broadcast out to the point of rejection, meaning they are heavily applied to the point where the floor is completely saturated/over-saturated with the color flakes to make sure that no area or spot is missed. On Day 2, the Granite Garage guys used a blower and a flat, scraper-looking device to gather up all the excess color flakes.

This excess top layer of flakes that never attached to the epoxy base was blown over to a corner where they were boxed back up to be re-used.
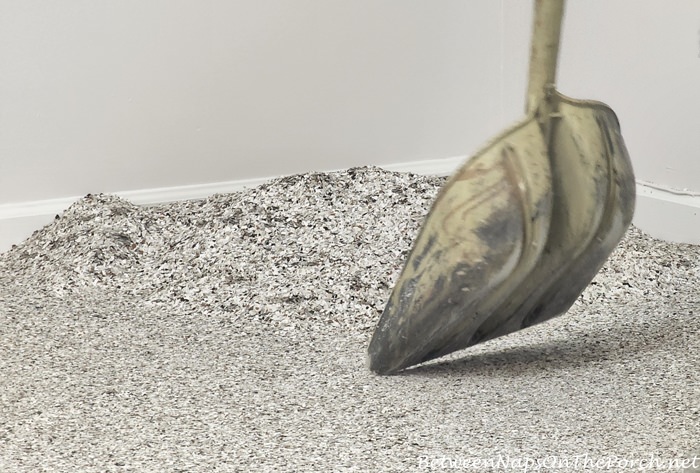
Next, the guys walked over the floor repeatedly scrapping the surface to make sure all the loose flakes were removed.
I snapped this photo as the guys worked. I loved the color!

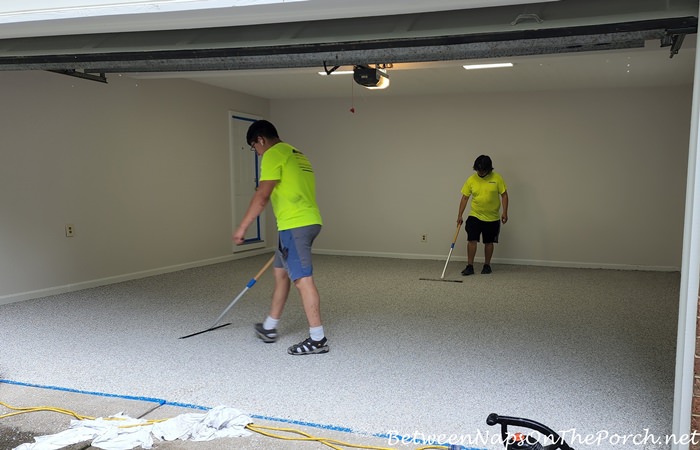
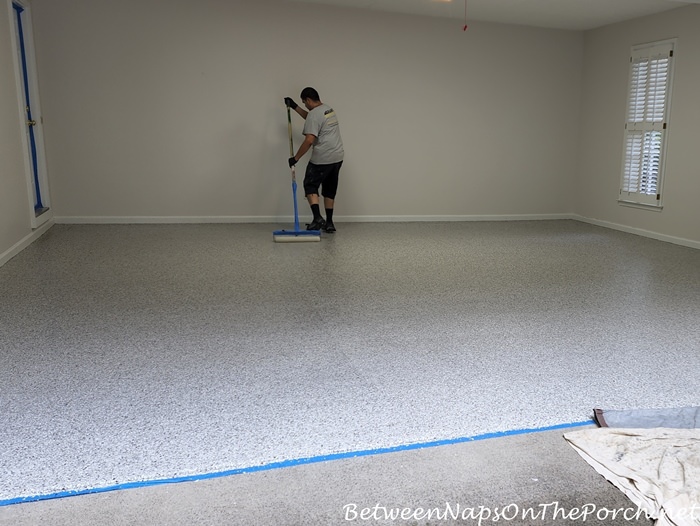
The next step was to apply the sealant which I think is a polyaspartic, industrial-type coating. This coating leaves a super durable surface that is supposed to be chemical resistant and easy to clean. The guys started by cutting in around the baseboards with the sealant.

Here’s how Granite Garage describes this process.
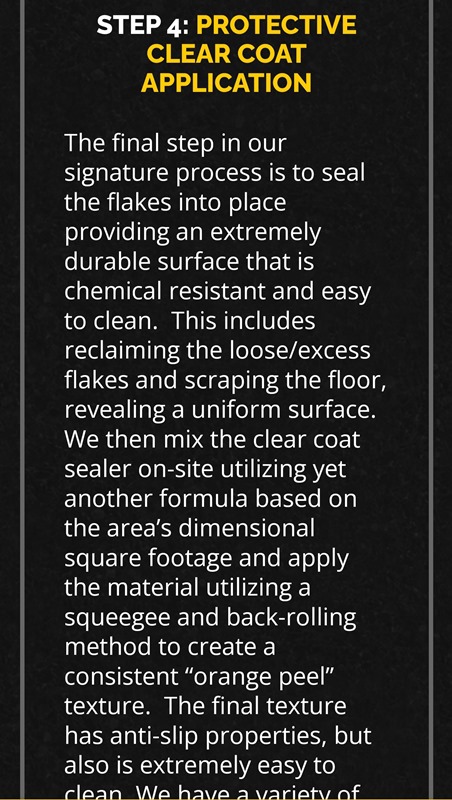
Next, the sealant was poured out onto the floor where it was then spread out over the whole floor.
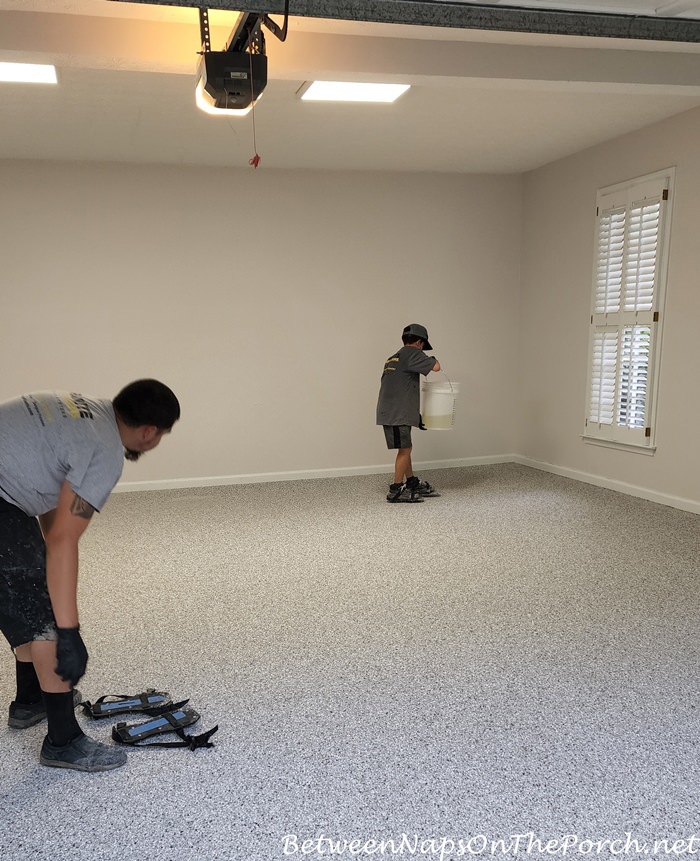
They went over and over and over the floor many, many times in all directions, ensuring the entire floor was completely sealed. Afterward, you’re not supposed to walk on the floor for 24 hours. After 24 hours, I was able to walk on the floor and move some lighter items back into the garage. They recommend waiting an extra day before moving in heavier objects and another 3-5 days before bringing a car back into the garage.
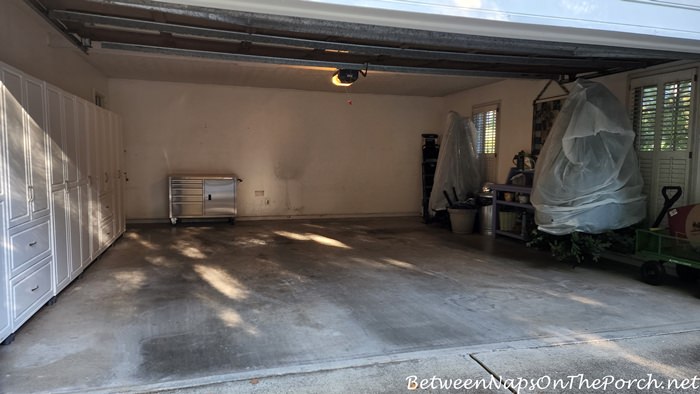
In case you missed the “reveal” post a few days ago, the garage went from looking like this…
…to this!
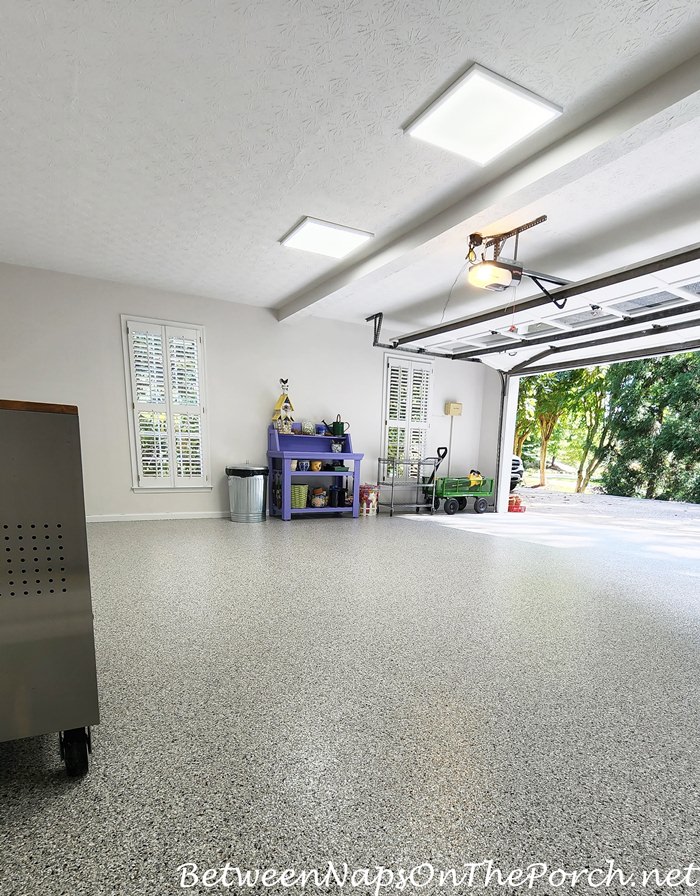
After clearing out the things I no longer wanted to have stored here, the garage received new overhead lighting, new paint for the walls, trim, ceiling, and garage door, and finally, new flooring. I’ve wanted to do this for so many years, so was thrilled to finally see it complete.
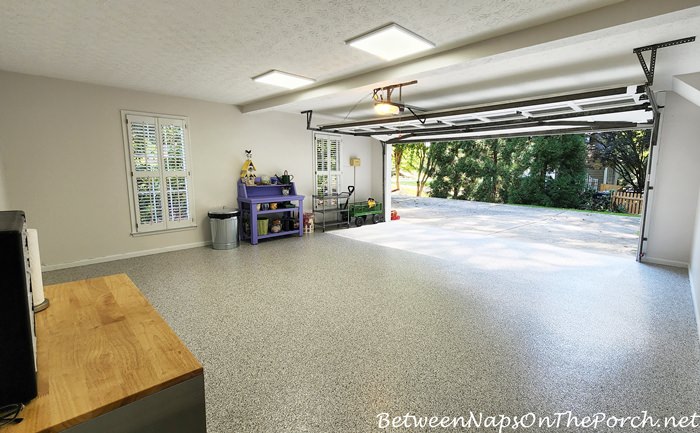
It turned out better than I ever expected or could have imagined. I love the lighting and the paint job was a definite need, but for me, the flooring is the star of this makeover. I’m so glad I decided to do that part because it really is the best part of this renovation. I’ve had several questions concerning if the floor is now slippery, especially when wet. The answer is no, not that I’ve detected. It has a lot of texture due to the flakes that were added to the epoxy base.
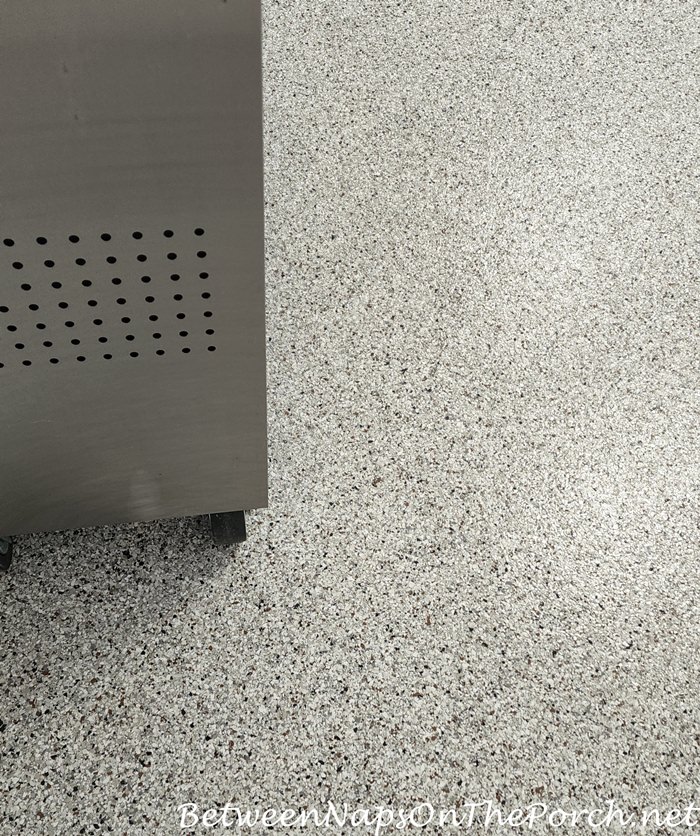
I asked the Granite Garage guys about this during the installation process and they said that if a customer insists on more layers of the sealant, a waiver has to be signed. So it appears that repeated layers of the sealant could be an issue, I guess it reduces the texture of the floor with each added layer. I’ve tested it wearing wet sandals and it did great! I’ll have to see how it feels underfoot when I’m wearing leather-soled shoes.
Many years ago, a friend gave me some L.L. Bean slippers that were all soft leather, including the bottom. They were sorta like moccasins in that respect…remember the moccasins we wore and loved in the 70s? Anyway, I stepped out the door onto my concrete garage floor after having previously walked on a wet deck, and my feet flew out from under me. Again, that was on a concrete garage floor. So beware of ever wearing wet mocassins on any flooring! I’m not sure L.L. Bean even makes those now. All their current slippers appear to have a rubber (or some type) sole.
I hope you found yesterday’s and today’s post helpful if you’ve been considering upgrading your garage flooring. I chose Granite Garage for my flooring because of their warranty, history here in the Atlanta area, and online reviews. Just in case anyone is wondering, I didn’t receive any discounts and I paid in full for my flooring, just as any customer would. I asked Granite Garage if it would be okay if I took photos and shared the process with you guys and they said, “Of course, they would be happy for me to do that.” I’m very happy with the results and I love knowing that if I accidentally damage my floor in the future, or some other issue pops up, they will be here to take care of it.
Happy Weekend! For Metamorphosis Monday, I’ll be sharing a small addition I added to the garage this weekend as I took a break from hanging cabinet doors to let my body recover. See you tomorrow for Met Monday!


Beautiful!
Thanks so much, Rita!
I truly have “garage envy” now! 🙂 So very beautiful.
Thanks, Sharon! It really turned out better than I ever imagined!
Looks great! I knew you would love it. A few years ago we had to repair broken pipes under our driveway. Since we had to get a whole new driveway we had the cement tinted dark gray, it looks so nice with the garage floor. HaHa, one thing always leads to another.
Thanks, Jillian! You are so right, it’s the “If you give a mouse a cookie” syndrome! Ha! I would love to completely redo it with a whole new surface of some type, but bathrooms are next on the agenda.
This was so interesting to see done Susan, I’m so glad you shared it with us. I love the look of the floor too, so pretty! It definitely steals the show with this little “remodel”, but the paint and lightening look great too…it all came together and gave you a beautiful garage that looks like a room inside the house. I love how you kept it clean and simple with what you have put back. The cupboards look so nice and I can’t wait to see the other ones placed in. You will have and have had the best organized dishware of anyone! I love it! Hugs, Brenda
lol Well, definitely of anyone storing it in a garage! 😉 Ha, ha.
Thanks, Brenda!
XXX
Wow what a transformation to clean, bright and beautiful. Thanks for sharing with us.
Thanks so much, Esther!
XXX
Can you give us an approximate cost of this flooring for your garage? I’ve thought of diy-ing it, but from your photos, it looks like it requires more experience and skill than you could get as a first timer, not even counting the machine rental and equipment needed for a one-time project…
When I was shopping in HomeDepot a few weeks back for lighting, the HD sales guy was telling me about a painter he hired once who also did his garage flooring. It was a disaster and peeled up the first time he drove in on it. I’ve read so many horror stories online like that, it’s one project I would be very reluctant to DIY. It was just under $3,000 and after seeing all the work that goes into it, I think it’s worth it to have it professionally done by a company that does nothing but that. I wouldn’t trust a painter or someone like that to do it.
Imagine…I would never imagined such a transformation…really COOL!!! franki
Thanks, Franki!
XXX
It looks great! So happy for you to have a new garage! Sad for me because I don’t! Hahaha
Well, I hope you get your garage makeover, Mary. This one was def a long time coming. Now I need to do the bathrooms. Ugh. I know you are so happy to have those done and behind you!
XXX
Your garage looks fantastic, enjoy it in the best of health.
Thanks so much, Dennis!
Would you mind sharing the approximate cost for the floor? It is so transformative!!Beautiful!!
Thanks, DBB! It was just under $3,000.
Curious what the square footage is of your garage.
I think it’s 22 ft x 22 ft., so 484 sq ft.