Imagine that you regularly visit a gym for a full workout, but for some reason, you don’t go for 3 months. After a 3-month break, you go back, but instead of starting back slowly, you dive full-in doing your old routine as if you’ve never missed a day. That’s how I feel today, every muscle in my body feels like it’s had a full workout to the max! I don’t think there’s a single muscle that’s not feeling the effects of moving all the cabinets back out to the garage.
Thankfully, I had someone help me, but honestly, I think I could have done it alone once I discovered how much lighter the cabinets are with the doors removed. The doors are definitely the heaviest part of these storage cabinets. So if you ever have to move one, keep that in mind and remove those doors first! Then you could lay the unit down on its side on a blanket (or leave it standing up) and drag it where you want it. That’s the way I normally move big pieces.

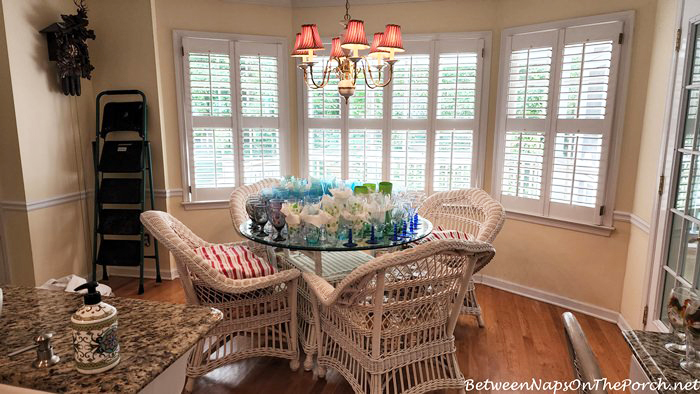
So here’s how the breakfast room looks right now, still not fully back to normal, but much better. The table and chairs are still full of glasses and they will have to stay that way for a bit since the cabinet they will be going in will be against a wall that’s awaiting final touch-ups from the painting company. I really want to get those reshelved but I also want the touch-up work done. Hopefully, it won’t be too much longer. In the meantime, I have plenty to keep me busy!
This is how far along the cabinets are at present. I squared them up and leveled them the best I could last night. It’s like moving around 80 lb puzzle pieces! Actually, I have no idea how much they weigh minus the doors, but to these tired arms, they felt pretty dang heavy!
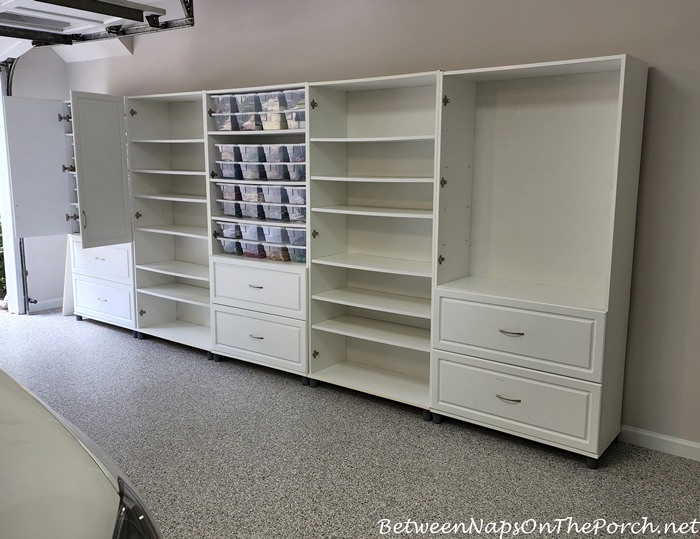
I couldn’t wait to implement one of the changes I had planned which was separating out the flatware and napkin rings into two separate cabinets. I was able to spread out all the napkin rings to their own boxes instead of having 3-4 sets all crammed into one storage container. I’ll share more about all that in a future post in case it’s helpful. Many of the storage boxes are almost empty, so there’s plenty of room for future napkin rings or flatware in the years to come.

Day 1 of my Granite Garage Floor Installation
Today, I thought I’d share Day 1 of the garage flooring installation. I had planned to share the entire process all in one post, but there are a lot of steps so thought it would be easier to see/read about it over two separate posts, just as it happened in real life over two different days. Granite Garage outlines its process in detail at their website, so if you have additional questions, you can get the nitty-gritty specifics there.
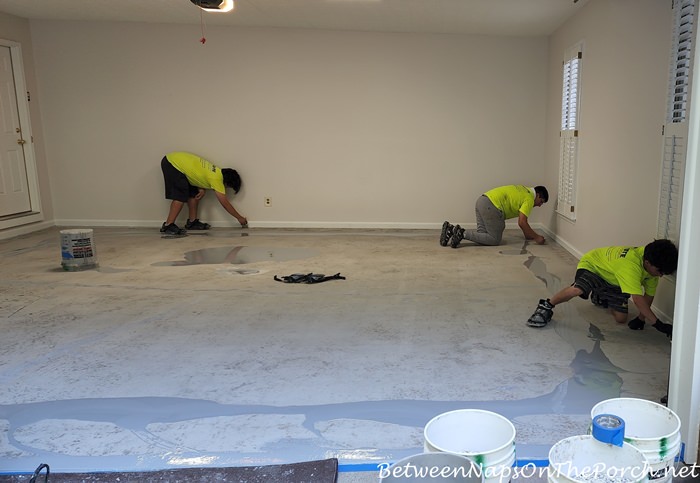
To start, the GG guys used diamond floor grinders to prepare the surface of the garage floor to “ensure maximum adhesion” of their coating system. Preparing the flooring is a super important step in this process. The machines have industrial filters so there’s little to no dust during this process. I didn’t notice any at all. This step also helps remove oil stains or any other stains that could affect the installation and helps the products they use create a strong bond with the flooring.

Then they gave the floor a good vacuuming to make sure it was ready for the next step.

Once the vacuuming was done, they repair/fill any little “cracks, fissures or spalling concrete.” They also start cutting in around the baseboards with the epoxy that goes down next.
Here’s an excerpt from their website explaining that process.

I was inside and missed the next step, but here’s a photo from Granite Garage’s website showing how they apply the primer and base coat as the next step in the application process. The products they use are low VOC and LEED compliant and are created specifically for Granite Garage Floors. They mix up the material on-site based on the square footage they will be covering.

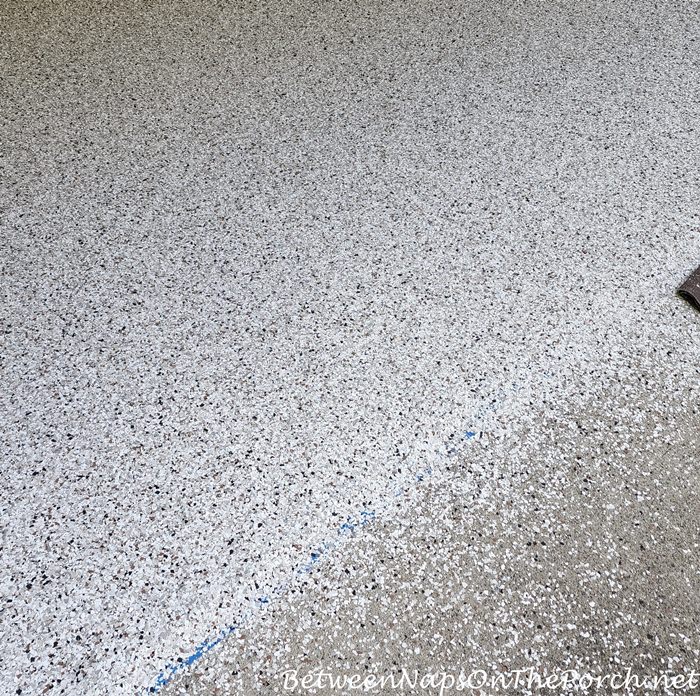
Next came my favorite part, the spreading of the colorful flakes. I came back outside just as they were finishing this step. They wear these funny-looking shoes that are kinda like cleats and throw out the flakes to the point of “rejection” which means there won’t be any part of the floor that doesn’t get completely covered.

I’ve had several people ask where they stop the flooring at the edge of the garage. The concrete part of the garage actually extends out 3-4 inches beyond where the garage door closes down. I guess it’s that way with all garages. Granite Garage covers that entire area and the flooring stops where there is a natural break in the concrete and where the garage attaches to the driveway. So when my garage door goes down, it actually lands a few inches back from the blue tape seen in the photo below. I love how it looks with the pretty flooring peeking out a few inches on the outside of the garage.
After the flakes that fell onto the driveway are swept and vacuumed up, the garage door was left a couple of inches up so it wouldn’t damage the newly installed flooring. They covered up the section of the garage floor that extends out beyond the garage door so it would be protected in case it rained–and it did. We’ve been getting rain almost every day here. The grass, trees, and flowers are loving it!

I’ll share Day 2 and the final process in an upcoming post–hopefully, tomorrow. I’m going to now take my achy, sore self to Home Depot to buy more of the thicker shelving for the two new cabinets I’m adding to the garage. Or, maybe I’ll just rest for a bit. Even walking sounds exhausting right now. lol


I’m impressed your plastic storage boxes are all alike! Is there a particular brand you find works best? Some seem more flimsy but you are the expert on things like this!
I needed more since I was spreading things out. Four years ago I purchased them from HomeDepot, then later bought a few more from Amazon. A month or so ago, I found the exact same ones again on Amazon and ordered them and the ones that arrived were not at all the same. I returned them and found another seller with them on Amazon and ordered again. Again, they sent completely different boxes than what was shown in the ad. I think the same seller must have multiple accounts on there and when you order, they just send whatever they feel like or whatever they have on hand. After returning all those, I started searching again and finally found them at Target here: Storage Boxes .
I noticed the price has gone up a good bit. I paid $58.99 for 24 on July 9th and now they are $73.99.
When I very first purchased them around 4 years ago, they were $1 each at HomeDepot. The next time I bought them at Home Depot, they were $1.99 each. So what would have cost $48 a couple of years back, is $74 now. Arggh!
I am also impressed with these storage boxes. I must have missed the sizes of them in your past post. What size are they?
They are 6-quart size. I purchased them here: Storage Boxes. Sometimes Home Depot has them but I would not order them from Amazon because when I did they, the seller kept sending the wrong the style and size.
Oh, meant to add, I really like these because they are fairly sturdy and stack easily. They easily hold a whole set of flatware and I like the white lids with my white cabinets.
Thank you! I am ordering them now lol
Susan,
Are you cabinets screwed to the wall or at least to each other to prevent tipping? I might just be missing that in the pictures but it appears you have some top heavy cabinets and it is very dangerous to not attach them for stability.
They were, I always do that. I haven’t attached them yet because I’m still shifting things around, but I had the painter leave the original holes in the wall so I don’t have to find the studs again. Do you like them Betty?
Betty, you may have missed this post, but you can see how they are attached here: https://betweennapsontheporch.net/storage-cabinets-for-the-home-garage-and-basement/
What a posh garage, lady! Once the touch-ups are complete, the rest is on your schedule. Are you thinking of doing something, like black vinyl molding, around the cabinet bases? Just to keep debris etc from collecting underneath.
Thanks, Mia! In the past, it was always easy to keep clean underneath with my leaf blower. The only cabinet that was harder to clean out under with the blower was the cabinet that was jammed right up against the wall beside the garage door. Since I only put 5 cabinets back, and not the 6 that were there before, I don’t have one
right beside the garage door wall this time, so it should stay clean underneath.
You may have posted where you purchased the cabinets but I missed it obviously. lol This garage looks beautiful. In our new house I may have to store food in one and put it in the garage since our kitchen will be miniscule! Cans, of course.
Thanks, Nita! I’ve purchased them from Amazon and Walmart. I just ordered another one and was thinking of ordering from Lowes, but Walmart actually had a better price and faster delivery. You can see it in three colors at Walmart here: https://bit.ly/3PgKgFy . I ordered it on the 11th and it’s supposed to arrive on Sunday, the 14th. Originally shipping was predicted a week out which was still very good. I’m amazed it’s supposed to arrive on Sunday.
The one with drawers is currently available on Amazon here: https://amzn.to/3QmjXis . I don’t think they have the one without drawers that’s currently available at Walmart. I’ve also seen these at the Lowe’s website, I think HomeDepot has had them, too.
I haven’t had the time to fully follow the story of your garage floor. Now that I see you had someone come out and do it, I am wondering who was the company that did your floor. Although I live in Alabama, I am wondering if you went through Home Depot or Lowe’s and had it done. I also love the cabinets. I started with things I had but need to replace a couple of cabinets with something more functional, so these links are great! Thank you for sharing!
I used Granite Garage. I think they first started here in Atlanta but I’m pretty sure they have locations in other states, too. Thanks, Martha! Here’s a post I wrote sharing the “Before and After” in case you want to see that: https://betweennapsontheporch.net/full-garage-makeover-with-new-lighting-new-paint-and-new-flooring/
I love the picture where they’re throwing the flakes! I love how to got the flakes in mid air (lol). Looking gorgeous (and very practical too) 🙂
I guess too you are tired! I love how the cabinets are looking on that new floor and against the new paint job. Looks like room inside the house! Very interesting watching the first part of the flooring being done. Love seeing the flakes being thrown. Sure makes a beautiful floor!! Rest Susan, you certainly deserve it! Hugs, Brenda