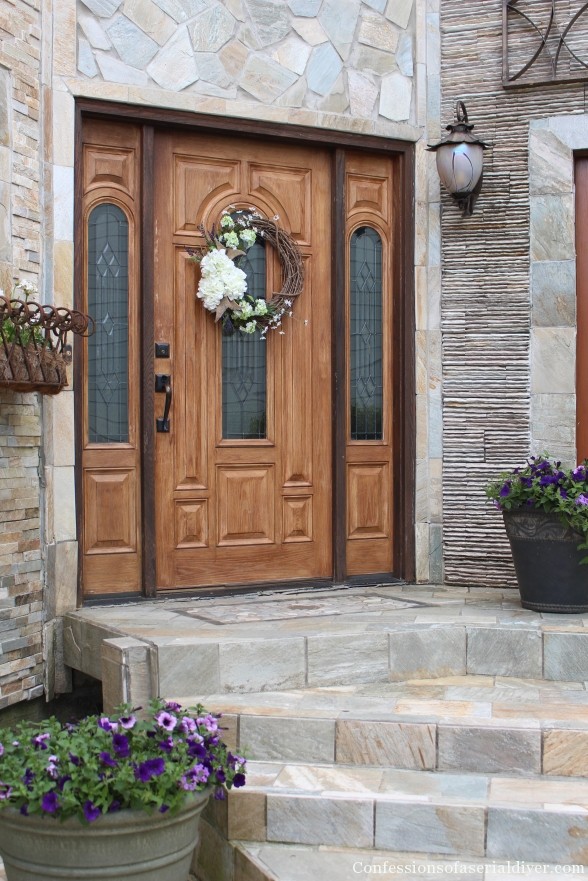
Have you decorated your front door for the spring season, yet? Shhh, don’t tell anyone but I haven’t either. I love what Christy did with her front door, though! It’s beautiful and I’m so glad she’s here today to show us how to dress up our door for spring.
Hi, I’m Christy and I am so thrilled (seriously, ya’ll) to be guest hosting at Between Naps on the Porch today! I have been following Susan’s beautiful blog for a long time and I am truly honored to get to spend time with some of the nicest readers anywhere!
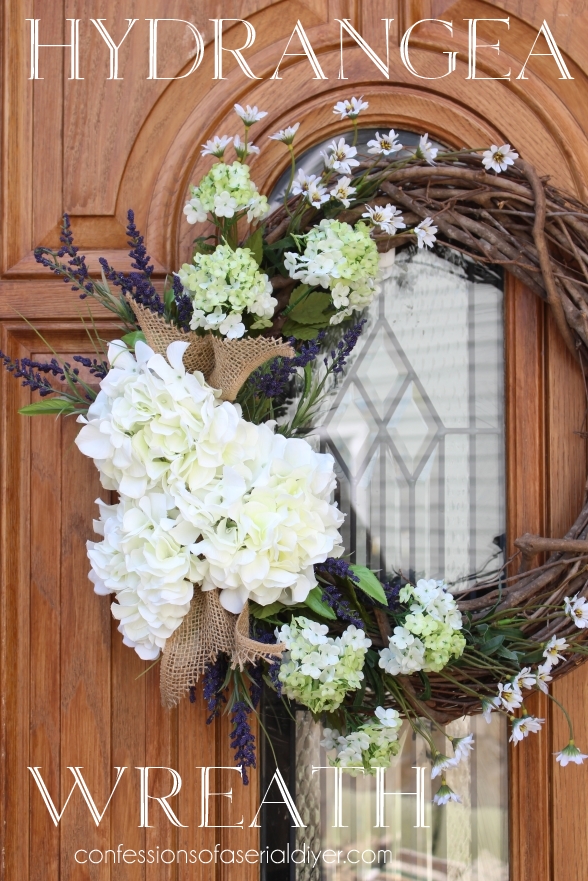
I blog at Confessions of a Serial Do-it-Yourselfer and as the name suggests, I move from one project to the next. Today I am sharing a hydrangea wreath that I made for my front door. I know some of us have hardly gotten to enjoy Spring, but Summer is just around the corner and I thought this would be perfect to carry me through until the Fall.

I needed something with some presence for my entryway and the Hydrangeas are perfect!
I’m going to quickly show you how easily this came together. Here are the supplies needed:

- Grapevine wreath
- Floral wire
- Wire cutters/Needle nose pliers
- Hot glue gun/ glue sticks
- Burlap ribbon
- Stems as seen below
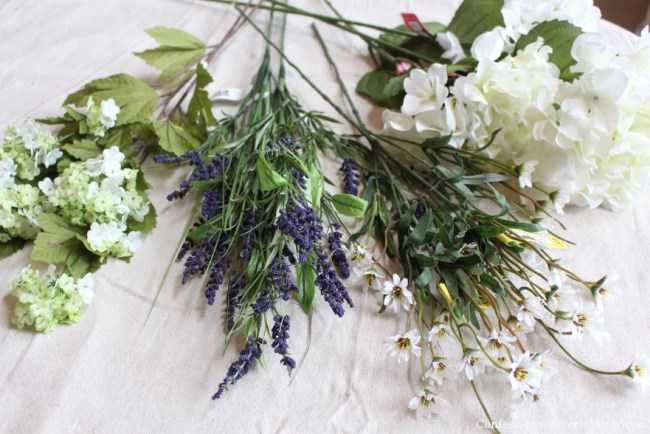
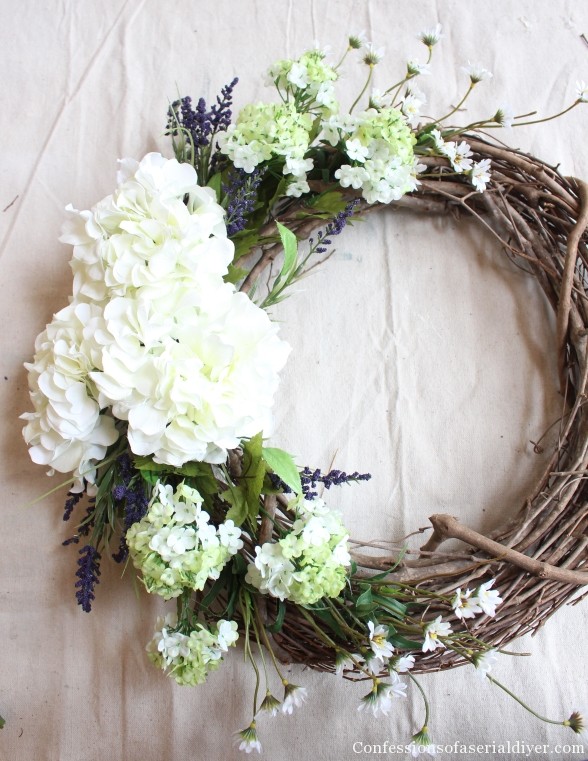
For my wreath, I knew I wanted Hydrangeas because they remind me of Summer. I chose the others because they remind me of wild flowers. All of my flowers came from Michaels. I used three large hydrangea stems from their Spring collection and two of each of the others from their everyday blooms.
I started by cutting the miniature daisy-like stems apart like so:

Then I added them to the grapevine wreath, using hot glue to secure in place.

I did the same with the smaller hydrangea blooms:

They were added next.

I also cut apart the purple stems.

Then I added those also.

I love seeing a wreath come together, layer after layer.
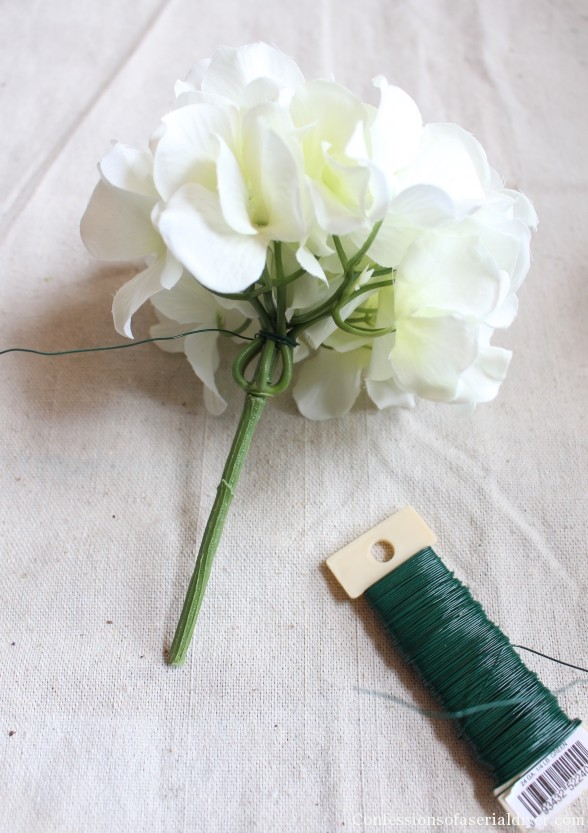
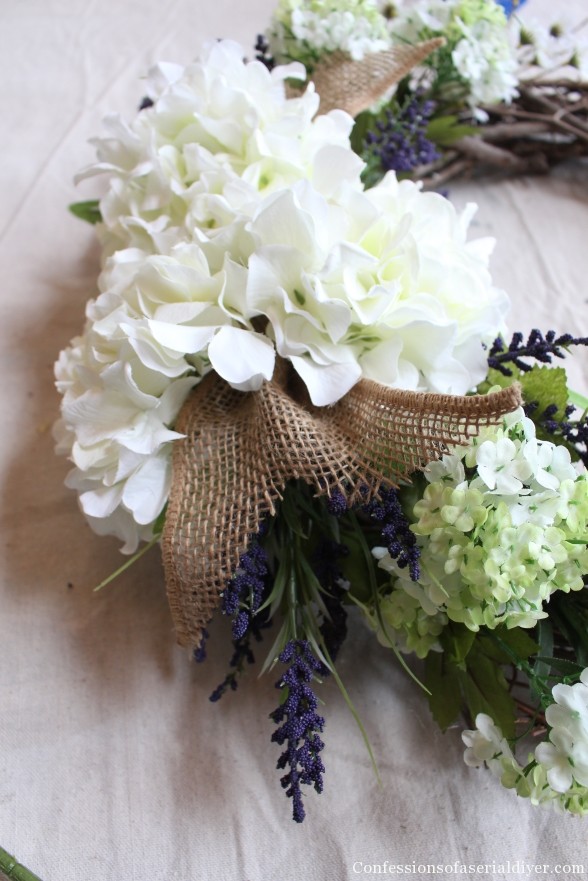
Finally I cut my large Hydrangeas down and because they were a bit large, I used floral wire to tighten them up a bit underneath like so:
Then I secured them in place. One…

Two…
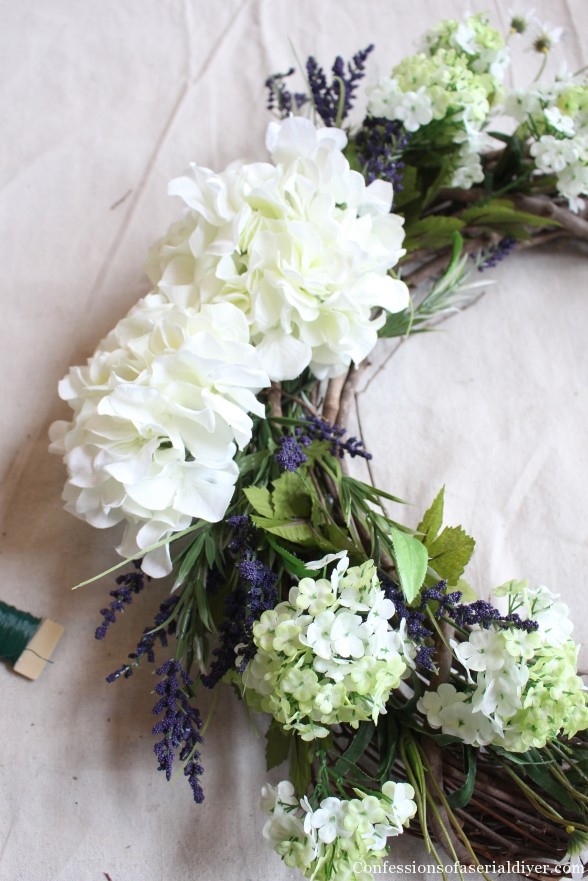
Three!
To give it a bit of texture, I also added burlap. I cut two pieces that looked like this:

Then I twisted the end, added a little hot glue, and tucked each in place on either side of the hydrangeas.
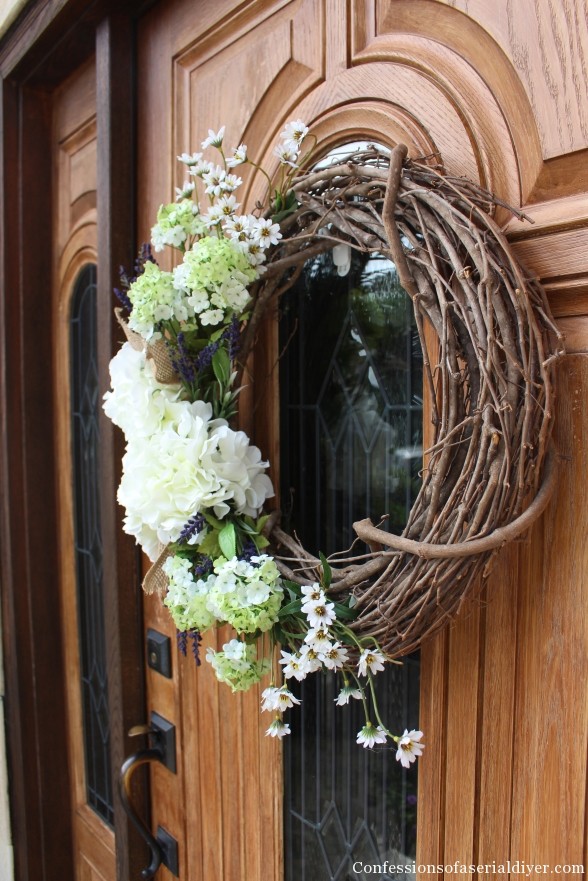
A piece of wire was added as a hanger and it was ready to go, just in time for Easter Sunday!
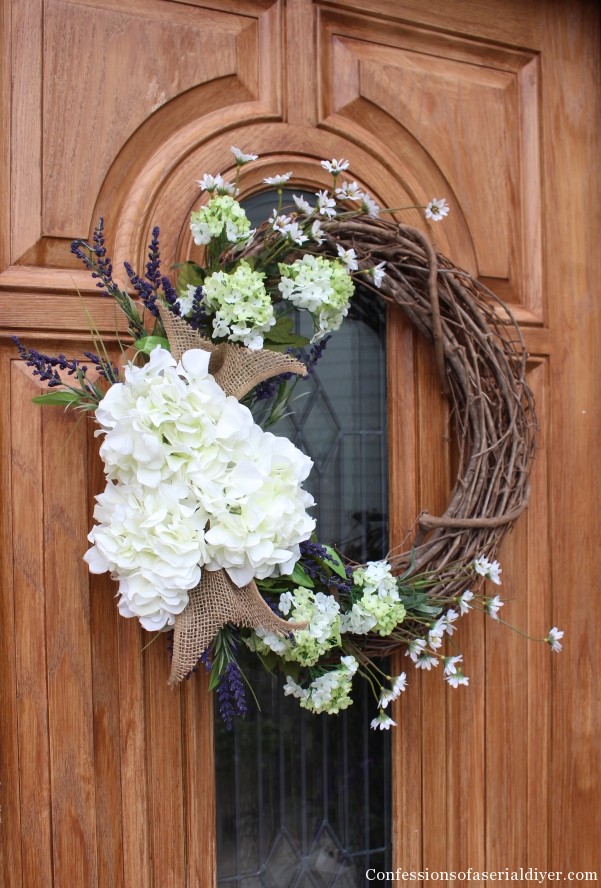
I love that it matches my Petunias and the Geraniums in my window boxes!

I already had the burlap ribbon and the wreath, which was a 75¢ thrift store find originally adorned with fall flowers. The flowers were about $30, but if I were patient enough to wait two days until I could use a 30% of coupon Michaels was offering , the whole wreath would have cost just over $20. Wreaths can be so expensive, so making it yourself saves a small bundle!
I hope you’re inspired to break out your hot glue gun and get your wreath-makin’ on!
I’d love for you to come by and visit me anytime at Confessions of a Serial Do-it-Yourselfer!
Thanks so much, Susan for allowing me to spend some time with your lovely readers!
XO,
![]()


Such a gorgeous wreath on a gorgeous door!….Thanks so much for the tutorial….I love how you added the “tails of a bow” to the wreath!…
Thank you for the fun tutorial. Lovely wreath!
Love this!
Beautiful wreath, Cristy!!! It came out beautifully. I love, LOVE your entry!!!!
Lovely! And I agree with Shirley. The ‘bow tales’ are ingenious and I’m DEFINITELY stealing that idea!
Your entry is beautiful, and the wreath looks perfect there. Thank you for sharing!
I am absolutely inspired seeing this. I need to take down my early spring one down.
Susan, you always inspire me. Thank you for that.
Hugs.
What a pretty wreath!! I love the colors and textures. Could you please explain how you hung it on your door? Do you have permanent hooks drilled into the wood? Rosie
It’s hung up with a heavy duty command hook, Rosie 🙂
What a gorgeous wreath! I was just at Hobby Lobby looking at wreaths yesterday, nothing like yours!
Beautiful Christy!! and fabulous tutorial!!
Nancy
Lovely wreath Christy!!
I am very inspired thank you! We have a fantastic dollar store here that has gorgeous full sized hydrangea blooms for a dollar. Guess where I’ll be this weekend!
I bought silk Forsythia and a grapevine wreath a few weeks ago and have done n o thing with it but now I can use your great tutorial as a guideline. Thanks for sharing. Your wreath is beautiful.
Look at you, hangin’ out on the Porch! Beautiful wreath Christy!
-andi
What size grapevine wreath did you use?
Karen, I’m not sure what Christy used, but check with her. You’ll find a link to her blog at end/bottom of that post.
Appreciate the tutorial. So helpful when I decide to make my wreaths. Thanks so much. Your wreath is beautiful.