9Welcome to the 232nd Metamorphosis Monday!
How was your 4th of July weekend? I hope it was fabulous! We had a rainy one here in Georgia. The sun came out for a few minutes but unfortunately, it didn’t last long.
If you’ve been reading BNOTP this past week, you know I pulled out some old, worn and out of style jeans from my closet and found another use for them.

I recycled the back pockets to make flatware holders for this years 4th of July table setting. (If you missed that table, you’ll find it here: Dining on the Porch for the 4th of July.
I still had a lot of denim fabric left over so the wheels started turning. What could I do with all that denim?

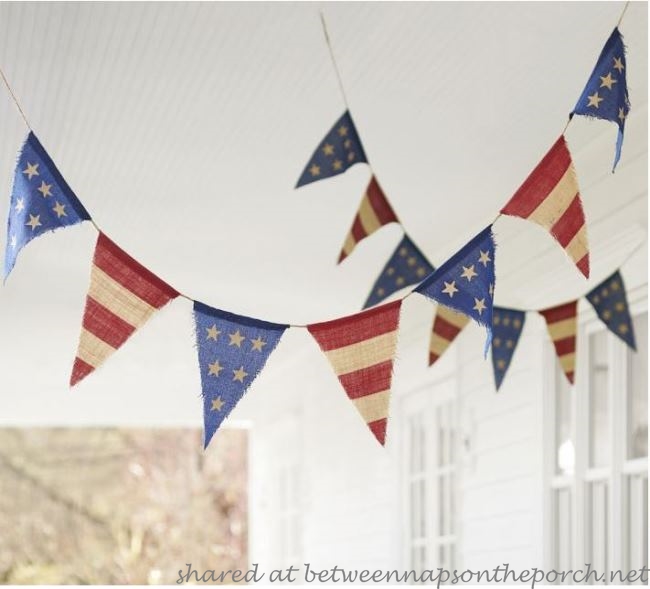
Inspired by this cute Pottery Barn patriotic party banner, I decided to use some of the fabric to make a patriotic banner for the porch. Though this tutorial is for a patriotic banner, you could use it to make other types of party banners, too.

I’m not sure how much the PB banner was because the ad is now showing it’s no longer available. Update: I think it may have been around $22.00 originally. (Picture above and below from PB site, here.)
The only thing I purchased to make my banner was a special fabric glue I found at Michaels and a can of red spray paint. I used a 40% off coupon at Michaels so my total cost for the banner was around $8-9. Also, I have plenty of glue and paint left over for future projects.
Make a Patriotic Party Banner: A Tutorial
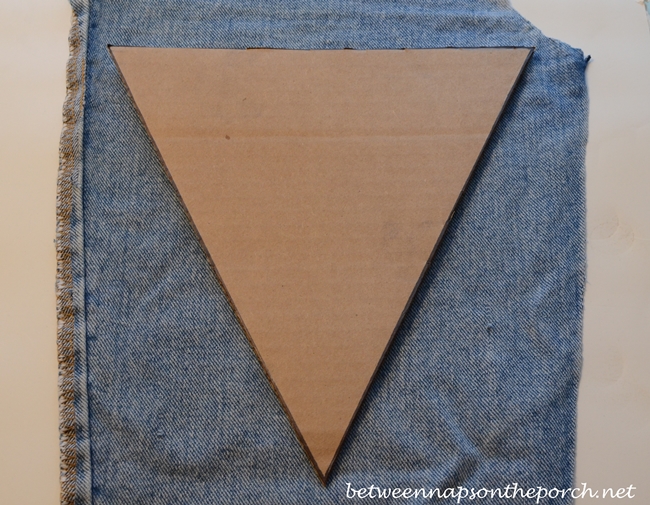
To make my patriotic party banner, I cut a triangle shape from a cardboard box, just eye-balling the size. It turned out to be 9 inches wide at the top and 9 3/4 inches in height. Tip: If I were making this banner again, I’d make the template exactly 10 inches tall (instead of 9 3/4) because that would make measuring and marking the stripes a little bit easier since they would be spaced exactly 2 inches apart.
Using the cardboard as a template, I cut five denim flags from my old jeans. The edges of Pottery Barn flags are frayed (see above picture.) I wasn’t really crazy about that look so I used pinking shears to cut the flags. I liked that look better for the edges.
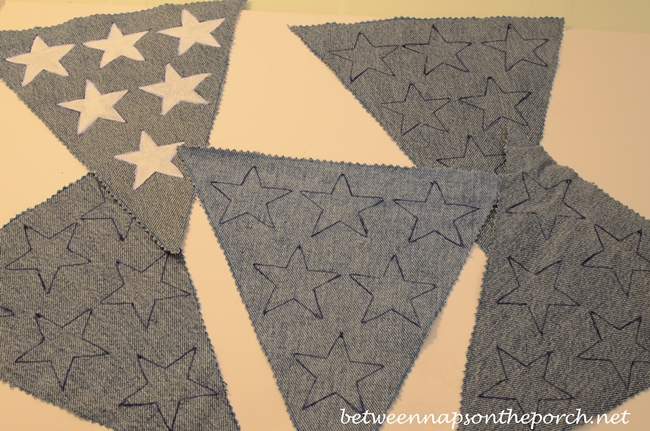
For the star template, I googled “star” and found several online. I found one that looked about the size I needed but each time I printed it out, it came out a lot larger than I wanted. Then I did the craziest thing. I placed a piece of white copy paper over the computer monitor and lightly traced the shape. The shape was visible through the paper so it worked great!
I traced the star onto cardboard and cut that out to use as my template. Then I traced the star shape onto the five denim flags. I tried tracing the stars with a white paint marker and the jean fabric just kept absorbing the paint, making it impossible to see the lines. I wonder if they make white sharpie markers? If they do, I recommend using that. I ended up using a blue ink pen instead which worked okay, but a white marker would have been better, you’ll see why in a sec.
If you wish, you could use white fabric and buy star-shaped stickers, then spray the white fabric, blue…then remove the stickers to get your white stars. That’s the technique I used to make a Pottery Barn inspired wood flag in this post: Make a Pottery Barn Inspired Wood Flag
In this case, I really wanted to use the denim/jean fabric for my blue flags so I had to go a different route for the stars this time.
Using some white acrylic paint I already had, I painted in the stars. Fabric paint may be a better choice but I just went with what I already had on hand. Painting in the stars was the most time-consuming part of the project. Originally, I had planned to cut a star shape from a sponge and just sponge on the stars, but when I tested that on a scrap piece of denim, it looked awful. So that’s why I ended up tracing, then painting the stars onto the flags. It went fairly quickly while I listened to a book on Audible.
I also cut off the seams of the old jeans.
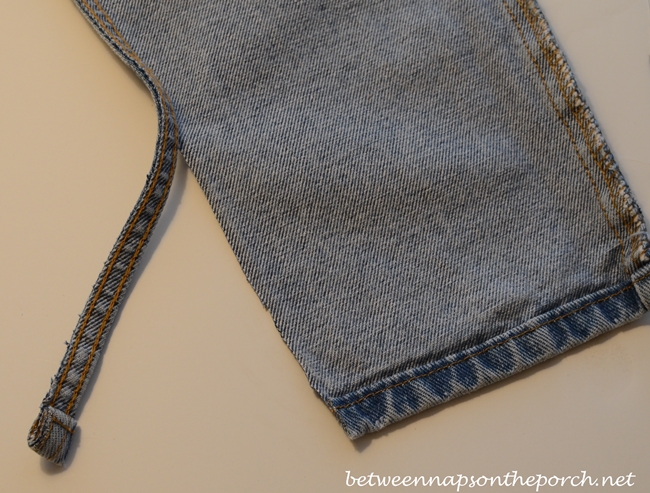
Can you guess how I used those?

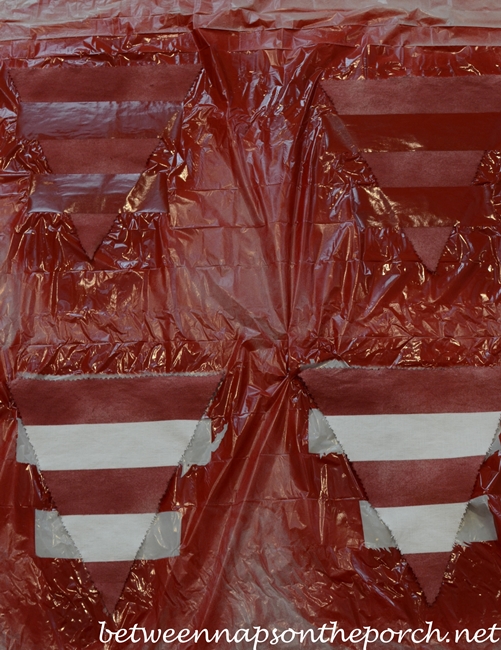
I had some off-white fabric left over from a past sewing project so once again, using my cardboard template, I cut out four flags. Using painter’s tape, I taped off the areas I wanted to remain white. The spacing ended up being just slightly less than two inches for each stripe since my flag length was 9 3/4.
Tip: Be sure to press really firmly along the edges of the tape to avoid getting paint up under the tape.

I chose Rust-Oleum “Colonial Red” paint for my stripes.

I sprayed the white flags and it took a couple of light coats to get the coverage I wanted. I didn’t want the flags to be a solid red color, I was going for sort of splotchy look thinking that would better coordinate with the look of the denim jean fabric.

The paint dried very quickly. After about an hour, I peeled off the tape from two of the flags to see the results. The tape worked great…no bleeding!
I placed plastic on the floor of my upstairs hallway and stretched out the denim seams I had cut from the jeans on top of the plastic. I placed the flags out along the seams/pieces, spacing the flags about 2 inches apart. I had noticed the Pottery Barn banner had the flags spaced slightly apart. I’m sure that helps with flexibility when hanging the banner, as opposed to having them all right up against each other. In the photo below, the flags were just laying on top of the denim seams.

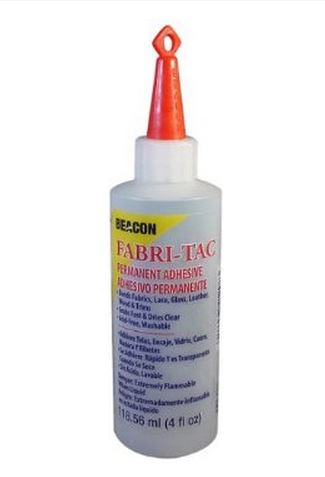
Next, I glued the tops of the flags along the seams using Fabri-Tac. It pretty awesome glue, it’s nickname is “the glue gun in a bottle.” It bonds with fabric, wood, leather, lace, tile and can be used to hem fabric. It was perfect for this project since it dries clear. That was important since I didn’t want any glue showing through.
Note: If you’re fabric is printed on both sides and you plan to hang your banner from a place where it can be seen from both sides, start your stars a little further down and make the first red stripe a bit wider. That way you can wrap the top of the flag over the yarn (or denim strips/seams in my case) for a more finished look on the back. You’ll probably need to paint the back of the flags, too. Again this only applies to situations where a banner will be seen from both sides.
Remember I mentioned it would probably be better to use a white pen or white sharpie to trace your stars? My ink pen marks kept bleeding through my white paint. I knew it wouldn’t be that noticeable once the banner was up, but if you can find a white pen to trace your stars, I’d go with that.

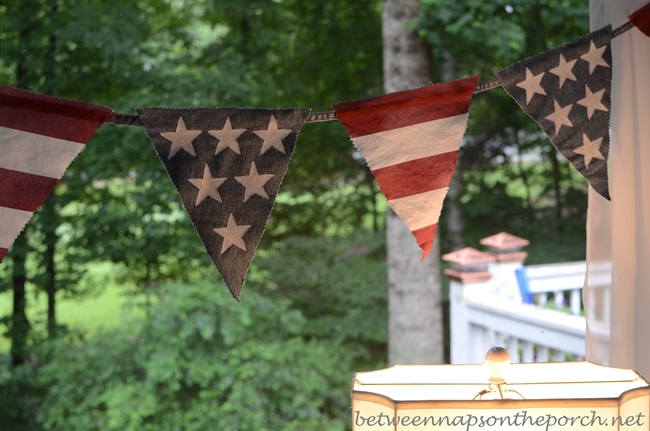
Fabri-Tac dries super fast so I was able to hang my flag about an hour later. It turned out a little longer than the Pottery Barn banner so if you decide to make one for next year or for an upcoming patriotic holiday, you can make your flag shorter or longer, whatever fits the area where you wish to hang it. I wanted to start and end with a denim “star” flag so my banner ended up being 9 flags long. (That blur at the top of the picture is a ceiling fan blade going round.)

Here’s the PB banner again below for comparison. My stars turned out a bit bigger, I think I like that, though. 🙂
This banner would be great to display for Memorial Day, Veteran’s Day, Flag Day, really any time of the year when you want to celebrate the red,white and blue!
It’s still raining here so still kind of dark and gloomy out. Just noticed, I should have tied the right side up a bit better…always notice this stuff after the pictures are taken.

I like it beneath the “Summer Breeze” sign.

When I glued the flags to the denim seam pieces, I just placed the flags on top of the strips/seams, spreading them out so the individual seam pieces met behind a flag. That way it didn’t matter how long the pieces were and I didn’t need to sew them together. This is definitely a “no-sew project.”
As I had hoped, the red stripe turned out a bit splotchy letting some of the white fabric show through in places. That was the look I was going for so it would coordinate with the uneven look of the jean fabric. If you want your banner to have an aged look, you can stain the fabric with tea like I did when I made the Pottery Barn knock-off clock plates here: Pottery Barn Clock Plates, Make Your Own

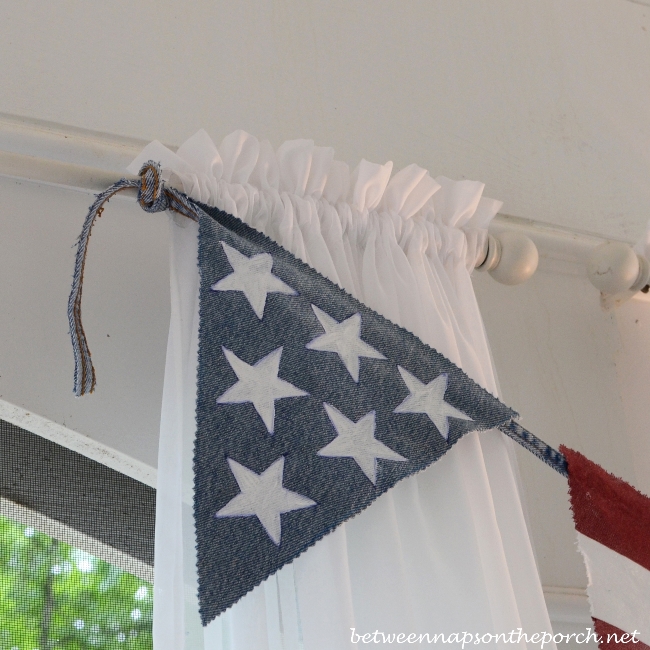
I also glued the first flag about a foot in so I would have a seam strip with which to tie my banner. If you don’t want to recycle the old seams from your jeans, you could use jute yarn. I think that’s what they used for the Pottery Barn banner.
I know Independence Day has passed, but I think I may leave my banner up a few more days, at least until all this gloomy rain goes away.
Love crafting and sewing with repurposed denim? You’ll find more denim projects at my other blog, Denim Do Over and many are No-Sew projects! You’ll find Denim Do Over here: Denim Do Over
Pssst: I post almost daily to Instagram. Follow Between Naps on the Porch on Instagram here: Between Naps On The Porch.
Looking forward to the Before and Afters posted for this Metamorphosis Monday!
Metamorphosis Monday:

If you are participating in Metamorphosis Monday you will need to link up the “permalink” to your MM post and not your general blog address. To get your permalink, click on your post name, then just copy and paste the address that shows up in the address bar at the top of your blog, into the “url” box for InLinkz.
In order to link up, you’ll need to include a link in your MM post back to the party so the other participants will have an opportunity to receive visits from your wonderful blog readers.
Please observe these few rules:
Only link up Before and After posts that are home, gardening, crafting, painting, sewing, cooking, DIY related.
Do not link up if you’re doing so to promote a website or product.
Do not link up a post that was just linked last week since a lot of readers will have already seen that post.
Do not type in ALL CAPS. It spreads the links waaaay out.
Let’s try something fun today! Please visit the person who linked before you and after you…that way everyone will get some visits.
Welcome! Thanks for coming to the party!


Thanks for hosting! I love your Stars and Strips bunting. So creative! Hope you have a great week.
Blessings,
Nici
Susan,
You have been busy! Your creativity knows no bounds! The banner is wonderful! And, I really love the jean pocket utensil holder. It’s so cute! I have a bunch of my girls’ jeans ready to go to the thrift store…perhaps I should rethink that and make some utensil pockets and a banner! Thanks for hosting! I’m No. 1 for the first time ever!! LOL!
This is such a great idea. I love your banner. I’m pinning this so I can have it up for Labor Day!!
I just ADORE the banner and what a great idea using old jeans!
Susan, I tried finding the PB banners online a while ago after I saw one hanging in the store, but I had no luck finding them there, and I never got around to making my own. I love your version using the jeans. Perfect! I’m pinning this. There are plenty of occasions to use a banner of red, white and blue and you have taken the guesswork out of it by providing your instructions!
Thanks for hosting another great party!
Liz
Susan,
Amazing Patriotic Banner made from your recycled denim, dear friend!!!
I adore the fact that it is “no~sew”!!!
Not only is this amazing for the Fourth of July, but could be used during Memorial Day,
Flag Day and Veteran’s Day. . .more bang for your buck!!!
Thanks for sharing this clever idea!
. . .and thank youfor hosting MM each week!!
Fondly,
Pat
That’s a great point, Pat! Thanks!
Great look. Thanks for showing that! Thank you for hosting!
Sherry
Susan, you’re amazing! That is so cute. You know, I often don’t go that extra mile because it just seems like too much of a bother, but you have inspired me to take it up a notch. Everything seems so much more fun and more festive, the way you do it! Haha. Have a great day, Susan.
Thanks, Pam!
LOVE your banner Susan! Yours looks better than PB’s~ I love the denim, pinking sheared edges and the seams used to hang it! Brilliant!
You are so creative & I love it when you share projects like that. I like your banner better than the one from PB. Very cute!
You are so creative & I love it when you share projects like that. I like your banner better than the one from PB. Very cute!
Susan, this is soooo- cute! I love your idea! I have already pulled my jeans out of the Goodwill bag, so I could make the flatware holders. Now, you’ve given me another cute project to make with the leftovers! Thanks for hosting another fun party!
I LOVE your patriotic banner, Susan! I honestly think it’s much prettier than the one from Pottery Barn. It has a more substantial look, and I like the pinking-sheared edges. It looks lovely and festive on your porch. Thanks for sharing how you made it.
Denise
Thanks, Denise! It was fun to make! 🙂
Love the banner and I love that you used old jeans to make it! Thanks for hosting, Susan.
What a cute banner Susan and super easy to make too! Thank you so much for hosting!
xx
Anne
Thanks so much for hosting each week!!
Hugs,
Deb
Great job. Thanks for letting me join in.
Love the banner, Susan! It’s so cute and festive! Happy week!…hugs…Debbie
Your banner turned out so perfect, Susan. Don’t you just love it when you can create a copycat version of a really expensive item! You have a special knack for doing it! Thanks for sharing.
Thanks, Donna!
I am going through my old jeans to look for pockets! I like your banner better. The larger stars make much more of a statement. Thanks so much for hosting!
Big Hugs,
Susan and Bentley
~Susan~
The banner is super, you really did a super job on making it!! , ahh just leave it up all of July!!
Paula
In
p.s love your white lamp!!
Thanks, Paula! Found the lamp at Tuesday Morning a few months back.
Susan, you are just too talented, girl!!!!! That banner you made is so much cuter than the one from the Pottery Barn plus yours is original art!!! It looks so cute on your porch. You just keep on being amazing! Maybe when we hook up, some of your talent will rub off on me.
I love this! You are SO creative and always an inspiration!
Looks wonderful! Love a no sew project. Very festive. Have a great week, Susan.
Susan, this banner is adorable! I’m always in awe of the projects your come up with, but this one is even more so. The fact that you used the jeans from your previous project to make this is truly awesome. The ultimate recycle project. Not a bit wasted! Love that you even used the seams for the string. You are one thrifty and clever lady. Very impressive!
Sorry you had a rainy 4th of July. TX would love some of that rain! ~ Sarah
How cute! I love the way it looks on your porch. You are so creative! Thanks Susan.
Thanks so much for hosting! Life to the full! Melissa
Love your very creative no sew banner, it looks so festive in your beautiful porch. Thanks so much for hosting Susan.
I am SO loving the banner and utensil holder from JEANS! Brilliant! And the good news is… I have about 361 days to do it… and since I’m a procrastinator… There’s a higher chance it’ll get done in time! 🙂
🙂
Morning Susan! I love your version – looks marvelous and so very creative – I hope you’re catching some sundrops today – I do appreciate you hosting,
Kathy
Susan, these banners look so good, I’d leave them up right through the summer! They are so festive…and with all the work you put into them, you should display them and enjoy for awhile!
You sure don’t believe in wasting anything, do you? I can’t believe all that you have done with those “old jeans” or did you go to a thrift store and buy some more “old ones?” Amazing what you accomplished with them. Thanks for sharing this with us.
Betty, these were just old jeans I had hanging in my closet that were out of style and no longer fit. Thanks!
Susan this is so creative! and using recycling materials makes it even better! Thank you for sharing and for hosting the party! Hope all is well!
Hugs,
Lizy
What a great way to spend all this indoor time we are getting from the rain. I am expecting Noah to come by any day and pick the dogs and me up!!! I’m with you on leaving it up for a while-seems like we got cheated not being outdoors for the 4th. I’m leaving my July 4th table up till I get tired of looking at it!! Which may be a while as there’s nothing better than the good old red, white and blue-a good reminder to be thankful I live in the USA.
I know, I’m so tired of rain! I keep having to clean my birdfeeders out…the seed keep sprouting and turning molding before the birds can eat it!
Once again you have provided such a clever idea with TERRIFIC instructions! Thank you! I’ve already PINNED it =)
Wish I could sit on your porch awhile, especially today, it is already HOT.
I had to pin your banner. I especially love that it is from denim.
Such a great idea!
Deb
I like yours as much if not more than the PB one! I just made a patriotic bunting too but I like yours better!
Hi, Susan! Love the bunting!! Once again, I have to encourage you to consider putting a book together. Not only could you include your wonderful tablescapes enhanced by your creative photography, but your “knock-off” ideas coupled with you clear, concise tutorials would make a terrific decorating “must have” for anyone’s library or coffee table.
Thanks, Rosie! You are a sweetheart and thanks for the encouragement!
I knew you were going to make me regret throwing out all those jeans that no longer fit! LOL!! I really like the way that banner turned out… I’ll have to go to the Salvation Army and get some jeans to cut up and make one. You’re right, it does make things look more cheery in all this dreary weather!
Enjoy your week my friend and giant hugs,
Thanks so much, Beth! The sun is trying to shine today. Hope it’s sunny where you are!
Such a clever idea using old jeans! The banners look great in your home.
What an EXCELLENT idea! I love your banner, Susan. It looks professional but also “vintagy ” & cheerful. Thanks for providing such easy, clear directions.
I’m thinking you need to make several more banners for different holidays… 😛
Where did you get that lovely sign on your porch?
I would love to have one like it for my porch.
Thanks for sharing your home and your many crafts.
Kathy, I found the Summer Breeze sign in a local thrift/antique store, but if you google “Summer Breeze Makes Me Feel Fine Sign” there’s a place online that carries them, too. I think the place is called Sawdust City, but it’s faster to just google the phrase with sign at the end because that will take you straight to the page.
Susan, I think yours look better than the PB ones. Great job!
Thanks, Margo!
SUSAN! You are brilliant! I LOVE your jeans banner and have pinned it for future reference. Thanks so much for the detailed tutorial. Thanks also for hosting the party today. I haven’t done anything creative over the weekend but I’m sharing the BEST grilled shrimp recipe ever that Mr. OTN loves to cook for company.
Blessings to you,
Patti@OldThingsNew
Yum, sound delish!
I love your banner! So cute! Thanks so much for hosting! Have a great week.
KC
I LOVE your banner, Susan. Thanks for the tutorial.
Love your banner and am going to try my hand at one. Thanks so much for always sharing your inspirations!
Hey my friend…that banner is amazing and an absolute look-alike. It looked like a lot of work but boy did it pay off. I loved how it looked on your porch! How is the yard work coming along? Hopefully you have had some pretty weather so they could work. Can’t wait to see it finished. Are you going to be at Haven? I sure hope so, and can’t wait to see you again. xxoo, Barb
Hi Barb, Unfortunately, the yard work has been at a standstill with the moonsoons every day. The forecast looks iffy this week but I’m hoping there will be enough hours of sunshine to get going again. Yep, I’ll be at Haven…looking forward to seeing you! XO
susan,
you are really talented! love the banner!
ann
GENIUS! With three guys in the house, the old jeans pile up around here and now I know what I’m going to do with them! I’m not much of a Summer holiday kind of girl, but now FALL that’s a different story… I’m picturing denim and flannel mix and matched for a fall banner… and pillows…. and oooh ideas are flying !!!!!
thanks for sharing!
gena
Ooooh, love that idea, Gena! Wouldn’t that be great hanging from a mantel for fall! I may have to make one for fall for the family room. 🙂
I love that banner! Your porch and placesetting were just perfect. It’s a wonder they don’t just come to your home and shoot their magazine photos. They are always so fabulous!
Awww, thanks Becky! Big Hugs!
Susan,
Love, love, love your banner! Amazing!! Thanks for hosting!
Susan, I love this idea. Yours look even better than the one from Pottery Barn. You have so inspired me!!! Now where are my jeans?!
GREAT BANNER, Susan! Fantastic tutorial and now I’m gonna look for lots of old jeans, so I can try to make even a small patriotic banner…I totally LOVE IT!!! Thanks for sharing and for hosting. Have a terrific week.
FABBY
Susan,
You are the queen of recycle! I love your banner! The fact that it is a no sew project makes it even better! I like your banner better than PB’s. Using the seems to affix the flags was a great idea, good look!
I can’t wait to see what you do with the rest of your old jeans! 😉
Blessings
Thanks for the great banner tutorial, it is adorable and you’ve thought of everything as usual! Thanks for the glue tip too, I can’t wait to try it!
Jenna
Your banner is adorable. I like it even better than the one from Pottery Barn. Great job!
Traci
Thanks so much for hosting, Susan. LOVE your banner!
Jeanette
Who knew there were so many uses for old jeans??! I love the bunting! So festive! Thanks for hosting week after week, too! 🙂
XO,
Christy
WHY, Susan, WHY?!?!
Why did you not tell me of your wonderful banner BEFORE I throw out the rests of those old jeans I’ve used
to make the flatware holders? I thought we were friends… Just kidding, Susan! 🙂
Btw, the denim pockets have been the “Highlight” of my decorations, in fact my guests thought they were a gift for them! WHAAAT?! (No way! lol)
~Hugs to you~
Cecilia
lol Cecilia, I almost emailed you when I started making the banner, but I thought, No, Cecilia will hold onto that jean fabric. I should have emailed! 🙂 It doesn’t take much fabric…you can make it with probably one pair of old jeans. The white jeans you had would have been perfect for the white fabric. Tell your friends to save more old jeans for you! 🙂 That’s awesome about the denim pockets! Too funny that they thought they were a gift for them!
LOL, Susan, only because I usually have a little gift for them when they leave after a party! Actually I had small votive/ tealight holders for them, in red, white and blue, but not those pockets! Sorry for them!
Susan, I wish you would have emailed before Saturday, but now I know I will never again throw out old jeans! And I’m going to buy a white one for me… 😉
XOXO
Susan, your banner is awesome. I really think it looks much better than the PB one. Love the use of the seams from the jeans, great idea! I will remember that one. You could create cushions for your porch furniture from some of the leftover jeans or placemats for your porch table to go with the cutlery pockets. You could reuse your stars on them too! I save my husbands old jeans in a tote, to make cushions for our wood patio furniture.
Jacquelene L
Canada
Oh, Susan, you’re the smartest one! This banner is just darling and I like the extra length to it. Looks great on the porch too. Hope you’re doing well.
Be a sweetie,
Shelia 😉
You rate a * * * * * on this one!! franki
Susan, your banner is the epitome of “waste not, want not”!! It is far cuter than the PB one….as for the leftover fabric – how much is left over? Could you make placemats (and tack on the utensil holder pockets temporarily when you use them)? Or make the placemats & use the seams you cut off to make a little loop on the left to hold a patriotic print napkin tucked under it and use the utensil holders separately. If not, how about coasters & make them a combo of the white stars on denim and the red & white stripe material (using white denim pants from a thrift store) & alternate them on the table? You just inspire all of us to be creative! Thanks so much for sharing your wonderful talents with all of us!
Susan, your banner turned out really pretty and festive! Love it! Thanks for hosting. Have a happy week. Toodles, Kathryn @TheDedicatedHouse
I love the banner.. I would love to hang out on your porch.. it’s always so beautiful..
Susan, your banner is AMAZING! I’m so glad I hung onto some old jeans. I’m pinning the banner because I MUST make one! Thanks for the tip about the fabric glue. I have been using another brand, but I’ll look for this one. Sending sunshine and bulldozers your way!
Jane, I had never heard of that glue before, either. One of the nice employees at Michaels told me about it saying she uses it all the time and loves it. She said it is so strong, once you place the fabric you have a very short time to re-position it because it starts to set up right away. I found that to be true. I liked that, though because I could hang the banner almost as soon as I was done gluing on the flags. I will definitely be using it again. It’s around $9.99 a bottle (not cheap) so be sure to take a Michaels coupon with you or pull one up on their site.
I just found a great new purpose for the husband’s old jeans! 🙂
I love, love, love this banner! What a great use for the giving new life to those jeans that “shrunk” (ahem… in the washer. I keep flag bunting up from Memorial Day all the way through Labor Day, it looks so great. This is the perfect addition to be happy with my crackled flag from one of your earlier tutorials. Perfect directions and photos, as always! Thank you.
Just gorgeous!
Hi Susan, I love the patriotic banner. Yours looks so much better than Pottery Barn’s flimsy banner. I like the idea about the white jeans. You are one clever lady. I always enjoy your projects.
Have a blessed week, Ginger
Susan, I like yours better because of the denim! Thanks for such a great idea! Sharon
Well I’ll definitely have to Pin this so I’ll remember to make one for next 4th of July, too easy and too cute. Glad you shared it. Joining the party a bit late but I’m here! Thanks & take care, Susan. -Dawn
Susan, Love the banners. Those of us who quilt always have on hand a white marking pencil for marking on dark fabric. There are many white pencil options at shops with quilting supplies.
Thanks, Cheryl. I think I had a wheel like thing years ago that did that for sewing. I definitely could have used a white marking pencil. I’ll look for one of those in the fabric store near me. Thanks!
Love the banner! Very cute indeed.
One suggestion to make this (and similar) projects easier is to use freezer paper for a stencil for the stars. You would simply trace stars onto freezer paper, cut them out with an x acto knife or small scissors, iron wax side down onto the fabric, paint, and then peel stencil away. There are many tutorials on the internet to show how helpful this method is, should you be interested. Just google wax paper as stencil.
Thanks for sharing this great banner with us!
Love your banner. It is a wonderful tutorial. I pinned it as it is too good not to share.
Thanks so much, Donna! XO
Stopping in to pin to my banners board, I love it and the tutorial is great.
Bliss
Thanks!
I like your banner better than the Pottery Barn banner! And it sounds easy enough to make!
Susan, Your banner is beautiful! One suggestion I have is to trace your stars onto the denim fabric using a white drawing pencil. I keep one in my sewing room & use it all the time on darker fabrics. Works like a charm.
Thanks, Linda! That’s a great idea! I should have used one of my colored pencils that’s white, that would have worked great.