Recently, I shared a tutorial for building a Pottery Barn inspired potting table that can also be used as party buffet server for an outdoor party. You’ll find that post containing lots of detailed photos here: Building a Potting Bench Garden Table
I’ve had a few folks ask for more information about where I purchased the vintage styled wheels and dragonfly hooks, as well as additional information about the dimensions. You’ll find a Cut List at the end of this post.
I’ve also included a few tips I learned about using a drill and what to do when things don’t go quite as planned. Hopefully between that previous post and this post, you’ll have all the info you need to build your own potting table.
Materials:
Cedar (Add up the inches in Cut List at the end of this post to determine how much to buy)
Heavy-Duty Steel Swivel Casters/Wheels
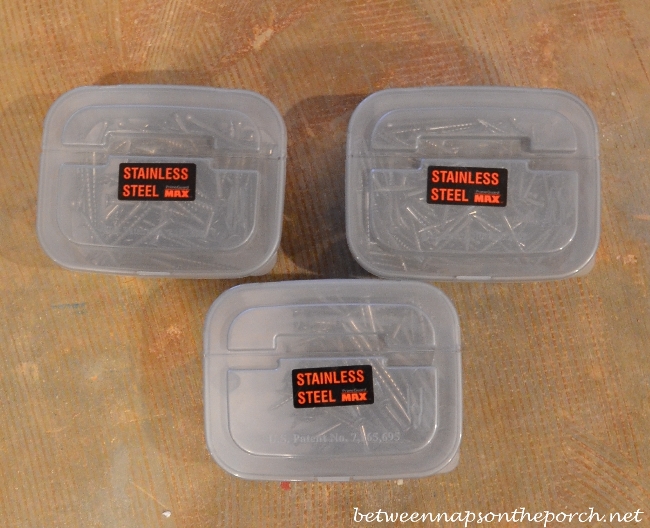
Stainless Steel Screws: I used three sizes: 3″, 2-1/2 ” and 1-5/8″
Dragonfly Hooks: Optional (I purchased mine from Lowes)
Tools:
Circular Saw
Jig Saw
Drill (for predrilling and installing screws)
Safety Glasses (I wore these while using the circular and jig saw to protect my eyes from flying wood chips)
Sander and Dust Mask (Not much sanding for this project but best to wear a mask for the little you do)
Measuring Tape
Pencil
Square (I didn’t use one but would have come in handy)
About the screws:
I recommend using Stainless Steel screws if you’ll be placing your potting table outdoors. They are more expensive but galvanized screws can/will eventually deteriorate so stainless is the way to go to avoid rust issues later.
I used three size screws to build my table: 3″, 2-1/2 ” and 1-5/8″. Each box of screws came with a drill bit the size needed for the screws. Not sure if that’s standard but it was nice to have in addition to the bits I already had.
Here’s how I used the various length screws:
3″ screws: To connect the 2 x 4s to the 4 x 4 legs and to attach the inside supports/braces to the legs
2-1/2″: To connect the extra supports I added under the top
1-5/8″: To attach 1 x 6 inch boards to create the lower shelf and the upper table surface
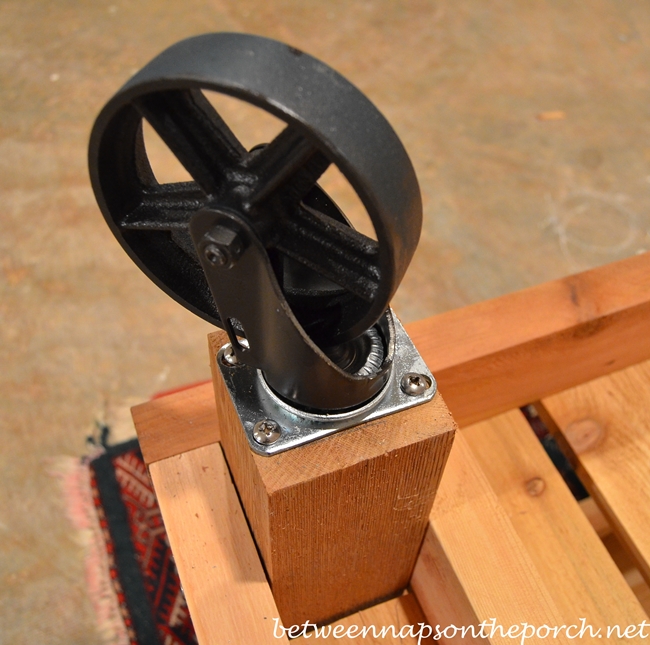
I purchased the Vintage-Style Swivel Casters from The Caster Guy. They measure 6-3/16 in height overall. Before painting them, I cleaned them with acetone. That’s removes any oil residue so the paint adheres well. Then I spray-painted them with Rust-oleum’s Metallic Oil Rubbed Bronze paint. The reason I went with the Metallic finish is I wanted the wheels to keep their metal appearance. It only took one coat to cover everything.
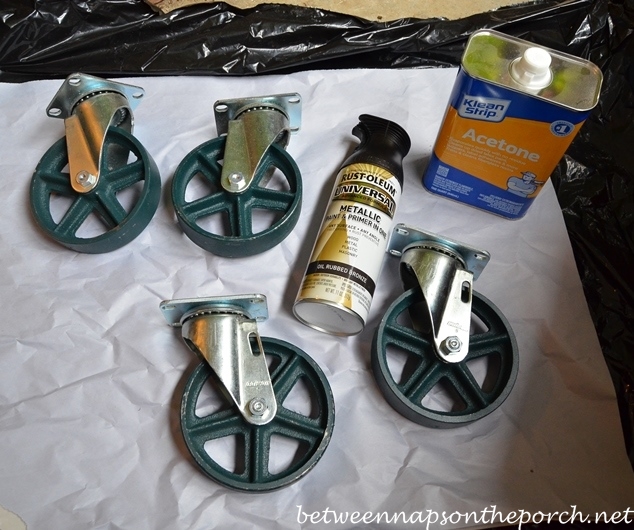
I needed heavy-duty screws to hold these heavy steel casters on. I took the wheel with me to the hardware store and I used what the guys at the hardware store recommended which was #14, 1-1/2 inch Stainless, Pan Head, Phillips, Sheet Metal Screws. I used four per wheel. They were a bit pricey but I didn’t want the wheels to loosen or fall off one day.
Pre-drilling for Screws:
The information on the package for all of the screws I purchased said they were designed where pre-drilling wasn’t necessary. I did it anyway. It just made it much easier to install the screws and prevented the wood from splitting, especially the thinner 1 x 6 boards. If you pre-drill the holes, make sure the drill bit you use is a good bit smaller than the screw. If it’s too large, the predrilled hole will be too large and the screws won’t be able to grab and hold the wood as they should.
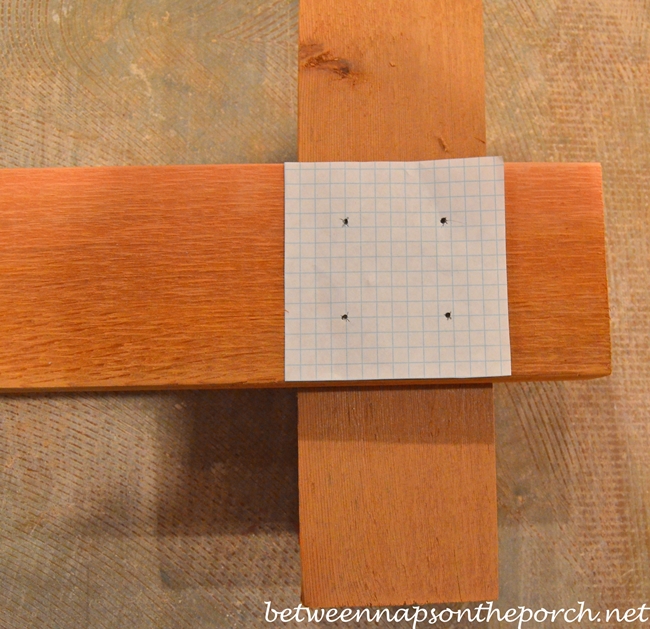
I created a little template and used it throughout the whole building process. I just punched little holes through the paper so I could place the paper atop the wood and mark the spot where I wanted to pre-drill with a pencil. It worked great, saved time and kept things lined up and looking neat. I knew many of the screw heads would be visible when the potting table was finished so I wanted them to be semi-orderly looking and neat. If that’s not important for you, you can skip making a template.
Tip for the beginner (like me) for using a drill to screw in long screws:
Since I was using a drill I had never used before and building something for the very first time, I had a couple of times where the screw I was screwing in got stuck/jammed half way in and in the process of trying to make it go in or trying to get it back out, I stripped out the head of the screw. It was kind of discouraging because it happened a couple of times right in the very beginning of the project. 🙁
I Googled what to do and found a video where it showed you could get the screw out with vise-grip pliers if part of the screw was still sticking out like mine was in the photo below. I didn’t have any so I headed off to the hardware store to buy some. I’m so glad I did because they worked great!
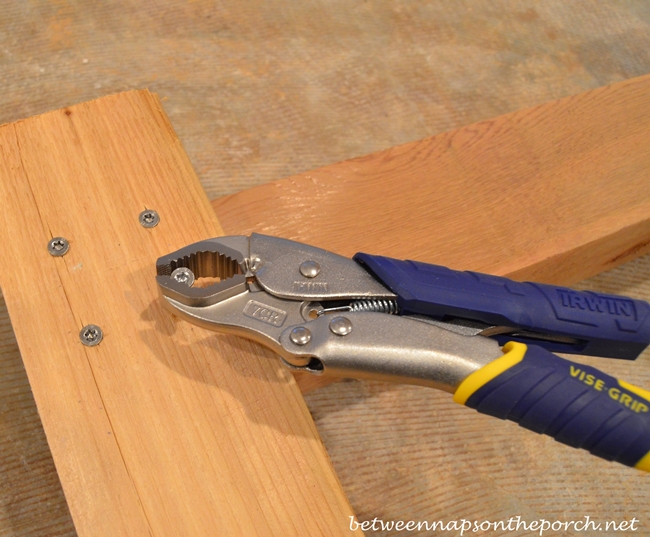
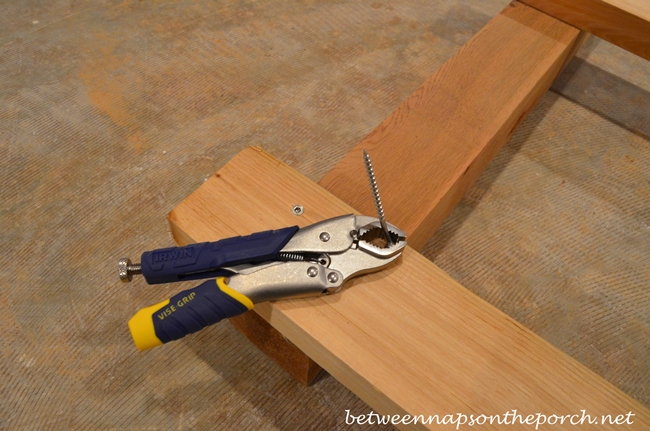
This photo below just shows the screw after I removed it with the vise-grip pliers.
If you need to remove a screw and it’s all the way down into the wood and you’ve accidentally stripped out the head, you’ll have to drill out the screw and use a screw extractor to get it out. You’ll find a video showing how to do that on You Tube, too. Fortunately, I didn’t need to do that since the two screws I got stuck while building my table were still poking out plenty far enough to remove them with the vise-grip pliers.
So here’s what I learned to avoid all these issues. Hold tightly to the drill and don’t let it move around when you’re screwing in a screw. Practice on a piece of scrap wood with a few screws to get the feel of your drill. If a screw gets stuck/jammed when you’re screwing it in, stop immediately. Don’t keep trying to screw it in because it will just get even more stuck and will become impossible to get out. Plus, you’ll just strip out the head of the screw. I speak from experience. So, stop as soon as it jams and reverse your drill to remove the screw. If the screw is even slightly bent, toss it and get a new one.
Each time I had a screw get stuck, it was usually because I didn’t have a firm/strong enough grip on the handle of the drill and the screw/wood was controlling me instead of me controlling it. So get a good firm grip and don’t let the drill move around in your hand.
It took me a while to determine what torque setting I needed to have my drill on. I had a few instances where I drilled the screw in way too far and I eventually discovered if the drill is set on the correct torque setting, it will not over-drill the screw and push it too far into the wood.
I learned so much on this first project! Don’t get discouraged if you have a few boo boos happen while building your table. You will get better and better as you go. The longer I worked, the better I got and eventually I didn’t have any issues with screws getting stuck. Yay!
Measurements:
Here are some pictures showing the measurements I cut for various parts of the potting table.
This photo (with the table upside down) shows the beginning stages and the length you will need to cut the legs, the front and back aprons and the side aprons.

One more picture showing cutting dimensions…cut list is below.

Cut List:
Hopefully I did this right, this is my first time providing a cut list for something. 🙂
4 – 4×4 @ 28″ (Legs) (I had the store cut these. If you’re not adding wheels, you’ll need to cut you legs 6-7 inches longer.)
4 – 2×4 @ 48″ (Front and Back Aprons)
10 – 2×4 @ 22″ (4 End Aprons & 6 Support Braces)
8 – 1×6 @ 25-1/2″ (Lower Shelf)
5 – 1×6 @ 50″ (Top)
When finished, the overall dimensions of this table are: 50″ wide x 27-3/8 deep x 35-3/16 high.
The top of this potting table ends up with a 1 inch overhang on all four sides and no overhang for the lower shelf.

I hope this additional information is helpful. You’ll find a detailed post (with lots of photos) showing how I built the table here: Building a Potting Bench Garden Table.
If you build this potting bench, take some photos so I can see! I’d love to show off your handy work here at BNOTP. Hint: Be sure to take your pictures without using the flash and they need to be non-blurry, full size photos, not resized down. My e-mail is: betweennapsontheporch at gmail dot com.
You can do this! If I could do it with my very limited skills (I didn’t even know how to properly use a drill!) you can, too! 🙂
Update: I asked Ana at Ana-White.com if she could draw up plans for this potting bench and she did! So, if you would like a printable copy of the plans, you’ll find those here: Potting Bench Plans Thanks so much, Ana for drawing those up!
Love a good Pottery Barn knock-off? Check out this tutorial for building a Pottery Barn Inspired Cubbie Organizer.


Next thing we know, you will have your on show on HGTV or DIY!!!!!!!! You go, girl!!!!!
Ha! I think I may need to learn to properly use a drill first. 😉
“Wonder Woman” that’s what we’re going to start calling you. Is there nothing you can’t do or won’t try? You never seize to amaze me at your skills and abilities. They didn’t teach you this in Social worker training! You put some men to shame at your abilities and determination. That cart is a beauty! Thanks for sharing all your experiences with your blogging fans!
lol No woodworking class in social work I’m afraid. 🙂 Awww, thanks Betty…you are a sweetie! XO
Susan, your cart turned out beautiful. You are a handy lady. Enjoy your beautiful finished project. I would like some added handles on the sides. Maybe you will find some perfect ones. Now you are ready for Spring!
Thanks, Peggy! I may add something on the side…just have to find something that I know want rust.
Susan,
You really need to have your own
TV show! You are very talented to say
The least! What do you have up your
Sleeve for St. Patrick’s Day?
Ann
Awww, thanks Ann. Nothing planned yet but I hope to put together a table soon. 🙂
Love the tut on the potting bench, love the way you added the arrows with the sizes,, so cool, thanks for always making such an interesting post…
Thanks, Phyllis! I was trying to find a way to get the numbers and arrows matched up…glad you liked that! 🙂 Hope you have a wonderful weekend!
Thank you so much for all the measurements. I was just telling my sister about your project and said “I wish Susan had included a materials list and measurements.” You must be a mind reader! Thanks again.
This is a beautiful project and your specs and photos are wonderful! I wish all specs could be so clean and clear! I thought I might share what I learned from my husband when drilling, if a screw gets stuck or slows down, put the drill in reverse, push down while drilling it out almost all the way, then put drill back in forward and, while pushing down very hard, drill it back in again with a strong torque. If it seems to get stuck again, repeat it. The voltage of the drill also makes a difference in the ease of getting the screw in. I use an 18 volt cordless Makita. Thank you for posting this!
Thanks so much, Debbie! Appreciate that awesome tip for getting out those stuck screws! 🙂