Welcome to the 709th Metamorphosis Monday!
It was a long time coming but I finally have all the cabinets back in the garage and filled back up. Before I share the “After” here’s a little reminder of where we started. The garage walls were in need of a fresh coat of paint and much better lighting than the builder-grade lights that had been here for 40 years.
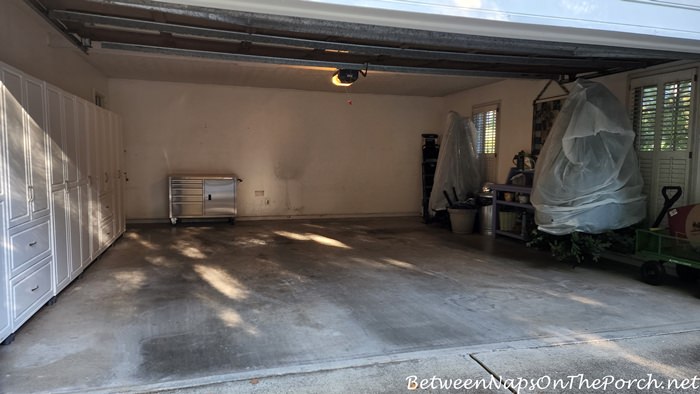
Previously, I had 6 dish storage cabinets down one of the side walls of the garage. This had worked great except for the cabinet on the far left. Over a period of 4 years of being shoved against that corner near the opening of the garage, it was starting to show some wear on the bottom shelf. Apparently, moisture was occasionally coming in through the small opening between the garage door and the wall. So I decided early on that I’d move that one cabinet to the front wall of the garage once the makeover was complete.
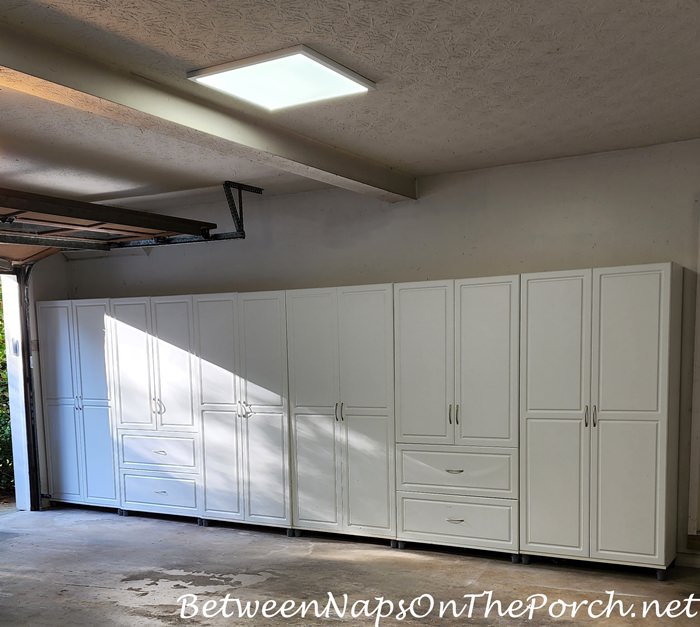
This is how the garage looked after its makeover–so much lighter and brighter!
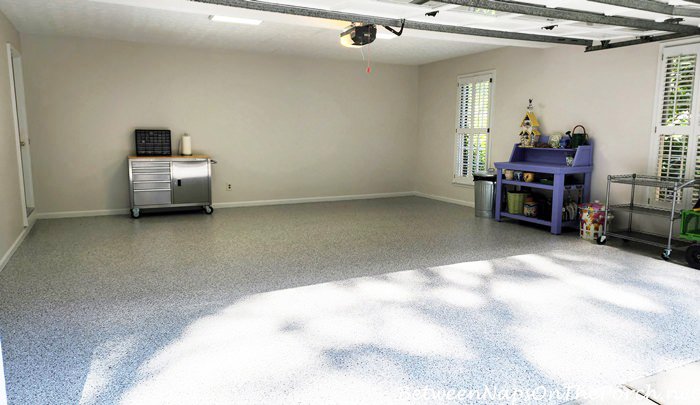
The flooring has to be my favorite part of this transformation. I had no idea it could make sure a difference! The garage feels so much cleaner now.
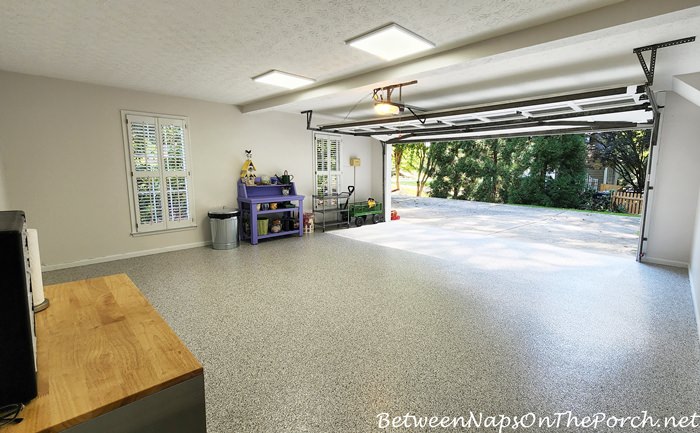
Paint definitely helps transform a room inside a home, but for a garage transformation, for me the flooring is the key factor. There are no words to explain how much I love this flooring! So how does the garage look now with the cabinets back in place?
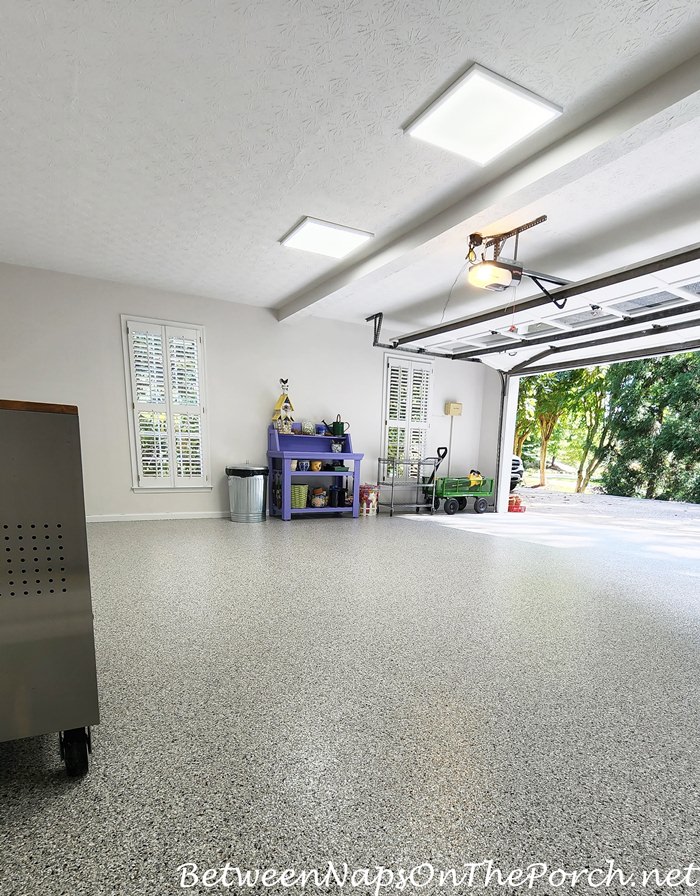
Here’s the view looking in…a bit shadowy this morning since these photos were taken early this morning and the sun was hiding behind the clouds.
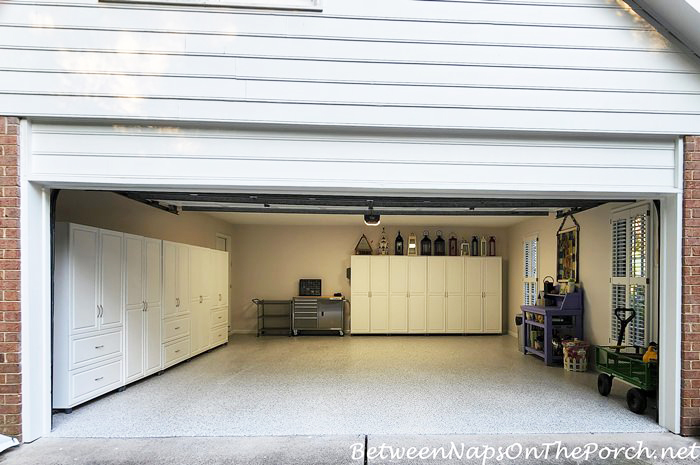
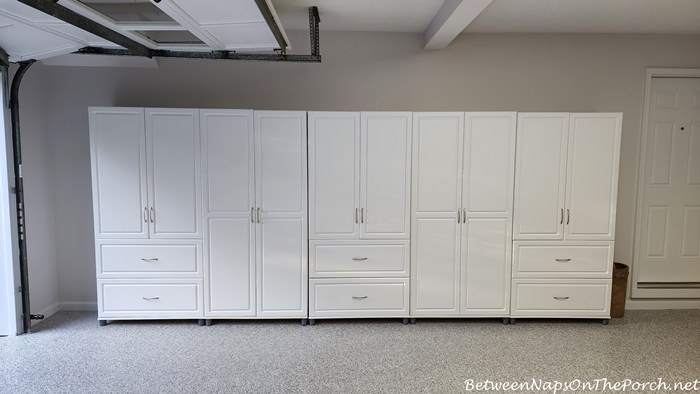
I knew when I moved that single cabinet to the front wall of the garage, I would need to add a couple more to go with it. A single cabinet alone would have looked really odd on that wall all by itself. After sitting down and plotting out what type of additional storage would work best for my needs, I ended up buying 3 additional cabinets–1 style with drawers and 2 without.
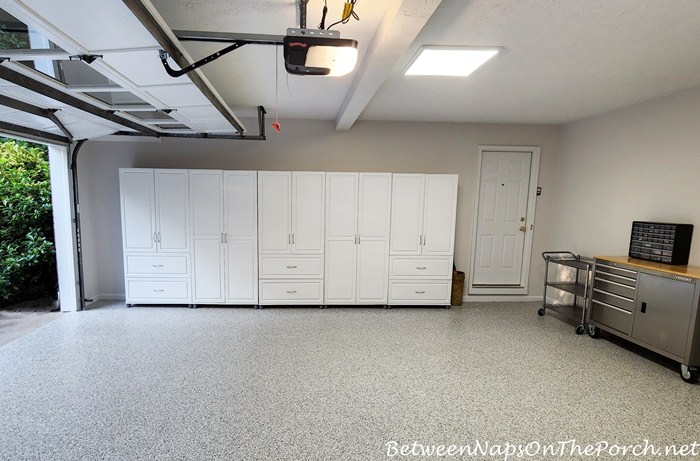
The one I purchased with drawers ended up along the side wall of the garage. So I have 3 with drawers and 2 without on this side wall. I’m looking forward to sharing how I’m using them in a future post.
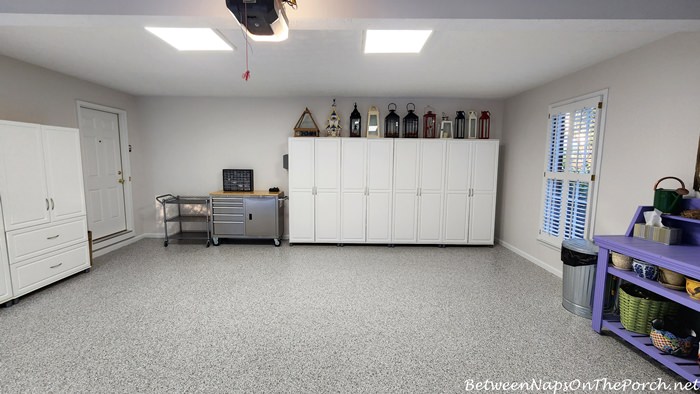
I also purchased two additional cabinets without drawers. Those ended up here on the front wall along with two that had previously been along the side wall.
I added something else along this side wall of the garage–do you see it there on the far right?
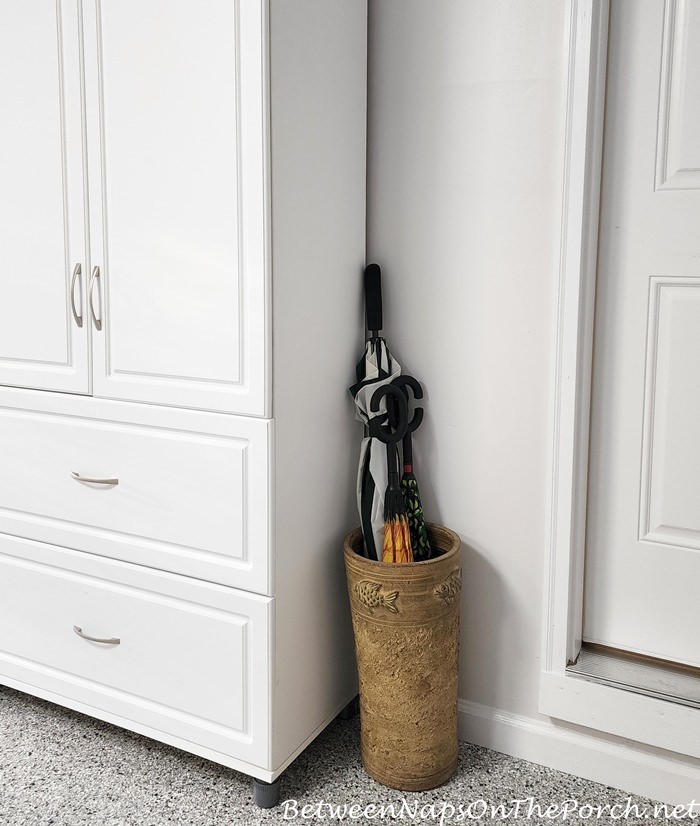
Since I have one less cabinet on this wall now, I ended up with this little spot by the door that turned out to be perfect for this umbrella holder I’ve had for many years. Previously, the holder was in the laundry room that’s just to the left once you enter in through the garage door. I think I found it in Old Time Pottery, I’ve had it so long that it’s hard to remember. It’s nice and heavy so very supportive and won’t tip over, but I’d like to find a cuter one for this spot.
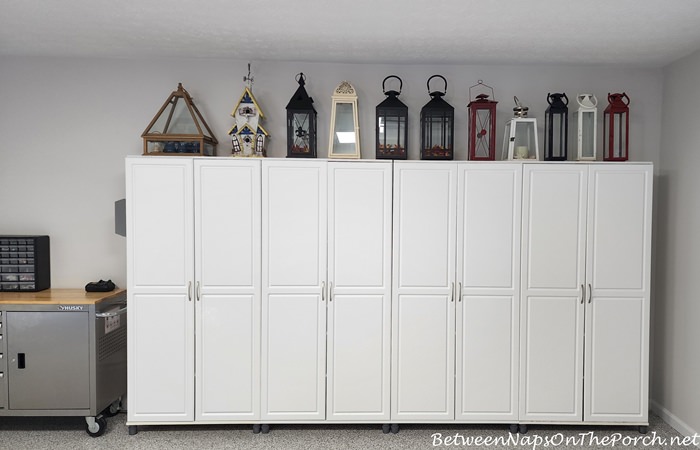
I placed my tallest/biggest lanterns across the top of the new cabinets on the front wall of the garage. They look cuter there in person than they do in photos. Most of the smaller lanterns are stored in one of the new cabinets below. I’ll create a separate post sharing what’s inside each cabinet real soon. I’m still adjusting the spacing of the doors on these cabinets so don’t look too closely at those. lol

The cabinet doors have taken 10 years off my life this go around. Argggh! After working countless hours out here trying to get them to attach properly, I finally decided there was something wrong with the hinges. Back Story: When the first new cabinet arrived, the one with drawers, there were 3 defects/issues: a bad cam screw, two bad K panels (side panels for the drawers) and a hinge that was missing a screw. When I called for replacement parts, the customer service person I was talking with said she would send out those three parts and would also send out 6 new hinge sets. Ummm, Oookayyy. I mentioned I wasn’t having an issue with the hinges but thanked her for offering to send those since it would be good to have them on hand.
Ha! Wouldn’t you know, the next two new cabinets I ordered, the two without drawers, the hinges were a blooming disaster. They would not properly lock into place no matter how many gazillion adjustments I made. I’ve previously put 7 of these cabinets together without having any hinge issues, so this definitely wasn’t my first rodeo! After I couldn’t get the hinges to work on the two new, drawerless cabinets, I wondered if she had been getting a lot of customers calling with hinge issues. I used up the 6 new hinges she had previously sent on one of the new drawerless cabinets and called them back for another 6 replacement hinges for the 2nd new drawerless cabinet.
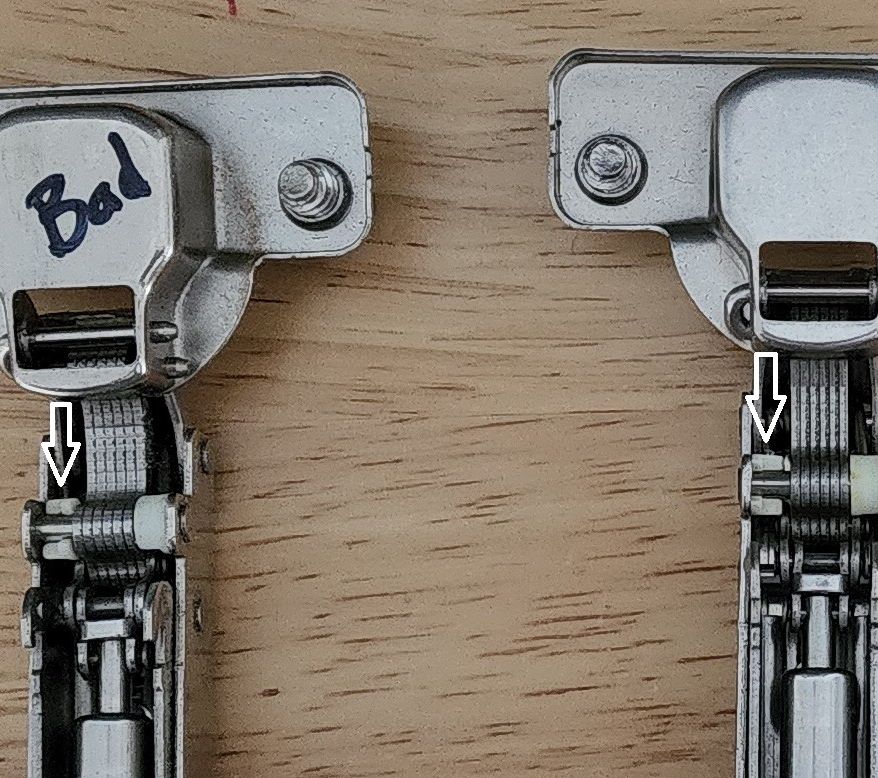
I closely examined one of the old non-working, non-locking hinges (the hinge on the far left) against the new replacement ones she sent and I could only find one small difference. Notice the tiny white spacer thing on the “bad” hinge on the left. The opening of that little white thing faces a different way than it does on the working hinges that you can lock into place.
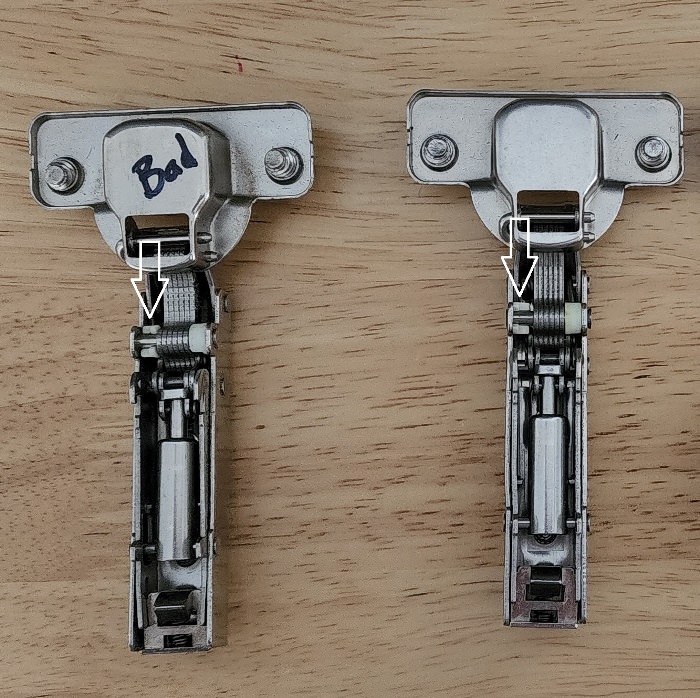
Here’s an even closer view. I have no idea if that’s why they weren’t working, but I noticed the new hinges that I received that do work, have that little white thing opening/facing a different direction.
I’m still absolutely loving the paper towel dispenser! I’ve used it so much since I added it to the side of the cabinet, I figured it was probably getting time to refill it. I opened it up and it’s still practically full! It holds a ton of paper towels and they dispense beautifully. The paper towels were so inexpensive for how many you get. I won’t need to buy any more for ages! (Paper towel dispenser is available here: Paper Towel Dispenser. These are the paper towels I am using inside: Paper Towels.)
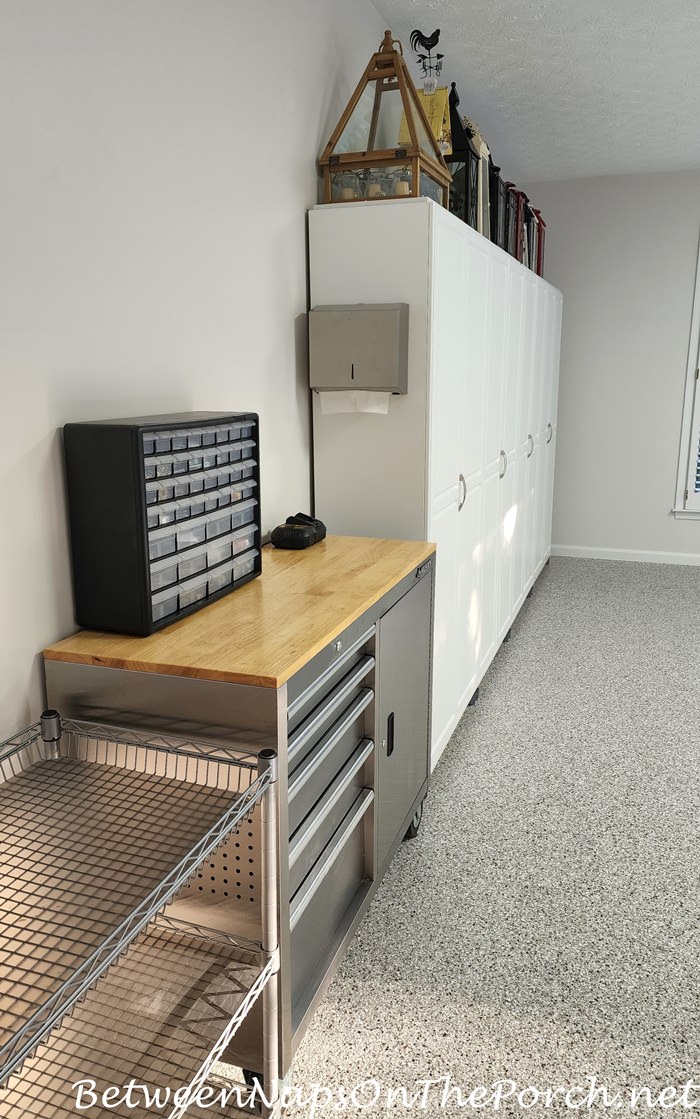
Not sure if I’ll hang the wood flag I made so long ago back on this wall where it used to hang. I’m taking my time deciding what I place back on the walls–just enjoying the clean openness of everything right now.

The potting bench is back in its original spot, along with the painted bunny window above. The bunny window looks better hanging in front of an actual window, of course, but I love it here with the potting bench.
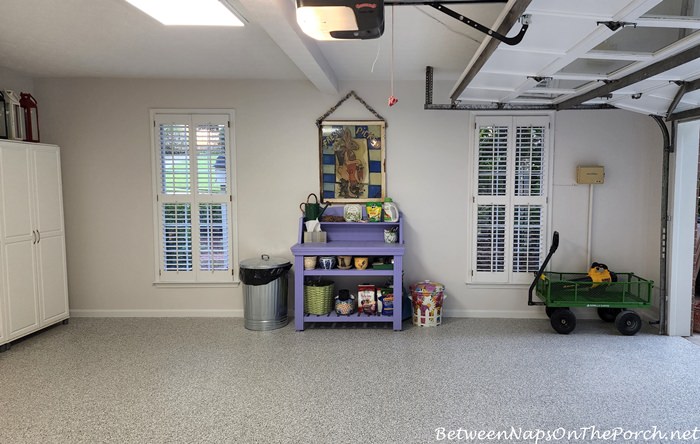
Here’s another view of the flooring and how it looks against other objects here in the garage.

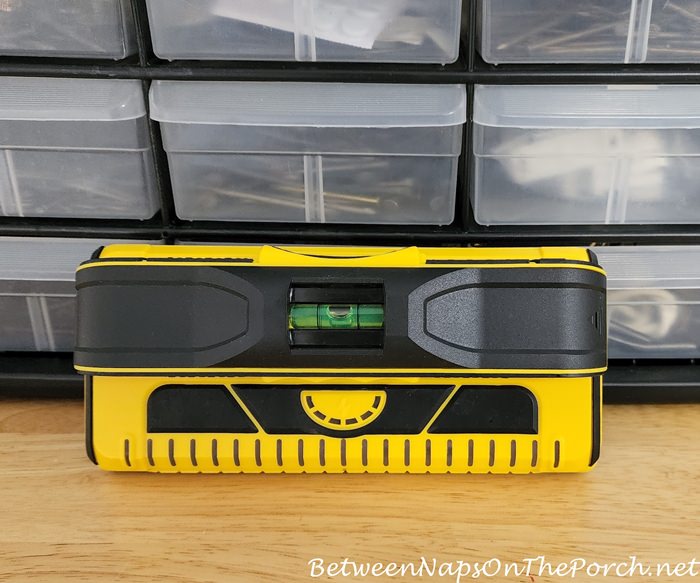
One of the things that made this makeover soooo much easier was this amazing stud finder. It worked like a dream and helped me locate the studs (for securing the cabinets) the first time, every time. (Stud Finder is available here: Stud Finder.)
Also, this cart saved me a gazillion trips! When it was time to bring the dishes back out, I would load it up in the dining room with dishes, push it over to the garage door and start unloading it. I can’t imagine how many trips I would have made without it! It also came in handy when I was adding the doors back to the cabinets. I pulled it over to the cabinet I was working on at that moment and it held the tools, hinges, etc…. that I needed as I worked. It also held the few glasses or dishes I needed to remove as I attached the doors. I didn’t want to risk my hand slipping and breaking anything. I wish I had purchased this cart many years ago, it’s amazing how much I’ve used it since buying it. (Cart is available here: Heavy Duty Cart.)

The painter still has to return to repaint the four shutter panels, but other than that, the garage is finished. Yay! It feels great to pull in and not have to worry about running over cabinet doors that are still laying on the floor due to non-working hinges. Ha! I have SO MANY stories from this renovation! It’s times like this I wish I made YouTube videos because all the craziness and shenanigans would be a lot more fun to share that way–like the hail storm that came during the time my car was still living outside right after the new flooring was installed! Thankfully it was small hail and not the golfball or baseball size!

Thanks for coming along on this adventure! Looking forward to opening up these cabinets and giving you a look inside real soon!
Looking forward to all the wonderful Before and Afters linked for this week’s Met Monday!
Pssst: Did you know Between Naps On The Porch is on Instagram? You’ll find me on Instagram here: Between Naps On The Porch.
Like to know when a new blog post is up and available to read? Subscribe for email updates, it’s free and your email will never be shared. Subscribe for free post updates via email here: Subscribe.
Metamorphosis Monday
Metamorphosis Monday is a party that’s all about Before and Afters. Please link up your Before and After projects like DIY projects, room makeovers, craft projects even recipes. Any Before and After is great! Please do not link up Table Settings, save those for our Tablescape Thursday party on Thursday.
If you are participating in Met Monday, you’ll need to link your post to the party using the “permalink” to your MM post and not your general blog address. To get your permalink, click on the name of your post, then copy and paste the address that shows in the address bar at the top of your blog, into the “url” box for InLinkz when prompted.
NOTE: Please do not link up more than 3 posts from your blog. In order to link up, you’ll need to include a link in your post back to the party so visitors to your blog can find the other party participants. When linking up to the party, give the InLinkz system time to find the link in your post to avoid having your link held for moderation/approval. Thanks!
This party has ended, click button below for the links to all who participated.


Susan, the garage looks amazing! I admire how you take on project and don’t quit until it is perfect. The floor is fabulous! Thanks for sharing this journey and I can’t wait to see the inside of all the cabinets. Happy Monday!
Thanks so much, Pam! Happy Monday to you! Hope you have a fabulous week!
XXX
gorgeous, Susan. We have garage envy.
Thanks, Debra! Glad the hardest part is behind now. lol
It looks so beautiful! I love that cart, what a great tablescaping aid! Thanks Susan!
Thanks, Jenna! I can’t believe how much I’ve used it since I first bought it.
XXX
Susan, a wonderful transformation. Thank you for sharing each step along the way. Love your post.
Thanks so much, Charlotte!
There is only one word to sum it all up. FABULOUS!!!!
Enjoy it every day.
Thanks so much, Anne! ♥
It’s been a long road for you Susan, but boy it sure was worth it. The garage looks amazing! I’m in love with that floor too, I will never see a floor like that, so I will drool over yours. lol That cupboards look great the way you did them. I love how neat everything looks, so clean, so sleek. Can’t wait to see how you arranged everything since you added more cupboards. I think the lanterns are super cute on top of the cupboards, I’m sure it is really cute in person when you drive into your garage. Hugs, Brenda
Thanks, Brenda! You know, it’s funny because I never like the look of things being modern, sparse, open concept, sleek, etc… inside my home, but here in the garage, I like those things. Ha! Inside I want cozy, warm, and inviting. 🙂
Hi Susan, I absolutely love the floor! It is stunning! Did I miss the application? I would love this for my basement.
You have also inspired me with your dish organization. I love dishes and have far too many lol! Did you use any other support on the shelves to hold the weight? I would love to hear your thoughts, as I will be ordering these beautiful cabinets.
Are they the Ameriwood Kendal? Thanks again for all of your amazing ideas and inspiration.
Thanks, Susan! You are so welcome!
You can see the floor installation process in these two posts below:
https://betweennapsontheporch.net/garage-flooring-installation-day-1-heres-how-they-did-it/
https://betweennapsontheporch.net/granite-garage-flooring-installation-the-final-day/
Granite Garage did a great job, I’m really pleased with their work!
The cabinets are Ameriwood Kendall. I normally buy them on Amazon but Walmart has had some great pricing lately on them.
You’ll find them here: https://bit.ly/3PgKgFy
And here: https://amzn.to/3KBlTl9
The price for the ones without drawers is much better at Walmart than on Amazon…not sure why.
Susan, I think I feel as relieved as you do, lol. (well, almost) That was stressful! It would have been fine if not for the painting flub and all the hassles with the cabinets! Ugh. Why do projects have to be so hard? Anyway, *phew*. Thankfully, it’s done and it is magnificent! I’m sure every lady here would love, love, love to have such a beautiful, clean and organized garage. I just realized though, you must have a shed for all your lawn and garden stuff. Because that’s what usually takes up so much room in people’s garages. Yours looks like it’s ready for the guys in white coats to bring in their microscopes and set up their lab, lol. So clean and bright!
I can’t wait to see how you’ve got the cabinets organized. Oh, and btw, regarding that ‘cute’ umbrella stand you have — I have one of those. But if I had to do it over again, I’d pick sturdy and stable over cute. It just is too easy to knock over. Maybe something simple like a new paint job would make you like yours again? And I’m sure you’re right about the hinges. Just a small slip up like that could make all the difference. Yeah, when you said the lady offered you the hinges I thought .. oh boy. Here we go, lol.
Lastly, I have to ask — do you mean you’re having your plantation shutters painted? I never thought of that! I have them also, but they are still in great shape, but I’ve been thinking of having some painting done and wondered about them because the trim color might differ a little. Have you ever had them painted before? You are particular and like things done right, so I figure you must have been happy with the results.
Alright, enjoy the fruits of your labor. You certainly earned it!
We had plantation shutters in a bay window in a den & they were light colored natural wood, matching all the the window trim & woodwork in the house. Over time we decided to have the trim all painted white & had the plantation shutters painted to match! They turned out great! The white trim made the house look 10-15 years younger!! It was worth the wait! Then a few years later we moved!! LOL!
Thanks, Susan! It’s good to know they paint up well. Mine are cream and I will probably keep my trim about that color, but if they were a little off, it’s good to know I could paint them as well. I appreciate your comment.
Yes, I decided to let the painter paint them since they had yellowed over the years from being in the garage. I wouldn’t let anyone paint my interior shutters unless I really, really trusted them because if it’s done incorrectly, they won’t open/function as they should. The painter did a good job except it was raining that day and instead of waiting until a non-rainy day, he painted them in the window instead of taking them down and painting them horizontally/flat. Sadly, he was all about speed, not quality. So the new painter will have to sand all the drips/runs and repaint them.
Oh no! What a hassle. Another delay for you. 🙁 But the bulk of it is done and it’s great. I bet that flooring company will want to use your garage as a testimonial!
Oh my gosh, Susan!! You’re garage looks like a magazine shoot! Our garage is hilariously chaotic compared to yours! 😀 Three cars, multiple lawn tools, snowblower, lawn mower, trimmer, blower, edger, 1 giant trash can and 1 equally giant recycle can, a storage bench that “stores” more on the outside than the inside, folding chairs, boxes of blue rock, a pressure washer, ladders, bikes, a wheelbarrow, an old fountain Dave’s been working on…OMG the list goes on! And you have this perfect, clean, orderly space! I want to just come and STAND in your garage! Shoot, before I could even think of using yours as inspiration, our garage floor, part of the driveway and front walk needs to be repaved. Oh, how I admire your beautiful home!
Aww, thanks so much, Selma! I appreciate that so much! I wish the lighting had been better this morning when I took those pictures. It was so cloudy out when I took those photos–it’s normally much brighter in the garage. I used to have a lot of those same things stored in my garage…now they are in the unfinished area of my basement. It’s amazing how much stuff we need to store, isn’t it? I would love to have a garden shed for many of those things.
This really looks terrific, Susan. Like a badger, I love it that you wouldn’t quit until the job was complete. You & I’d either get along great, or butt heads because we’re so much alike. I love it.
lol Yup, something tells me you and I are a lot alike! 🙂 Sometimes when stuff starts going sideways, like insanely sideways, it makes me even more determined to make it work. I get really charged! I don’t throw in the towel easily. lol
What a transformation. I really enjoyed the progress photos. It looks like a showroom for the flooring and cabinets. Our garage is tools, cars, bikes, smokers (for the chef in my home) and Christmas decor. If my garage looked like yours, I would put a TV in it, table and chairs. Nice place to hang out. Great job.
Thanks, Teresa! I’ve had some of your chef’s cooking and it is scrumptious! Def worht sacrificing some garage space. 🙂
Perfection!!! Now, if you are like me, you will stick your head out the door into the garage, every hour or two, and exclaim “WOW!”. 🙂
Thanks so much, Rosie! I have looked out the door a couple of times. lol I’m kinda shocked when I look at the “Before” photos. So happy to have it almost completely done…except for the repainting of the shutters.
Oh my! It is all just SPECTACULAR!!!!! What an amazing job!!!
Thanks so much, Vickie!
XXX
Your garage turned out so nice!
I feel inspired to go declutter mine now! :0)
It feels so good to get it done, Laura. That would be a great fall project when the temps start cooling down a bit.
On “Metamorphosis Monday,” I must say, “WHAT A METAMORPHOSIS!!” Your garage looks wonderful. The floor is really awesome. Thanks for sharing.
Thanks so much, Doris! So happy I can share this Before and After! The flooring is my favorite part, with the upgraded lighting coming in second.
XXX
It looks great! All your hard work really paid off!
Thanks so much, Karen!
XXX
OHMYGOODNESS!! What a marvelous transformation! I have major floor envy, and I love the new cabinets on the front wall. If it was my garage, I would go out and eat dinner there…you know the old saying “so clean you could eat off the floor”…maybe an idea for a future Tablescape Thursday with a garage theme! ;–)
Regarding the wall over the tool cart…I purchased these to go over my garage potting bench. It’s a very clean look that offers a lot of open storage to hang my garden tools, etc. They would look great with the paper towel dispenser. https://www.homedepot.com/p/Wall-Control-32-in-x-32-in-Overall-Size-Shiny-Galvanized-Steel-Pegboard-Pack-with-Two-32-in-x-16-in-Pegboards-30P3232GV/202477786
You always share such inspirational posts, but this time you knocked it out of the park!
Enjoy!
Thanks so much, Gail! Ha! Right now it’s so clean, you could probably do that…eat right off the floor. I hope it stays looking that way, I’m amazed how it camouflages leaves and such. 🙂
That steel pegboard would look amazing over the tool chest, thanks for that suggestion! Right now all my tools fit pretty well inside but I’m definitely keeping this in mind. I love how it looks!
Susan,
The end result of your garage makeover is fantastic. An option to make the cart even more convenient (as I too have that cart) is to make a ramp for your interior door. It does not have to be the full width of the door, just a little wider than the cart itself and whatever length of the slope you are comfortable with. 2 boards of 2″ x 6″ or 8″ sloped to the floor from the threshold of your door and a piece of plywood attached on top (and of coarse painted) will enable you to go from cabinet to table with the dishes. The wedge/ramp is only used when needed and can be stored beside one of the cabinets or around the cart.
I am not able to make a million trips and carry heavy dishes to do the thing I love most in all my crafting. Tablescaping makes me happy, so I came up with the idea to make it easier on myself. Looking forward to your next project.
That is an awesome idea, Gwen! It would also be great for those times when I bring home some large/heavy like a piece of furniture. I love that idea!
Don’t you love that cart?! I wish I’d had mine well before now…I use it for so many things!
Susan, this looks absolutely fabulous and it must feel so good to have it done! I can’t wait to see how you arranged all your dishes. Happy Met Monday to you!
Thanks so much, Kim! It does feel so good to have it complete! Yay! 🙂
XXX
Susan, I really love the garage makeover. When we moved recently we bought a house with a three car garage even though we only have two cars. Now that garage is one of my favorite areas for crafting, painting, etc and my cars are only brought in before bad weather! Who knew what a great space it actually was. Love the lanterns by the way on top of the cabinets. A few timed battery operated candles placed within would look great and provide nice lighting as well.
Oh, a 3-car garage sounds amazing! I would love that!
That would be so neat to come home to a candlelit garage in the wintertime when it gets dark so early. 🙂
What a transformation! Question: Do you have yard tools? If so, are they in a separate shed or something?
I do, I keep those in the unfinished half of my basement. It has a door to the yard for access when needed. I have a few gardening tools hanging on either side of my potting bench, too. I have a lawn guy who cuts my grass but I’ve kept my old Honda lawnmower…not ready to part with it yet.
Thanks again for hosting this charming party every week! I know how much time goes into doing so and I want you to know that it I truly appreciate it!! Stay safe, healthy and happy!!
Hugs,
Debbie
Thanks, Debbie! Have a great week!
XXX
Over the top awesome, Susan! So happy for you and your new “Butler’s pantry” / garage! It is absoultely beautiful! I love the floor too and the extra cabinets along the front with the lanterns on top is like the cherry on top! You could make a video on how to put those cabinets together and show the company how its really done, you’re a pro for sure! Congratulations!
Over the top awesome, Susan! So happy for you and your new “Butler’s pantry” / garage! It is absoultely beautiful! I love the floor too and the extra cabinets along the front with the lanterns on top is like the cherry on top! You could make a video on how to put those cabinets together and show the company how its really done, you’re a pro for sure! Congratulations! Enjoy!
I never thought I would have “garage envy” until NOW! It’s fantastic. I’ve always felt that a clean garage keeps a home cleaner because stuff isn’t tracked in. This is BEAUTIFUL! Never ever described a garage that way before! Good job Susan. Enjoy!
What a huge accomplishment Susan! It must feel so good to be this organized and complete such a big project. best of all it will make styling and entertaining so much easier. Just lovely and so well done!
I had lunch with a friend today who had her garage floor painted a couple of years ago and it needs to be painted again. She is looking for the right paint that won’t wear off this time. I know your garage floor isn’t paint but what is it exactly? We are in SW Florida so we won’t be using the same contractor you used. I love your garage makeover and I look forward to seeing what you do in your basement.
Thanks, Lin! It was done by Granite garage and the process applies epoxy then they sprinkle to rejection these little flakes that I’m not exactly sure what are that give it the pattern and design and then it gets a polyspartic coating on top. Just do a search for granite garage and they have some really detailed information on their website. Also I wrote two posts showing the entire installation process. So if you scroll back a few pages at the blog you’ll come to those posts. Do you have trouble finding them let me know and I will email them to you. It’s a two-day process but quite durable. Definitely held up better than paint especially under tires.