Welcome to the 724th Tablescape Thursday!
Before we get into today’s Tablescape Thursday, for those who have asked for it, I’ve added a printable version of the recipe I shared recently for these delicious Crunch Wraps to that recipe post. You’ll find that post here and the printable version of the recipe is right at the end of the post: Crunch Wrap Recipe.

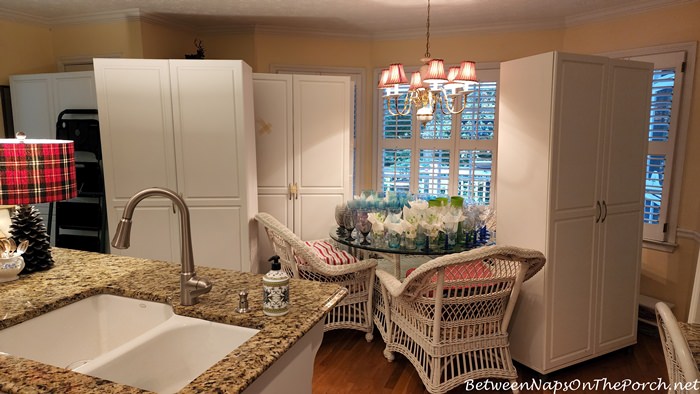
Soooo, though the garage is basically finished (I’m even parking my car there now) my breakfast table still looks like this.

And my dining room still looks like this. Why, you may ask. lol
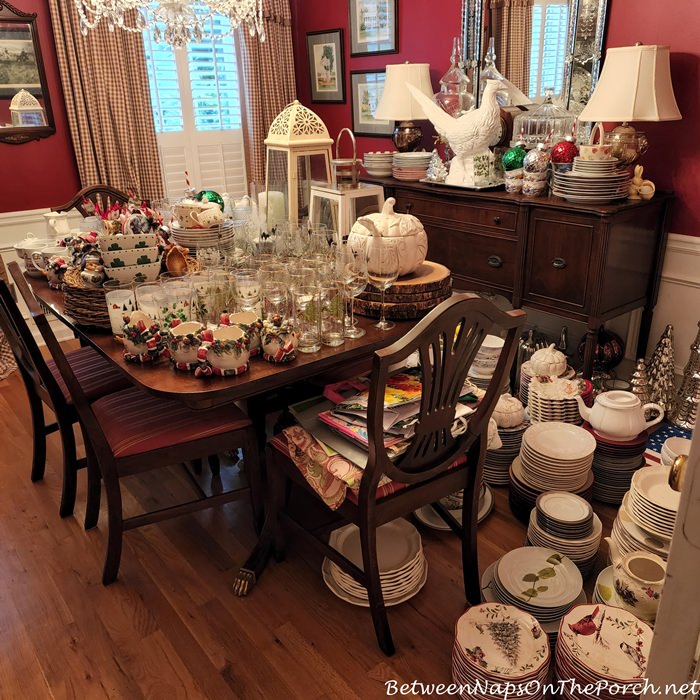
I haven’t been able to move the dish storage cabinets back to the garage just yet because there is some touch-up painting and additional work that needs to be done and the painting company is saying that it will be another week to 10 days due to their schedule. Frustrating! They (the painting company) offered to help me move the cabinets back out to the garage, but if they do that, I still can’t put the dishes back in them since they would need to be moved out from the wall to make some of the repairs.
I was thinking last night, I’m going to contact them to see if they can go ahead and send someone out to take care of the issues with the baseboard on this wall where the cabinets go. If not, I may try to fix the paint in that area myself today. Then I could go ahead and get the cabinets moved back out into the garage. When they come to take care of the other work that needs to be redone, they can just cover up the cabinets.
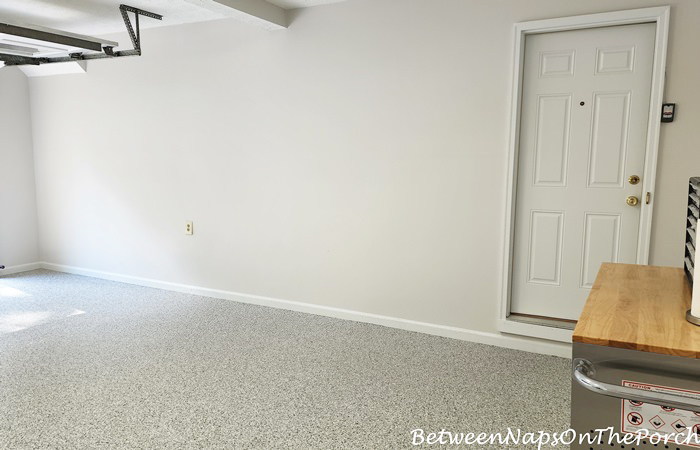
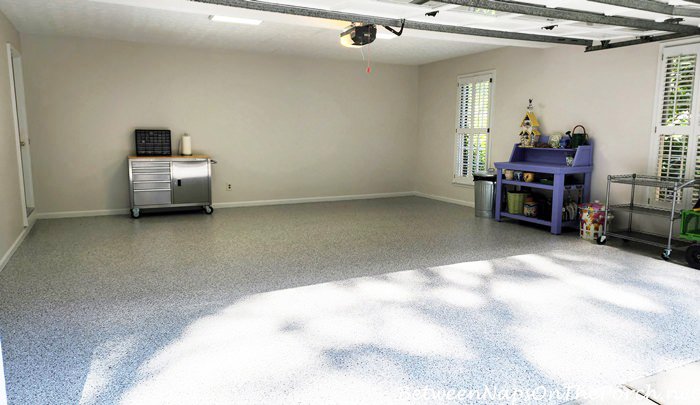
One thing I will do differently when they are moved back is, I’m not going to put a cabinet back at the far left end of the wall right up against the garage door. After having the cabinets here for several years, that was the only cabinet that was showing some dust/debris inside and it’s because it’s right by the opening of the garage. All the other cabinets have stayed nice and clean. So this wall will only get 5 cabinets back, not six.
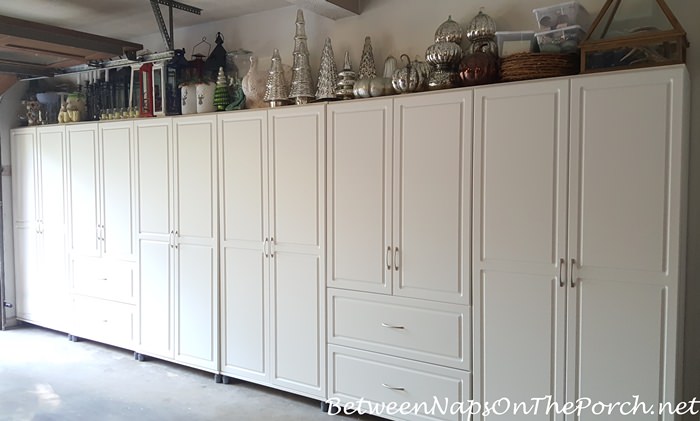
The plan is to move the standing tool chest a tiny bit to the left and place that 6th cabinet along with two more cabinets along the front wall. I’ve already purchased another cabinet, but still need to buy one more.
I ordered one of the new cabinets a few weeks back and it’s been laying here in my entry for almost a month.

Since it was approaching the 1-month “return” period, I figured I’d better go ahead and assemble it to make sure there were no broken pieces.

If you’ve been reading BNOTP for a while, you may remember that when I ordered these cabinets in the past, they kept arriving dented and chipped. One even arrived completely broken in half! The UPS guy said it was because they didn’t have the correct equipment to move them around their warehouse and load them onto their trucks.

Fortunately, this cabinet, which is one of the cabinets with two drawers, arrived without any damage. However, it has other issues. See that stack of small golden brown panels on the floor on the right side of the photo below? Those are the sides of the drawers and two of them are not drilled out correctly. When assembling these cabinets you use cams and cam bolts to hold them together but I was unable to install all the cams because a hole on two of the drawer side panels wasn’t drilled out deep enough. Whatever machine Ameriwood/Systembuild uses to drill out the holes that hold the cams, must have been on the wrong setting that day in the factory because it was the same exact hole that was messed up on two of the panels.
Also, the head of one of the cam bolts was badly misformed. Instead of having a screw-type head, the head had been flattened out like a nail. You could still see the slightest hint of the cross design of a Phillips screw pressed into the head. I managed to get the cam bolt screwed in using a pair of pliers, but unfortunately, the drawer piece that is supposed to connect via a cam, would not connect since the head of the cam bolt was so badly malformed. In addition to the bad drawer panels and the malformed cam bolt, one of the door hinges was missing a screw that comes already installed in the hinge. Ameriwood is shipping all the replacement parts, Since they are coming from Ohio, they should arrive any day–then I can finish putting this cabinet together.
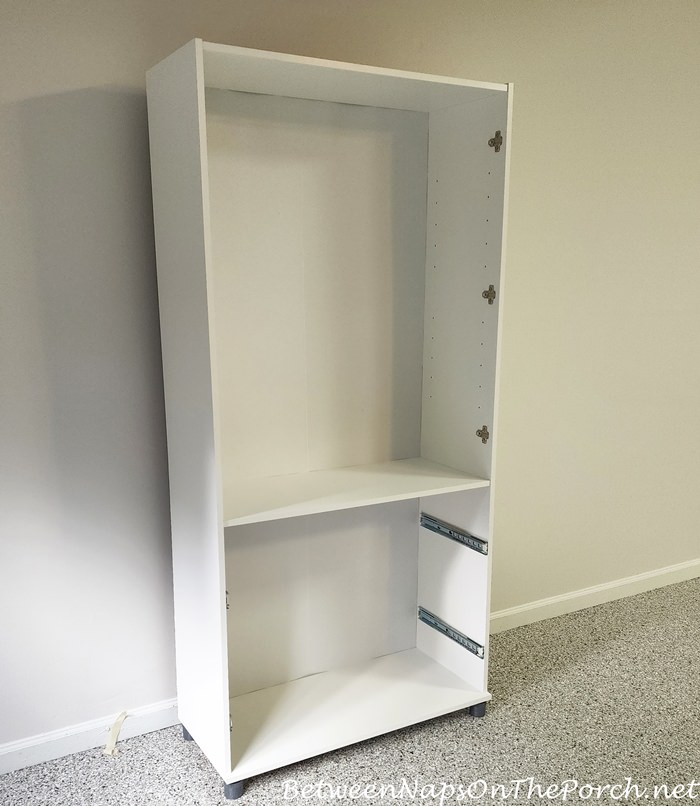
One reason I wanted to share this photo below with you is because I discovered something awesome while putting this cabinet together. Garage floors can be hard to crawl around on–hard on the knees. I remembered my exercise mat and brought it down. It worked great! I could crawl around on its cushy surface while working to install the various cam bolts, hinges, and drawer slides. I’m totally remembering this little hack for future furniture assemblies of any kind! lol
So today, I think I’m going to try and do the touch-up/repair work on the garage wall that will hold the cabinets because I’m ready to get those back in place. With the addition of a couple of more new cabinets, my storage will change a bit for the better! Currently, I have all my flatware and napkin rings in the top of one of the cabinets with drawers.
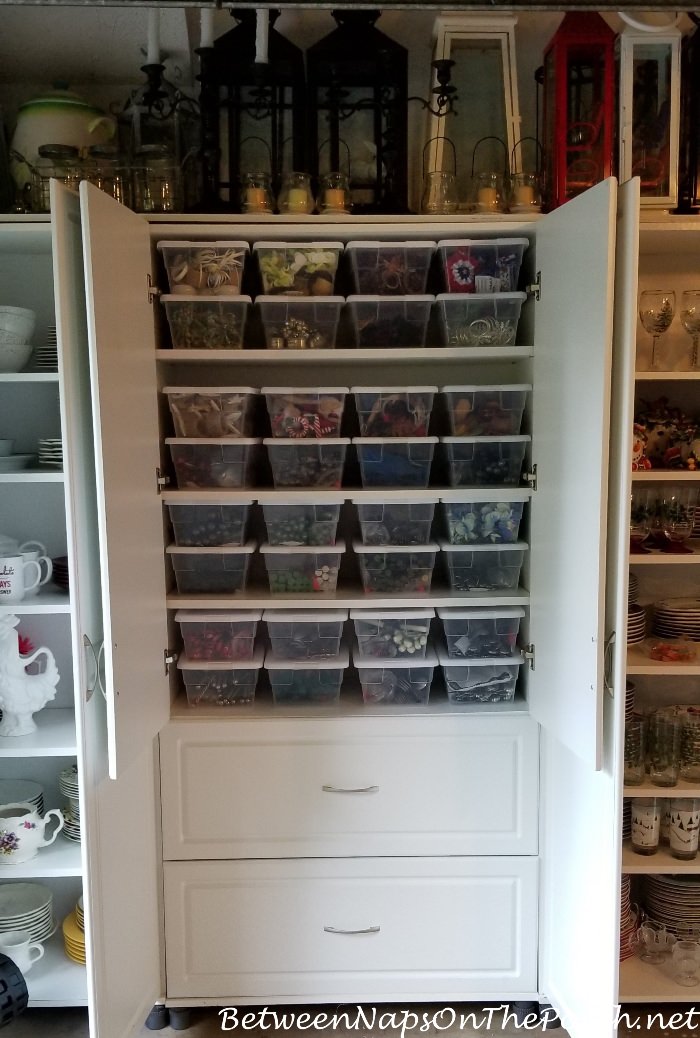
With the addition of the cabinet that I’m currently assembling that’s exactly like the one above, I’ll be able to separate out the flatware containers from the napkin rings, placing all the napkin rings in the top of one cabinet and all the flatware in the top of a second cabinet. I’ve already purchased more containers so I’ll have room to add more napkin rings/flatware in the years to come. It will be wonderful having a bit of extra space to spread out because some of my napkin rings are kinda squished together right now.

A few weeks ago I purchased this flatware when I came across it for an incredible price on eBay. I was able to buy 8 place settings for what you would normally pay for 4. I have this flatware in a few other colors and love it! I don’t have any gray flatware and I think this will be pretty in future table settings.

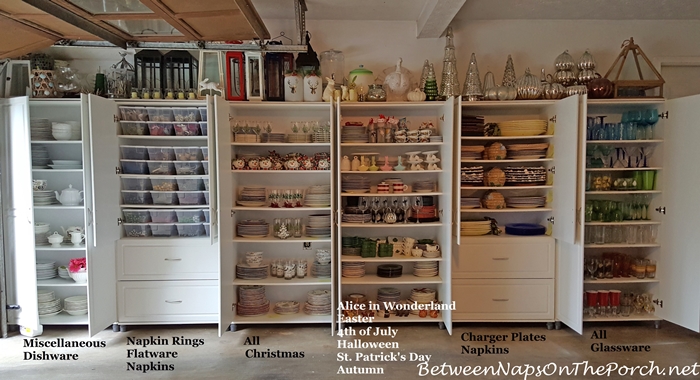
One question I received recently was why don’t I just store all my tableware in the basement? The garage is super convenient because that door you see on the right is the door to the garage. It opens up right into my breakfast room, a place I often set tables during the colder months. You can just barely see a breakfast chair on the left beyond the cabinets. The screened porch, another spot where I set tables quite often, is just past that chair.

Here’s another perspective…porch door is just to the right of the cabinet on the right. And behind me a few feet, you’ll find the door to the dining room. So having everything right there in the garage is super duper convenient. I would hate to have to haul plates and glasses up a flight of basement stairs each time I wanted to set a table. (Sorry this photo is so dark, I took it really early this morning so it was still kind of dark outside. Plus, the cabinets are blocking a lot of the natural light.)
Fortunately, my garage stays quite comfortable temperature-wise year around. I think that because it’s surrounded by heated/cooled spaces on four of its six sides. The bonus room is above, the laundry room and back staircase is behind the cabinets, the kitchen is across the front of the garage and the basement is below. So the only exposed wall(s) is the one across the front of the house and the garage door which faces east so doesn’t get any intense sun. I hope this answers some of the questions I get from time to time about why I don’t just store everything in the basement. This is just so convenient and easy to access.
Can’t wait to share how everything looks once the cabinets are all back here in the garage! That day is coming!
Looking forward to all the beautiful table settings linked for this week’s Tablescape Thursday!
Did you know Between Naps On The Porch is on Instagram? You’ll find me on Instagram here: Between Naps On The Porch.
Like to know when a new blog post is up and available to read? Subscribe for email updates, it’s free and your email will never be shared. Subscribe for free post updates via email here: Subscribe for Post Updates.
Tablescape Thursday

If you are participating in Tablescape Thursday, please be sure to add your permalink below, and not your general blog address. To get your permalink, click on your post name, then copy and paste the address showing in the address bar, into the “url” box when you link up. You’ll need to include a link in your post back to the party to link up and participate. That’s so visitors to your blog will be able to find the party and the other Tablescape Thursday participants. Please link up table-setting related posts only for Tablescape Thursday.
This party has ended, click button below for the links to all who participated.


Why not put your cabinets across the wall in front of your vehicle? That way you wouldn’t have to walk past them every time you get in and out of your car.
There will be 3 cabinets there across the font…maybe eventually 4…to the right of the standing tool chest. The space to the right of the garage is perfect because it’s around the depth of a cabinet, so they fit nicely there. The space across the front could hold all six cabinets, but I would have to move the shorter standing tool chest and when you came out of the door from the kitchen, you would be staring straight into a cabinet side/wall, which I don’t want. I love having the tool chest there since it’s shorter and is nicer to see when coming out of the kitchen…no big cabinet wall in your face.
You could easily start your store of everything tablescape. How long have been collecting this array? You should put on place setting displays at dishware departments.
I never tire of all the many “goodies”!
I started really collecting when I started blogging back in 2008. Now I rarely buy dish sets since I have plenty to mix and match to create different table settings. I still love adding new napkins, napkin rings, and flatware occasionally. If I come across salad plates I really really love, I will sometime buy a set of those. I’ve also donated a few sets over the years that I just never seemed to use. Thanks, Bev! I can’t wait until everything is back in place and I can set a new table!
I love reading your blog. I may have missed it but where did you purchase your cabinets?
Thanks, Karen! I’ve purchased them on two sites: Amazon and Walmart. I discovered recently that Lowes carries them, as well. I think I’m going to buy the other one I need from Lowes because their price seemed better than what I found online at Amazon, but that may have changed by now. The price seems to fluctuate with availability. This last one I ordered from Amazon was delivered via an Amazon truck with two guys, so it came in great shape. I hope they are all being delivered that way now and hopefully, UPS is not being used anymore. This is the one I am going to order from either Amazon or Lowes: https://bit.ly/3cDwsaB
Dear Susan, you must feel as if you’re running, and also participating in, a 3-ring circus! But, it is all turning out so beautifully. I just love those cabinets and if my garage were attached, I would have massive dish and supplies storage right there! Nothing could be more convenient. Your weariness with having all of your things in disarray reminds me of a situation some friends of ours had years ago. They were moving into a house locally after having lived away for 2 years. Every transaction had to be done remotely, and when they returned to our area, they realized that the new house really needed more repairs than they originally thought. So, with no other choice, they moved in, but everything was destined to be in complete chaos for several months. We did not know this and arrived to help one day. The husband was tired, sweaty and needed to get ready for work, the wife was going around and around in circles. At lunch time I suggested we have pizza delivered. She agreed and produced a cute new shower curtain, spread it on the floor and that is where we ate our pizza! We had so many good laughs about that and the laughing helped us all put things into perspective. I am just green with envy over your garage…hang in there!
It already looks awesome!!! franki
GREAT tip about the mat to work on your cabinet! I’m definitely remembering that for next time. I’m crossing my fingers for you that the painters arrive sooner, but sounds like you have a good plan to get your table space back. Thanks for another inspiring post, and as always, for hosting this party. Happy Thursday!
Thanks so much for hosting!
I would love it if you could give a mini tutorial on how you move these cabinets and other large pieces by yourself. I’m trying to do some re arranging in my basement. I hate waiting for someone to help me, but I’m having trouble finding a way to do this on my own. You have the best ideas.
Every time I move something, it’s always a different situation that requires a different tactic. I use a lot of blankets for sliding things around that are heavy, I think blankets are my favorite thing in the world for moving furniture. I sometimes use my gardening cart to get items from the back of my SUV over to the door into the kitchen, it has come in handy in the past. When moving furniture down a flight of stairs, I often turn it over and slide it slowly down the carpeted stairs. If it’s a super heavy item sometimes I will slide it step-by-step, letting it pause on each step so it doesn’t get the better of me and shove me down the stairs. So every situation is different.
For these cabinets, when they are first built, they are not that heavy until you add the doors and shelves, so they are pretty easy to slide on a blanket to wherever you want them. I always build them in the room where I intend to use them and then lift each end/corner up and place it onto the edge of a blanket or a towel and slide them where I want them. Once you add the shelving and the doors, they become much heavier. When it came time for me to move these cabinets inside, I removed all of the shelving inside and stacked those all up in the laundry room. Because they are so heavy, I wasn’t going to try to move them on my own mostly because they are made of engineered wood/pressed wood and the backs are just cardboard. This type of furniture is notorious for not being holding together very well when it’s being moved unless you are really gentle and don’t put too much stress on the joints/connections. I know I have put them together well but still, it’s not like moving regular wood furniture.
I had thought about calling a moving company but the one I called had a $500 minimum to just come to your home and that seemed excessive to just move six cabinets 10 ft inside to another room. One of the guys who works with the painting company offered to help me move them so he helped me move these inside. I knew that the doors we’re removable but it had been so long since I built these that I was not sure exactly how to detach them. Now that I am currently assembling another one of these cabinets, I have re-familiarized myself with exactly how the doors attach, so I’m very tempted to try to move these out to the garage by myself, first removing the heavy doors. If I take the doors off which is a huge majority of the weight of the cabinet, what I would do to move them is to lay them down on their side atop a heavy quilt or blanket and pull it to the door then gradually out of the door onto the garage floor. Once I get it out in the garage, I can turn it upright while it’s still on the blanket to make sure I don’t scratch the new floor and then I would just slide it on the blanket to where I want it. Then I could add the shelves and doors back. I think I’m going to try it on one cabinet and if the door comes off pretty easily, I may go ahead and move these on my own. The guys at the painting company have already offered to move them back out for me oh, I just don’t know if I’m going to have the patience to wait until they can come back out.
So, every situation is completely different. I have moved a huge huge high boy that came apart into two different pieces to my upstairs master bedroom. After removing all the drawes, I pulled each half section up the carpeted back staircase, across the carpeted bonus room and down the upstairs hall on a blanket to the bedroom. The trickiest part was getting the huge top half back up onto the bottom half. I did that by dragging the top half up onto my 4 poster bed which is pretty high off the floor, then I pushed the lower section over to the bed and gently turned the top half sliding it over onto the bottom half. I was really proud of that and didn’t get a single scratch on either piece. lol
I have moved chairs huge chairs all the way down to the basement, I have moved a lot of stuff over the years and it just involves lightening up the piece as much as you can by removing, shelves, doors or cushions or whatever you can and using blankets to slide it to where you want it to go. You have to be super careful of course when going up or down stairs. I take it literally one step the time when I’m doing that unless it’s something that’s not too heavy that I can slide down the tops of the carpeted steps.
I don’t think my arms is quite as strong as they used to be when I was doing so much gardening and hauling around 40 lb bags of mulch, but if you put a lot of thought into exactly what you’re going to do before you start, that helps a lot. You need to sorta come up with a plan of attack before you start. Also be very conscious of not hurting your back. I’m always careful to not put strain on my back.
Not sure this helps much, but that’s how I do. If I can’t get the doors off of the cabinets easily, I’ll wait to get help moving these simply because they are somewhat fragile being made of “engineered” wood. I don’t want to have one come apart on me because they normally can’t be repaired, or at least, not very easily.
Thanks so much! I appreciate the ideas.
I am so in love with your garage floor! That is FABULOUS! Thank you for sharing!!!
You are a braver soul than me going through this redo. It will be wonderful though upon completion. It’s been a long time since I’ve joined Tablescape Thursday or any blogging party. A lot of things have changed, a new learning curve for me.
Carolyn/A Southerner’s Notebook
This is such a complex project–so many moving parts, so to speak. But how wonderful to have it done for the busiest tablescape season(s) in the near future. By the way, our entryway looks just like yours: wood floor, patterned rug, open cardboard box, and something to be assembled!
Hi Susan!
Your garage is going to look fabulous when it’s all done! Please post pictures.
I have a quick question…my son and future DIL are going to Paris on their honeymoon. I would like to purchase the purse you travel with and cannot remember where you bought yours (or the brand). Would you please email me with the details?
Thanks – have a great weekend!
Thanks, Susan! This is the one I use by Travelon. I love that it has side pockets that will hold a small umbrella or water bottle: https://amzn.to/3Agn7Pl . It has a ton of great features!
Susan, not sure if you saw this post but it shows the garage completed, just without the cabinets. I’ll be adding the cabinets back very soon.
https://betweennapsontheporch.net/full-garage-makeover-with-new-lighting-new-paint-and-new-flooring/
I love your garage and how organized it is. I’m struggling with mine. Can I ask where you purchased the white cabinets? I have a mix of old plastic ones that are not very attractive! Thanks
You are a woman of many talents. I don’t think I could assemble those cabinets. Putting all your treasures away will be more fun than removing them was. Is there anyone to help you do all that?
Yup, just me putting it away but I’m really looking forward to it.
I absolutely marvel at your ability to attack such incredible tasks without an army of help! My muscles hurt just reading about all you accomplish. Bravo to you, Susan. You are an inspiration to all, and your home reflects your creativity and grit to GET THINGS DONE. I anxiously await “the big reveal”!!
Aww, thanks, Rosie! I think I’m just stubborn! Ha! I had help moving the cabinets into the kitchen, thankfully! 🙂
Not sure if you saw this post but this was sorta the big reveal: https://betweennapsontheporch.net/full-garage-makeover-with-new-lighting-new-paint-and-new-flooring/
Once I have all the cabinets back in the garage (I’m adding a couple of new ones) I’ll share another post of how it looks then.
The garage looks great, Susan!! So fresh and clean! I’ve been meaning to tell you, too, that I’ve already made the crunch wraps a few times….talk about easy! They are soooo good, thank you for the great recipe. Have a great weekend!
Gosh Susan! You’re amazing! Your ability to reason out where things went wrong in a factory, while still working around the problems is amazing! I too had wondered how you managed to move furniture, and your doing it so adeptly is a testament to your “can do” spirit. (Just please be careful). Thanks for sharing so many interesting posts! I always look forward to what’s happening at BNOTP.